|
When discussing about 4K wallpapers, we’re usually referring to either a resolution of 3840×2160, or 4096×2160 pixels. 4K is four times the resolution of 1080p. Other such High Definition resolutions may include 720p and 1080i. In commercial digital cinema, 4K refers to 4096×2160, and many movies are actually either shot or mastered in 4K by upscaling them from 2K. It has two official consumer labels, UHD and Ultra HD, and 4K is a well-established term in home theatre, usually with the resolution for 3840×2160. There are plenty of home theatre receivers that either come with 4K pass-through, or have 4K upscaling capability, as well as a lot of TVs or source devices that work with 4K upscaling. You might also find 4K under other names, such as 4K x 2K, or 4K Ultra High Definition, QFHD, UD, 2160p, or even Quad Resolution and Quad High Definition. 4K is a pretty popular option with gamers nowadays, and such users are often in need of 4K wallpapers. Fortunately, there are some beautiful 4K wallpapers online, from 4K wallpapers for games, to 4K wallpapers showcasing nature landscapes, 4K abstract wallpapers, 4K space wallpapers etc. Amazing 4K wallpapers aren’t that difficult to find. Just do a quick online search for “best 4K wallpapers”, or even “cool 4K wallpapers”, and you’ll come across some stunning 4K desktop wallpapers. You could even add a more specific term, for example if you’re into nature, search for “4K nature wallpapers”, and you’ll find a great selection of 4K wallpapers for PC.
Why is 4K an option to consider?4K is a pretty significant upgrade. When you’re using a larger TV, or a video projector, you get a much more detailed image than 1080p, and there are much less visible pixels. Up to 65”, 1080p may look good, depending on the viewing distance, but 4K is still miles ahead, especially when you’re looking at larger resolutions. You will find that there are a lot of 4K TVs on the market nowadays, and you’ll also find some 4K video projectors as well. Plenty of streaming sources will provide 4K content, such as Netflix, Amazon or Vudu, and you can get Ultra HD Blu-ray discs as well. What you should know is that even though a lot of the regular Blu-ray disc players can upscale 1080p to 4K, only an Ultra HD Blu-ray player can play native 4K files. There are also cable and satellite providers that might offer 4K content, but not many of them do. The problem is with over-the-air TV broadcasting, as things are severely lagging here. South Korea is leading the field as far as tests go, and the US isn’t far behind. However, the electronic infrastructure that 4K requires isn’t compatible with the current broadcasting systems, which is a major obstacle. What does 4K mean for the average consumer?The availability of 4K is increasing, and consumers get a much better video image, especially with larger screens. The ability for a user to see any pixel structure when viewing from a regular viewing distance is also greatly reduced. When you combine 4K with fast screen refresh rates, you’re getting almost as much depth as with 3D, but you don’t need the glasses. You should know that Ultra HD’s implementation won’t make 720p or 1080p TVs obsolete by any means. However, they will be cheaper, and fewer of them will get made. The current TV broadcast infrastructure won’t be abandoned anytime soon, due to the compatibility issues mentioned above. And, at some point, it will be the default standard. However, plenty of infrastructure changes need to be done by then. 4K has a few reasons why you might be reconsidering your next TV purchase, and not all of them are obvious immediately. If a photographer is routinely viewing their work on an HD TV, they get just a fraction of a detail their images have. 4K gives them a much better look at this. And, a 4K display will truly give you more details and nuance, with an astonishing difference. 3D is somewhat of a faddish diversion, but 4K doesn’t really have any caveats, and the higher resolution images are just better. What comes after Ultra HD and 4K?After 4K, we get 8K. This has 16 times 1080p’s resolution, and there have been quite a few prototype TVs in the past few years. There are also 8K monitors that professionals use, but you will find that affordable options for the regular consumer are still far away. Translating the video resolution to megapixelsWhen you want to compare the pixel resolution of some modestly priced still cameras, here is how things stand currently.
Discussing contrast and colorWith all being said, when you’re looking at something on your TV screen, you are the one that should be satisfied. Sure, resolution is important, but there are other important factors as well, such as video processing and upscaling quality, or color consistency, contrast, black levels etc. Even how the TV you’re using physically looks is something that matters. Let’s discuss the difference and sitting distance with 4KExtra pixels commonly mean extra information, which translates into a sharper image. This is much more engaging, and, consequently, much more fun. And when you’re watching TV, fun is kind of a relevant factor, right? The level of difference is in the range of a 480p to 1080p upgrade, and coming from a 1080p screen, you will find a 4K one noticeably sharper. However, there are a few reasons why you might not feel the exact same thrill. First of all, when you went from a 480p TV to a 1080p one, you most likely got a much bigger panel as well. Display size is a much more powerful WOW factor than resolution can ever be, and last time, people usually jumped both in size, and resolution. However, this time the screen size remains more or less the same, and some of the most popular models are in the 40” to 70” range. The difference with a 4K set is visible if, one, you’re watching 4K content, and two, you’re sitting close enough. And yes, sitting close enough is a thing. Apple made a big splash with “Retina” a few years back, where a Retina screen is a screen with sufficient resolution that, at a normal viewing distance, you can’t make out individual pixels. If you get far away from a 1080p screen, there, you get a Retina display. But, at the same distance, you won’t be able to distinguish between 1080p and 4K. If you’re already at “retina” distance, and won’t be getting any closer, you might not notice such a difference with 4K. So, do you move closer? Yes, you do. Getting up close without losing image quality is one of the most stunning things about 4K. The same sized screen now fills more of your visual field, which results in much greater immersion. This is one of the primary reasons why 4K monitors are one of the fastest growing sectors. Even at a foot or two from the screen, a 4K monitor is extremely sharp. In case you aren’t confused enough with the acronyms, there’s also Ultra HD PremiumThere are quite a few acronyms, and many of them sound confusing. Therefore, a group of companies formed the UHD Alliance which has a task of determining the technologies to be included in the next generation of TVs. Some of the big names here are LG, Panasonic, Toshiba, Samsung, Sony, Sharp, as well as audio companies such as Dolby, and TV production companies like 20th Century Fox and Netflix. The main goal for this is to have consistency. If they all agree on some features, then Disney can produce a movie, and Netflix will be able to stream that same movie through an LG TV, and the resulting image will be just what the Disney director wanted it to be. Therefore, we had a UHD Premium specification, announced back at CES in 2016. There’s a list of features that must be included in TVs and Blu-ray players for maximum compatibility. That specification requires:
Now that the standard is defined, it’s just a case of you checking whether your next TV has that UHD Premium logo. You won’t have to worry about incompatibility with the 4K content that will undoubtedly come over the next couple of years. But, yes, things aren’t really that simplePanasonic and Samsung are proudly wearing the UHD Premium badges. However, Sony decided to make things a bit more confusing, and stick with the “4K HDR” label, even though their sets meet the required specification. Philips aren’t using the badge, but their sets at this point don’t meet the specifications. These are all problems we’ll have to face with an emerging technology. However, we all hope that sooner rather than later, we’ll be looking at UHD Premium sets without any reservation. And, until the standard is backed by the whole industry, you should look into details to ensure maximum compatibility. Ending thoughts on 4K wallpapers4K, or Ultra HD, is a resolution that can fill up four 1080p screens. And, four times the pixels does mean four times the detail, making for a stunning difference. If you liked this article with 4K wallpapers, you should check out these as well: The post 4K Wallpapers for Your Desktop Background appeared first on Design your way. from http://www.designyourway.net/blog/inspiration/wallpapers/4k-wallpapers-desktop-background/
0 Comments
Pro by Themeco more than lives up to its advertised features and capabilities. This Pro Theme Review addresses those capabilities together with a review of new features and updates that are included in the recently released Version 2. There are several qualities about Pro that differ from the more conventional WordPress themes, qualities that make this website building tool a genuine game changer.
There’s much more you’ll like about pro – starting with the major Version 2 updates. Pro Update – Version 2What’s new in Pro Version 2? Template Manager
This feature saves you the time and trouble of constantly re-inventing the wheel or undergoing constant editing as your design activities progress from site to site. You can save and export any and every part of your website down to the element level for use on other sites or to share with others. Global Blocks
Content you create can be placed in multiple places in your website. When you update it in one place, it auto updates everywhere. This is a real timesaver when designing a large or complex website, and also in the maintenance phase once it has been deployed. Design Cloud
This feature provides easy access to more than 100 premium assets – headers, content, footers, and style kits for Elements. The Design Cloud can also be used as a vehicle for sharing templates with other Pro users. Element Presets Anytime you use an Element on a site, it will take on the custom style you’ve previously preset. The above features and other changes and updates are based to a large extent on feedback from customers over the past year. The other changes include bug fixes, minor feature improvements, and the ability to easily click back and forth from the Header, Content, and Footer Builders. Navigation has also been updated so that anywhere you want to go is just two clicks away. Pro’s Original Set of Features
Pro is aptly named in that it was designed and built with professional designers and developers in mind. The resulting product is equally adaptable to beginners and those who aspire to become pros. The original version was already a game changer. When building a website with Pro, first-timers will discover that many things are done differently than they may have become accustomed to when using other WordPress website-building tools. Yet, the designers were able to proceed without encountering problems. Pro is a case in point that advances in technology don’t need to make things more complicated. It’s quite the opposite in fact. This was before Version 2 was released. With the new and advanced site-building features that are found in this latest release, Pro is easier and more efficient to use than ever. Why this is true:
A Game ChangerThere are a several ways to look at Pro. It’s a definite game changer. Its features and capabilities are more than enough to justify the claim that it is the most advanced website creator for WordPress. The ability to save and store content down to the atomic level means that with every website built, more content elements can be saved and stored for future use or shared. From a purely creative aspect, every website built contains the seeds for future design and website building ideas. Pro is built for creatives and professionals (and everybody else), it gives its users the opportunity to play and experiment. And it will make anyone who serves multiple clients more productive than they thought possible. The post Pro Theme Review: The Most Advanced Website Creator for WordPress appeared first on Design your way. from http://www.designyourway.net/blog/misc/pro-theme-review/ So, what is an illustration? And what are the illustration styles available? Illustrations mean an artist interprets a text, or even social meaning, turning it into a drawing or painting. This often means incorporating personality or humor. An illustration is used to create emotion or give a message. It is expressive in style and doesn’t demand attention. Illustrations are used in books, magazines, advertisements, comic books, cartooning, fashion design, storyboards and video games. There is no single way of illustrating, and there are many illustration styles. Illustration styles
Although there are many different styles of illustration, these may be categorized into the following groups: Literal Illustrations
A literal illustration style depicts reality in a similar manner to non – fictional books. The picture depicts a credible scene, even while using fantasy or drama. Some examples of literal illustration include: Photorealism – creating a photographic imageWith photorealism, the artist uses a photograph as his source and creates a realistic replica in exquisite detail. In photorealism, the artwork is often mistaken for a photograph. Drawing, perspective and color choice are crucial to this form of artwork. The artist often uses airbrushing, or hand-painting with acrylics or oils to achieve the final results. Illustrations showing history or culture
This type of illustration is used to depict historical or cultural events. Often used by a culture to depict scenes or circumstances, this form of illustration can also be used even within an era of photography in order to depict mood or add a sense of drama. Although sometimes used to flatter or degrade a culture or figure, these illustrations are realistic enough to be seen as literal images. Hyperrealism – as close to reality as possibleThis form of illustration tries to erase the line between art and reality and is seen to be an advancement on photorealism. Sometimes extra features are added to a representation or an artist may work with monochrome pencils to create a social message. However, the goal is to create an image that is as close to reality as possible. Conceptual Illustrations
Conceptual illustrations are metaphorical, with thought or imagery taking the place of realism. Although this work might contain elements of reality, the goal is to convey mood, metaphor, and subjectivity. This form of illustration By could be compared to fictional writing, where anything goes. Examples include: Images in sequence
Images in sequence tell a story and can be used for cartoons, graphic novels, and even to plan movie scenes. Styles may differ, from quick sketches, to fineliner drawings with airbrushed detail. Depending on the message, an image may use crisp, clean colour, or may use ink, jagged lines, and a chaotic layout in order to depict the messy business of politics. Information graphics
These are graphic representations of knowledge. They are often used to assist with understanding complex information. While they show the audience what they are looking at, this is often represented in a way which contains additional insights. Some may look like literal illustration. Abstract or distorted designs
An expressive form of illustration, removed from reality, where representations emerge from imagination. As it is so subjective, two abstract artworks will look very different to one another. Freehand digital drawings or illustrations
In this type of illustration, the artist draws on a digital pad, allowing for smooth transitions between light and shadow. An artist can use layers of imagery to create complex backgrounds and add fine detail. Many of these images use raster (or dot) format, limiting the size they can be blown up to before losing quality. Vector graphics and illustrations
With vector graphics, mathematical equations are used to produce designs. As vector diagrams don’t use strokes in the way freehand digital drawing does, the images are not as smooth as freehand designs. They can, however, be blown up without losing quality. These images have clear shapes and outlines and are very popular for web illustrations. Children’s illustrations
Children’s illustrations tell a story or give a visual representation of a tale or even an imaginary being. The style of illustration depends on the age of the child. Some may be complex and realistic, while others may be naïve. Many children’s illustrations are colourful, and contain a lot of movement or activity. Characters are often bright, colourful and friendly. Illustrations for commic books and graphic novels
Comic books or superheroes often involve characters in action. Styles are often complex and range from line drawings to airbrushed images. However, cartooning is often one of the most frequently used styles in comics. Comic images often come in panels and often involve speech bubbles, or narratives. There may be words which combine with actions, such as POW! The size of panels, as well as how often they feature helps to set the pace of the story. Book covers and publications
In many old books, such as those which focused on geography or natural history, illustrations were designed by hand and then reprinted. Now, however, book illustrations are designed in many different ways and then printed. Illustrators are often used to design covers of books, in order to make them stand out in a bookshop. A cover often hints at what is inside the book and gives the idea of humor, seriousness, culture or movement. Book illustrations range from cartoon style drawings to historical or cultural images. Although the saying ‘never judge a book by its cover’ is often repeated, it is actually the cover which will sell a book, and will assist the book with appealing to the correct audience. Designs for logos or branding
Logos are a very specific style of illustration. Very often their goal is to give information about a product, using colour, font or imagery. Popular and easily recognizable logos include the Nike Swoosh or the Apple associated with Macintosh. Logos are often simple, but grab attention to a product, defining it as belonging to a particular brand. Often this brand is associated with imagined qualities, such as speed, power or creativity, and the logo helps to conjure up this emotional message. Sometimes, businesses use more than simply a logo to assist with branding. Many use mascots or images of their employees, in order to convey a message. This helps to transcend a product such as a shoe, and give it a deeper meaning in the minds of customers. Tips to develop your illustration style
Using the internet, we are frequently introduced to illustrations in online news articles, the music we can download, comic books, adverts and even emails. This exposes us to a wide range of styles and is a good thing because it creates a wide range of examples to draw upon.
However, if you are bombarded with many good quality illustrations on a constant basis, how do you develop your own style? You Here are some tips: Understand the underlying principles
While it is possible to learn illustration through practice, this often means imitating the styles of other illustrators who have already developed a style of their own. Unleashing your own creative potential is considerably more important so that you can build and grow, developing your own talents and sharing your own messages.
Without copying, you may be asking “What is an illustrator?” A formal education will teach you the underlying principles, motivations, and techniques of illustration so that you can use these building blocks to create your own designs. As well as learning from those already within the field, you’ll learn the philosophies which will enable you to join in, expressing your own style as you do so. Explore new illustration styles
If you feel stuck in a style rut, reproducing work you’ve been doing for a long time, you might want to pick up some new illustration styles or techniques, to develop your own work further.
However, remember that there is no reason to force yourself into uncomfortable spaces. If you feel stuck, or don’t enjoy the work you are trying out, remember that no artist is capable of doing everything, and if something doesn’t feel right, be prepared to move on. Try new mediums
If you’re recognized for your pen drawings, how about giving acrylics a try? Switching the medium you use may give a new dimension to your work, focusing on a new atmosphere, colour or flare. If you already use multiple mediums, you could try textures, etching, stencils or even metallics.
You could change your format from small drawings to large canvases, or from large-scale paintings to comic books sized imagery. Even though your results may not be exceptional at first, exploring new mediums will bring you out of your style rut by taking you out of your comfort zone. Your experimentation will be worth it. Be true to yourself
When defining your illustration style, don’t work on designing it around what is currently selling on the marketplace at the moment. Your first commission is a big achievement, and making money from art is rewarding. However, share your own style in the marketplace so that you are able to develop your own artistic identity. As the market moves constantly, trying to copy or imitate current trends will leave you one step behind.
By developing your own style, you’ll be consistently working on your own techniques, improving and developing them, instead of remaining a second-rate version of illustrators you admire. Developing your own style means sharing your own meanings and bringing your own imagination into the foreground. Without this, you won’t have the creative energy which will help to both define your work and keep you motivated. Without this, you risk losing your love of illustration. Ending thoughts on illustration stylesThere are many different illustration styles or techniques. Some of them overlap. However, understanding the different styles and the techniques they use gives you access to the principles behind each different design, enabling you to explore and expand on your illustration practice. If you liked this article about illustration styles, you should check out these articles as well:
The post Illustration styles: definition and examples of this art appeared first on Design your way. from http://www.designyourway.net/blog/graphic-design/illustration-styles/ Mood boards are great tools for all sorts of projects, from interior design to team projects to fashion to even engineering projects. What is a mood board? A mood board is an accumulation of images, colors, fonts, and words that inspire you and, well, set the mood you’re going for. You can use a mood board to get an idea of what feelings you want to evoke in your audience. It’s a great way to keep track of where you want to go. You can use it to keep certain elements on hand as your project progresses. A mood board also serves as an inspiration board for any time you get stuck. Mood board design is not a set thing. There are a lot of formats and applications out there you can use to create your mood board. Creating your mood board is very personal and project-dependent. You may find that one format works well for one project while it’s completely wrong for another. Take a look at our mood board guide to learn how to create a mood board that works for your projects. How to Make a Mood Board
Treat your mood board design like an unassembled puzzle or the ingredients of a recipe. It will contain elements that will come together to form the final version of your project. Start out just by assembling images, fonts, and whatever else that fits with your project. Sometimes contrasting images may work well right next to each other, drawing out the mood you’re looking for. You want your mood board to offer inspiration and direction. It should evoke the forms and feelings of your project. Structure
The structure of your mood board depends on your purpose and your mindset. You can have borders to separate images or you can have a wild collage. Regardless of what kind of mood board template you choose, it should remain consistent throughout. If you choose to use borders, make sure they are equal in size. Balance and a sense of flow are very important to a good mood board layout. This is not a decoration, it’s a tool that you’re using to help complete your project. Digital or Physical?
A digital mood board has its advantages. Mood board maker software is easy to find and use, allowing for you to easily arrange the board how you want. If you find your layout isn’t working, you can completely rearrange it with a few clicks. Adding things to a digital mood board is a cinch. You can freely experiment with a digital mood board with hardly any effort at all. Digital mood boards are easy to present and share. However, a physical mood board might be a better option because it gets your message across. There’s more drama to a real object and it projects a sense of reality that might be more motivating and inspiring. Certain industries, like fashion or interior design, benefit a lot from having a more tactile mood board. Getting a sense of how objects, especially fabric, look in the real world can be a big help for communicating the message. Text
If you’re using text on your mood board, make sure the font helps get your message and mood across. If you’ve got quotes, phrases, or words, choose font that accents the words or presents them in the tone that you’re going for. Be creative and see what you can find. There are a lot of great fonts that can lend your mood board’s text the right flavor. If you are working with text as a part of your project, like you do in web design, include the fonts you want to use on your mood board. This can also help you make sure all the fonts you plan to use work together well. Use it as a reference as you go along, too. Small design elements like font types can sometimes get lost in the midst of difficult, large projects. Color
Remember that color communicates feelings. Dark tones will not communicate an upbeat mood, even if your moodboards are covered in flowers. If you want your colors to communicate a certain mood, consider adding objects that are that color and evoke the mood. For instance, a swatch of yellow paired with some bananas has a very different feeling than the same swatch paired with a yellow street light. While a sense of color may come from the objects accumulated on your mood board, feel free to add color cards or fabric swatches, especially if you’re looking for a very particular shade of a color. This makes for a useful reference, especially if you aren’t using that color yet but will be doing so as the project progresses. TexturesAdd items with texture to communicate feelings, even if your project doesn’t involve fabric or anything textured. Use plush fabric to convey the feeling you want your project to evoke. Consider using a bit of metal for a harder, structured feel. This might be just the addition you need on the mood board to communicate the right sense of your final project. The ability to add textured items is one of the great aspects of creating a physical mood board. Types of Mood BoardsFree Collage
This is a very basic, almost unstructured kind of mood board. A designer will collect together free high-res images to use in a project. Many people use this kind of mood board early on in a project or use it to get an idea of possible future projects. These collections can be used later to create more structured and/or specific mood boards. A free collage can quickly and effectively communicate a mood. Don’t restrict yourself just to photos. Use illustrations, fonts, color swatches, anything and everything that will help communicate the mood. A free collage is a sort of visual brainstorming session. It can be vague or specific. This is a great tool to use and keep around if you are looking for inspiration. These are the easiest and fastest kinds of moodboards to create. It’s not the most detailed kind of mood board and isn’t very useful for determining or explaining relationships. Expect to use a free collage as an early form of your mood board that you might never present to a client, especially if they are more detail-oriented. Make sure you don’t destroy it if you do have to create a more structured mood board. The free collage can be used to give you inspiration for fitting solutions to future problems or provide a good boost to kick you out of a creative block. Reference Collection
You can also use a mood board as a reference collection. This is a great way to keep track of different elements you have used, plan on using, or are even currently using. Some great mood board examples and mood board makers for reference collections are Behance and Dribbble. These kinds of mood boards are great for both design teams and for client presentations. They can quickly communicate what the project’s direction and mood are. A reference collection doesn’t just have to include colors, fonts, images, or phrases you’re using, but can also include images that you are looking to emulate. Clients often like reference collection mood boards since they almost instantly get across the feel the designer is going for. These are often cleanly structured mood boards. Template Board
These are mood boards that showcase wireframes and prototypes. They aim to show off the structure and ultimate visual hierarchy of the final project. The elements won’t be as detailed on a template board as they will on the final product. Various components are variously shown as illustrations of photos to present the overall layout. You can use images so they match the final color palette. This is a much faster option than prototyping since there aren’t any details. These are favorites of UI/UX designers. If that is your niche, a template board is probably a good way to start using mood boards. This can be hard because they seem like frivolous wastes of time, but they can improve your whole creative process. Uses for Mood BoardsExperiment with Visual Hierarchy
It can be hard to sort out the right relationships for the elements of your project. You want to make sure your project has the best visual hierarchy to capture attention, hold it, and communicate your project’s message. Every project has a different way of doing this. A mood board is a fun and interesting way to experiment with visual relationships. UI/UX designers will use samples on their mood boards to help them out. Use it for sorting out your fonts and colors. Make sure colors work together. Rearrange, add, or subtract elements. Prioritize or deemphasize different things. Create guide to help you understand the best way to present your project. Save Time and EnergyMood boards are typically pretty quick to make. It might take you only a few hours to create a useful one that you can happily present to clients. They’re also easy to edit. This way, you won’t be spending time creating more detailed, conventionally structured presentations. You won’t be stuck editing highly detailed prototypes and can quickly move on to the next stage. Inspiration
We all get creative blocks. You can’t just wait for inspiration to strike, however, especially if you’re working on a deadline. A mood board can offer a way for you to easily pursue inspiration instead. You can use one you’ve already made to give you some ideas or add to it to get the creative juices flowing. Create a small new one if you need to and see if it helps. Creating a physical mood board can be a particularly nice way to find inspiration. Use objects around you. Tactile objects and physical motion can be a big boost to creativity. Several design firms have begun offering materials to help their designers do just this. It’s had a positive effect, inspiring designers and also relaxing their tired brains. Better Communication with Clients
Projects at abstract stages can be very hard to explain to clients. A mood board can be a great way to do so. You can better clarify exactly what you’re going for with a design and so avoid miscommunications about different interpretations of styles. Especially for projects with a strong visual component, a mood board is a much better way to communicate, as well. Everyone always says “show, don’t tell” and mood boards are all about showing. Words can fail to really communicate a look. Visuals are more reliable guides. They can even help you better understand your own ideas and find the right words you will need to use at some point. Brainstorming
If you don’t have specific directions from your client, you can use a mood board to decide on the style of your project. You won’t need to build new prototypes this way, which is a time consuming and often expensive project unto itself. If an idea goes nowhere, you haven’t expended too much effort, since mood boards are so easy to create. Feel free to use a mood board to test out ideas. Involve Clients
Open your mood board to your clients to get them more involved and gain more of their trust. You can do this at the earliest stages of the project. Mood boards allow for even non-designers to give their input without very much effort. Just ask for a collage of images and colors, or even references if they have some in mind. This will also allow you to get a sense of their tastes and preferences. You might find that an outsider’s point of view will give you new ideas and perspectives on your designs. Tips for More Effective Mood BoardsLook Beyond an Image Search
It can be tempting to just use Google or Bing to find images for your mood board. It’s certainly easier. If you’re working on a digital project, it might even make sense. However, don’t feel constrained by image searches. Look around at the world around you. An image search will give you things you were already looking for, but the outside world will offer you unexpected sources of inspiration. Keep your eyes peeled, or even go looking. A perusal of old library archives or a walk through your neighborhood can offer you whole new avenues of inspiration to put on your mood boards. Take Pictures
Since real-world inspiration is everywhere, don’t hesitate to take pictures. After all, you’ve got a camera on you at all times with your phone. Whether you find a suddenly inspiring piece of architecture, a bird in flight, or a cool-looking sign, snap a picture of it for use on your mood board. You’re not looking to win any photography contests with these pictures. You just want to capture the emotions the image invoked in you. You want to get a sense of themes and feelings for your mood board. Curate Your Mood Board
Don’t just throw things at a mood board to see what sticks. This might be a good way to get inspiration at very early stages, but it will quickly result in a confused mess with no unified theme. Curate your mood board. Figure out what items work well together and help convey the message you want. While it’s very fun to go and collect images for your mood board, you need to think of yourself as a curator more than anything. This will make it much easier to interpret and explain your mood board, even for yourself. Select the Right Format
Are you presenting your mood board in person? Or are you emailing it to your client? This is a very important factor in deciding whether you create a physical mood board or a digital mood board. In many ways, a physical mood board allows for more wild creativity. You can add more different kinds of things to it, including textures and actual items. It can offer an extra emotive kick to a presentation. Digital mood boards need to be more tightly curated as they are often the main way a theme is communicated to a client. Everything you add is a digital image or text, allowing for less diversity in actual content (though it can certainly look like different content). Create a Central Focal Point
Make sure you highlight key theme images. Once you decide on what those images are, everything else can be used to accent and emphasize them. Make these key images larger than the rest. This is a subliminal trick and a clever use of visual hierarchy. The large image will trigger questions and prompt people to scan the rest of the board to answer them. The supporting images should provide the answers to the questions people will ask about the larger ones and help clarify the message. Use Tactile ElementsIf you have a physical mood board, use it to its best by including tactile elements. Foam board is the traditional material for mood boards for a reason, even though it is not easy to cut or spray mount cut-out images. It adds a tactile element that enhances the mood board’s effectiveness at presentations. Don’t knock traditions. Try out this foam board technique to see why it’s still in common use as a mood board material. Present the Mood Board Yourself
The mood board is a reflection of your creative processes and you are the one who understands what it’s communicating best. Try to be involved in the presentation of the mood board to your client. Do it yourself if you can. No one else will be able to explain it as well. Make sure you watch the faces of the people you’re presenting the mood board to. Verbal cues are not as informative. Your mood board is about emotions, so look to see what kinds of expressions it generates. You’ll get a much more honest understanding of what the reaction is to the proposed mood of the project. Many managers will be happy to not do extra work, so don’t worry too much about asking. It’s a great opportunity and is the only way you can be sure that everyone understands your mood board correctly. If you don’t care for public speaking, embrace it as a chance to learn. Keep It Loose
Don’t lock down yourself or your client into a style. Keep your mood board loose. Don’t let things seem too final. This can put you in a creative straitjacket and may receive a negative reaction from your client just on impulse. A mood board communicates the mood of the project. It’s not a step-by-step plan. Don’t change something meant to inspire to something meant to lock you down. Use Text
While we think of mood boards as purely image-based, don’t underestimate the value of few well-placed words or phrases. They can tie everything together to the theme perfectly. Add in some big, bold words that capture the mood you want for your mood board. This is also a great chance to experiment with fonts. Try to put the words you add in a font style that draws attention to the tone or theme you’re going for. Don’t Be Subtle
Moods boards are all about gut reactions. You shouldn’t hide your theme or ideas. There’s very little nuance here. Have fun and be bold. Design your mood board to clearly and bluntly communicate your message. Enjoy the creative opportunity. The final project may be much more subtle, but you’re not prototyping here, you’re mood-boarding! Test it Out
See if your mood board works for a test audience before presenting it to a client. See if they have the reactions you’re looking for. They shouldn’t be asking too many questions about what things mean or why they are on the mood board. If an element on your mood board prompts too many questions, you may want to remove or replace it with something that does a better job. Ending thoughts on mood board designA mood board is a great tool for any kind of design project. It will not only help with your creative process, but it will also make communication with your clients much easier. So break out the foam board and get moodboarding! If you liked this article about mood board design, you should check out these articles as well:
The post Mood board design: How to create a mood board appeared first on Design your way. from http://www.designyourway.net/blog/design/mood-board-design/ What is a graphic designer? What is the graphic designer job description? What’s the difference between a senior graphic designer job description, and a junior graphic designer job description? Questions we see a lot, and we would like answers. Let’s take a look at a graphic artist description or graphic designer description. The graphic designer’s job is to bring a lot of kinds of communication to life. They’ll give their client a design that will get their message across and achieve a high visual impact. The role actually requires a business sense, as well as creative flair. They tend to work on a variety of products, from packaging, websites, magazines, and books, as well as corporate identities, exhibitions and computer games.
Nowadays, most of their work is done on a computer, with specialized software packages. They have to work closely with other colleagues who are involved in the project, such as photographers, copywriters, as well as sales staff. And, they often work directly with clients. They tend to work Monday through Friday, but extra hours, especially when they need to meet project deadlines, are common. And, part-time work may also be possible. The work is commonly done in a design studio and includes sitting at a computer for prolonged periods of time.
A graphic designer makes a combination of art and technology in order to communicate an idea through images, web screens, and printed pages. To achieve both decorative and artistic effects, they use a variety of design elements. They’re behind the development of the overall layout and the production design for anything from a business card to a corporate report. They’re in charge of choosing types, fonts, sizes, colors etc., and decide how the text and images go together on a screen, along with the writers who both choose the words, and decide whether they are to be put into lists, paragraphs or tables.
The graphic designer job commonly involves some of these things:
Graphic design is nowadays an important part in the marketing and sales of products. Therefore, the designers are also referred to as communication designers, and they work closely with people in advertising. And, designers often specialize in a specific category, or type of client. For example, some make posters and print media, while others make credits for motion pictures. They must keep up with the latest computer graphics and design software, on their own, as well as through software training programs. And they need to be able to create a design that’s both interesting to consumers and clients, and artistically interesting. They use either hand sketching or a computer program to make a rough illustration of a design idea.
They must communicate with the customers, clients, as well as with other designers, to make sure that the design they create will accurately reflect the message, and express the information effectively. Most of them will use a graphic design software, and they need to be able to think of a new approach to communicate an idea to the consumers. Their goal is to develop a unique design that will convey a recognizable meaning on behalf of their clients. A graphic designer works on projects with other designers and marketers, as well as business analysts, programmers and writers. They need to collaborate in order to make a successful end product. And, some individuals who have a background in graphic design will often teach in design schools, universities and colleges. EducationA bachelor’s degree in either graphic design or a field that is related, is commonly required. However, if you have a bachelor’s degree in another field, you may pursue technical training in order to meet most of the hiring qualifications. There are plenty of programs that will give you the opportunity to build a professional portfolio, which means collecting some of the finest examples of their designs, be it from a classroom project, internship, or any other experience. You can use these examples to demonstrate your skills when you’re applying for a job or bidding on a project, as a good portfolio is often the deciding factor. If you’re interested in a graphic design program, you should take basic design and art courses if available. Many bachelor’s degree programs will require you to complete a year of basic courses before being admitted to a formal degree program. Some will even require you to submit sketches and other examples of your skills and abilities. Important qualities
Analytical skills. A graphic designer must have the ability to look at what they’ve done from a consumers’ view point, and examine how the end consumer will perceive the design, to make sure that the desired message is conveyed. Artistic ability. A graphic designer needs to be able to create an artistically interesting design that will appeal to consumers and clients. They’ll make a rough illustration, often by a computer program or by hand sketching.
Creativity. They should be able to find a new approach of communicating their idea to consumers. The unique designs they develop should convey the message on behalf of their client. Time management. Graphic designers will often need to work on multiple projects at the same time, where each has a different deadline. A graphic design input will be necessary for a variety of products, such as:
Their tasks will commonly include:
A graphic design will either need to meet with their client directly, or if working in an agency, they may take briefs from the account manager who is responsible for the client contact. They also need to work with their other colleagues, and may take part in formal presentations if they’d like to pitch their ideas to a potential client. Do they need to have the ability to draw? Nowadays we have a lot of computer based-tools and the drawing abilities aren’t that important. You don’t have to be a great artist, but you need to have a good sense of design and be able to make a basic sketch or drawing. The sketches and drawings need to be able to convey the ideas to either your boss, or a client. If you’re uncomfortable with your drawing skills, find some tutorials, and spend time practicing. What’s the difference between a graphic designer and an illustrator?
Both of them do design-type work. However, a graphic designer will work on the design structures and elements, and provide a visual message or brand for a company that wants to sell a product, or service. An illustrator, on the other hand, will do commercial work for someone like a comic book house, or a publishing house and advertising agency. They do a lot more drawing, illustrations and company logos or graphic novels.
A graphic design degree requires a concentration in website design, product design and publication design. An illustration student will have some kind of graphic design training, but the majority of their coursework is focused on art history, drawing and painting. And, the illustrator commonly won’t have the graphic designer’s advanced knowledge. If drawing and illustrating concepts is something you like, illustration is a good fit. However, if you want to do detail-type work, as well as code and make websites, a graphic design is a bit better. What is it like to be a graphic designer?
The job isn’t as glorified as many think, and it’s actually a stressful, cutting edge job, where you have to face challenges on a daily basis. The industry evolves faster than any other industry, technically and creatively, and you have to stay on top of trends continuously, as well as stay creative and learn new software. A huge part of the job is being attentive to the clients’ needs, and being intuitive, as well as being able to see through what they’re saying. To be a good designer, it takes more than just an artistic ability, as you’ll also need to have great communication skills in order to understand your client’s expectations and criticisms, and manage them.
If you want to set yourself above many other designers, you will need to develop client-related skills, and make the entire design process about them, and their products. Keeping your ego out of your work is also a key point here. Designing for print, versus designing for the web
When you’re designing for the web, you have a lot of new variables, as well as opportunities and limitations that aren’t there in print design. With print, you usually know exactly how the content is displayed and you have a fixed layout, but web design requires that you are aware that users can be viewing your content on a variety of devices. This often means designing for a fluid experience, where your design needs to change, and react to changes such as a different screen size, which is a design challenge by itself.
Furthermore, you have higher technical constraints when designing for the web, as you should know what you can, and can’t do with the current technologies. For example, a lot of the standard typographical tools aren’t available, or at least easily accessible, and a lot of foundries won’t license their typeface for online use, meaning that web typography is nothing more than in its infancy.
Additionally, constraints such as bandwidth will require that you consider file size, which often restricts your design opportunities for the sake of a better user experience. However, when designing for the web, you’ve got some interactive elements that you won’t find with print design. They will both offer plenty of new possibilities, and create more work for the designer.
For example, you can add animations and transformations to elements on the page, but you also have to worry about user experience as well. With print, on the other hand, there’s very little user interaction. But, on the web, this is a very big concern. Ending thoughts on the graphic designer job descriptionLet’s go over the graphic designer job description again. A graphic designer will use either their hand, or a computer software, to create a visual concept that communicates an idea that will inform, inspire or captivate the consumer. They should develop the layout, as well as the production design for anything from brochures, advertisements, magazines as well as corporate reports. If you liked this article about the graphic designer job description, you will like these as well:
The post Graphic Designer Job Description: What Is A Graphic Designer appeared first on Design your way. from http://www.designyourway.net/blog/graphic-design/graphic-designer-job-description/ Those among you who’ve never tried black and white photography may have difficulties appreciating its true value. At the end of the day, isn’t it how it all started – didn’t silent movies on our black and white screens set the basics for today’s high-tech age? Indeed, black and white pics made it all happen! But is the age of black and white photography techniques officially over? The answer is a definite no, as black and white pictures nowadays have their own art form. For some admirers, monochrome photography is the absolute leader, given its rich history, and even more promising future. Better yet, there is plenty photographers can learn by doing black and white photos, particularly when speaking of composition. Colors, on the other hand, are trickier to use, as their absolute dominance takes over important elements alike shape, form, texture, and light. An expert photographer won’t have troubles identifying these elements on any piece of work, but a laic observer may not. Therefore, we recommend all aspiring photographers to adhere to black and white photography tips at the dawn of their career. Black and white photography techniques are pretty much applicable in all themes and scenarios, but there are subjects where they’re just ideal. Two specific cases are black and white portrait photography and black and white landscape photography, which is why we often find beginner photographers working on them. Shooting in black and white with your camera
Prior to the emergence of digital photography, artists had no other choice but using special black-and-white films to produce such photos. Nowadays, it has become way easier to make monochrome masterpieces, as all you need to do is to switch the mode in question on your camera (you should be able to locate it in the Picture Styles menu). There are also cameras equipped with electronic viewfinders which give you the option to turn any image into a black and white photo, and check it out before you’ve pressed the shutter. A similar effect can be achieved with the Live View on digital SLRs, which will be particularly beneficial when working on a tripod. The best way to go is to use the Raw format instead of JPEG, as it will preserve the image’s quality. Novice photographers, however, should stick to JPEG only, as it is more beginner-friendly. This is also how we’ve structured the tips and practices in this article. Shooting in monochrome mode
Set up the monochrome mode, and choose any of the cool options you have available. Depending on the settings, you can improve the results of your work, in particular when you work manually, and you switch between options. Color filters
The color filters on your camera are actually remains of film photography, when an artist would purchase a colored filter, and use it to change the black and white tones on a photo. For instance, a yellow filter would help them darken a blue sky, and so would orange and red filters. Green filters are also available, so that they’d highlight green subjects on landscape images. The four basic color filters have preserved their influence in today’s digital photography, and we can still find them in any black-and-white settings menu. Contrasts
For photographs taken in flat lights (someone’s portrait in the shade, for instance), you may produce a flat (two-dimensional) picture. In this case, you’ll need to increase the contrast to compensate, an operation which is fairly simple using Lightroom or Photoshop. Square formats and croppingIf you own a modern camera, odds are good you won’t need image manipulation software to adjust the aspect ratio of your images. With most cameras, you’ll be shooting in a square format (the same as with your mobile camera app), but composition will still be easy to adjust with an electronic viewfinder. Toning the image
Toning the images is another interesting option to consider. Some cameras support toning functions, but they may not be as subtle as you need them to be. Shooting in colorThe reason why so many photographers nowadays choose to shoot in black and white is because their camera allows them to do it directly. As weird as it sounds, beginners should skip this function, and do the heavy lifting themselves. Black and white pictures turn out much better from colored originals, as the standard conversion ensures better quality. Consider this a rule with no exception – all images shot with the black-and-white present should be in RAW format, so that the colors will be preserved, but the conversion won’t look poor on the display. RAW formats put the photographer in control over the final result, and help him understand whether a black-and-white version is actually an option. Shooting at the lowest ISO setting
Grainy film is a frequent choice of black-and-white aficionados, but it may not be the best option out there for novice photographers. Instead, we recommend opting for the lowest ISO setting available, and add grainy film only in the post production. This is because ISO settings are actually used to come up with a grainy look, and they can provide the right amount of noise without affecting the quality. When shooting with the lowest ISO setting, make sure there are no unexpected movements. On the safe side, modern cameras can take up to movement significantly before the noise begins to show, but they won’t guarantee you a clear subject and a sharp shot. Make the weather work for you
What could be better for a good photographer than a rainy day? Instead of staying in bed and doing nothing, grab the camera and create the perfect black-and-white shot. The softer the light is, the smoother the transition between subjects will be, and you can always polish your masterpiece with some extra contrast. Get used to seeing things in black and white
Black and white can definitely change how the world looks, and if you learn how to picture this in your head, you will capture perfect situations. Instead of scrolling through your works and deciding which one would look the best, envision it in black and white at the first place. Of course, this won’t happen overnight, but there are few tips that can help you achieve it. To start with, observe the shapes and not the colors. Even when the lighting conditions make it difficult to distinguish a shape, you can use the shadow over it to define it. Colors fall short in exposing beautiful shapes, and black and white photography brings them back. Where there is no color, one can also distinguish structures with ease. To point it out, you can add up extra light, as done in black and white photography of people with their skin and hair. You should be careful when applying contrast on a colored photo, as using too much of it may confuse the viewer, and have a considerable harsh effect. Without color to obstruct your work, you can make contrast more beneficial, and attract attention towards the subject. PatternsAnother side effect of colored photographs is the minimized impact of patterns, as some of them may even go unnoticed with bold shades distracting the viewer. On black and white images, one has the possibility to capture all attractive patterns, as his attention is already focused on discovering shapes and scenes. Textures
The same as with patterns, textures often get lost on colored photos. When looking at the colors, we use them as indicators that label the main subjects on the image, and we see what we expect, rather than what is already there. As you can guess, this doesn’t help your efforts to convey a message or make an image memorable. On black and white photographs, the mind is free from interpreting color information, and focuses on texture first. If you want to expose a prominent texture, there is no better way to do it. Adequate lighting
Every experienced black-and-white photograph will agree that the key aspect of his work is lighting. Good lights are decisive when it comes to exposing shapes, patterns, textures, and contrasts. You need to take the influence of each factor in consideration before you make lighting decisions. Ideally, you should opt for a setup that enhances as many of them as possible. RAW shotsThere are many DPS readers that are unable to shoot in RAW (there is no such function on their camera), as well as those who prefer not to do so because they don’t like the final effect. Yet, shooting in RAW formats on cameras that allow it is a highly recommended practice, as it facilitates turning an image to black-and-white in the post production phase. You can also shoot black-and-white in JPEG formats, but it may still be a good idea to let RAW surprise you. Color shots
If RAW is not an option, create the image in color, and convert it to black and white using an image manipulation programs. This puts you in control of the image data way more than working with an original black-and-white image. Low ISO shots
When shooting, set the lowest possible ISO. As most of us know, this option matters to colored photographs, but it is even more important in black-and-white shooting to reduce the noise. If noise is what you’re after, there is the option to add grain in the post-production stage. Taking it out, on the other hand, is quite difficult. Composition
When it comes to frames and compositions, the rules for colored and black and white photography are almost identical. Nevertheless, there is one difference you should know about – without color, it becomes more difficult to lead the eye towards the desired object, and you need proper lighting to make it stand out. Long exposure and why you should try itMonochrome photography relies heavily on long exposures, especially when shooting clouds or moving water. Long exposures help record a wider area of water and enhance its contrasts, and highlight the important moments on the image. The textual contrast on solid frame objects is further enhanced by the blurring movement. To achieve an even stronger effect, you can use neutral density filters alike Little or Big Stopper by Lee Filters. These filters extend the shutter speed (10 or 4 stops) and reduce the exposure. Extending the exposure more than 1/60 second may cause blurring, which is why we recommend you to use a tripod so that the camera won’t move. If possible, use also a mirror lock-up and a remote release to ensure there is no vibration. With these tips in mind, you will produce stunningly sharp photographs. Using filtersAnother useful practice from color photography that proved useful in its monochrome counterpart is the use of filters. Particularly important are the polarizing and the graduated neutral density (ND grad) ones that help manipulate contrast on your images. ND grad, for instance, will be of great use to accentuate details on light sky images, while the polarizing filter can boost the contrast and reduce the reflection. You can also change the exposure and make several photos at once, so that you will get high-dynamic-range (HDR) composites. On long exposure shots where the sky looks brighter than the foreground, feel free to use the ND grad filter with standard density. Contrast, on the other hand, can be manipulated with the same filters used for colored photography. These filters darken the objects that have the opposite color of theirs, and lighten their own objects. For instance, applying an orange filter on a blue sky image will make it look darker. Stay in control
There are two ways to manipulate contrast in monochrome photography – to use colored filters while shooting your image, or to save the image as such and process it later. For many years in a row, photographers used Channel Mixer by Photoshop to tune colored images to monochrome ones, but Adobe came up with a much more powerful tool this year. The tool is called Camera Raw, and it lets users work with even 8 separate colors to adjust the brightness of their image. A dedicated sliding control lets you adjust any of these colors in all nuances from while to absolute black. Yet, you should check how the graduation of a particular color affects the image, as you may achieve an unnaturally-looking result. To give you an example, using the red slider to change the brightness of a pink or red shirt can change also the color of the model’s lips or skin. Tones and contrasts can then be manipulated with Curves and Levels controls, while the Grayscale/HSL controls help achieve complete separation between objects with varying colors. Burn and Dodge
Burning and dodging are two very useful techniques inherited from the darkroom period, and used primarily to manage highlights and to hold shadows back. Photoshop offers a Dodge and Burn Tool with an incredible level of control that allows you to target shadows, highlights, or both. Basically, you will have a burning tool that darkens highlights that are too bright, and a dodging tool that does the exact opposite to strengthen the contrast. This means you can easily enhance beautiful textures and obtain more sharpness. Since you can set the opacity of your tools, you can easily change their effect and subtle the edges of your objects. Suitable subjects for monochrome photography
Editing colored photos to turn them into black-and-white ones is a two-way street, as you’re automatically eliminating the only element viewers use to interpret the photograph. Therefore, you need to find an alternative way to guide them, and to give other elements a central role. How to identify suitable subjects for your black-and-white photo? There are several elements you should consider, all of which can be used separately. Yet, we recommend you to combine them in different ways, and to create amazing mono photos with clout. Tones
There is a large range of grey tones appearing on any black-and-white photo, and their role is to make your image look subtler. The human eye is normally attracted to subjects translating to black and white tones, but that doesn’t mean that lighter and darker subjects won’t have a good effect. Subjects to avoid in monochrome photographyWhile there is no universal rules to as which subjects you should/shouldn’t use on monochrome photographs, there are scenes and settings whose impact is simply not good without color. Similarly, not every lighting condition allows the creation of a good black-and-white image. These are the subjects you should avoid in black and white photography: An empty sky
With a limited number of subjects on an image, black-and-white photography comes somehow intuitively. Yet, it’d be a bit naïve to assume that the weather or lighting conditions won’t affect it. Photoshop will without doubt provide skillful adjustments and conversions that can solve the drama issue in the post production phase, but it is way easier to launch your project on solid grounds. Instead of rushing, you should take some time and wait for the ideal lighting conditions. Images whose impact relies heavily on moodImages supposed to invoke a particular mood look much better with color, excluding certain exceptions alike black and white animal photography. Sunset or sunrise shots, for instance, are all about color, and making their hues subtler can have the opposite effect. Tips on using filters
Digital cameras can’t work with traditional color filters intended for black and white films. Therefore, you can only boost the contrast with a polarizer, and rotate the filter to make objects lighter or darker. Another important role of a polarizer is to reduce the reflection from water, glass, and similar non-metallic objects. Infrared effects and why you should try them
To create an even more dramatic image of a black sky with lots of grain and glowing foliage, you should try to replicate the effect of infrared films. To do so, you can use a dedicated filter and attach it directly to the lens, so that it will transmit the infrared light. Modern cameras can also be set to produce infrared images, but the quality may not be the best one. To achieve an infrared effect, you can also use the black-and-white conversion features available in CS and Elements. To learn how to see things in black-and-white, look for shapes, lines, and shadows. Experienced photographers rely on this trick to create the most astonishing black and white images. Keep noise under control.Modern DSLR cameras have a surprisingly good low light performance, and offer a number of noise removal programs like those used for professional black and white street photography. Work with gray tones.On a monochrome photography, black and white tones are only use to attract interest towards a particular object, while all other areas are handled with a wide range of gray tones. Get your polarizer.A polarizer can be very useful when capturing reflective surfaces on an image, including excess sunlight. Reflection is even stronger on black and white photos, and can distract attention from the main composition. Pay attention to texture.Contrast is the best mean to expose the beautiful details of textures, which is why black and white fashion photography is so popular. We can also find many amazing monochrome images of antiques and old barns, and other items with weathered textures. Learn to distinguish between black and white, monochrome, and grayscale photography.Monochrome refers to images where a color is applied on a neutral background (a black object on a white background, for instance). By ‘grayscale’, we refer to displaying black and white photos on a computer screen, and using a limited set of gray tones to preserve their effect. Black and white is perfect for long exposures.Many digital photography experts agree that black and white is the ideal approach for long exposure images. Limited colors don’t always create the ideal setting for black and white.You will for sure be tempted to transform a colorblind photo into a black and white one, as for instance a night sky photo, or a penguin image. The less color there is on the original image, the less able you will be to transform it into a perfect black and white image. The mysterious ingredient is HSL.Despite of appearing last on this list, the HSL trick may be the most important thing about black and white photography that you will ever learn. In order to post-process an image and turn it into black and white, you should first tweak its colors in Lightroom’s or Photoshop’s color panel. You should be able to find many tutorials on how to do this to improve the looks of your images, so don’t lose time! Ending thoughts on black and white photographyBlack and white may be the best photography medium to excel in, and one that certainly has the potential of making you appreciate your work even more. Learning how to produce beautiful black and white pictures is also an enjoyable process, so take your time! If you liked this article about black and white photography, you should check out these as well:
The post Black and White Photography: Monochrome Pictures That You’ll Love appeared first on Design your way. from http://www.designyourway.net/blog/photography/black-and-white-photography/ Even if you are working with basically no budget on your graphic design or web design project, you can still find some really amazing fonts free for commercial use out there with a bit of work. The most useful royalty free fonts are legible and come with a choice of different weights as well as any special characters you might need. They shouldn’t need much or any tweaking to get the right kerning and tracking. These fonts are ready for you to use on your project and are easy to adapt to whatever you need. It can be hard to find good free fonts out in the wilds of the internet, however. There’s just so many options, many of them with conditions attached that aren’t initially advertised. Here is a collection of some of the best free fonts for commercial use. These are some of the top free fonts you can find on the web today. A lot of them have excellent pedigrees, created by major design firms and professional graphic designers around the world. Having no budget to purchase fonts doesn’t mean you shouldn’t get some great free fonts to use for your project. Aileron
This versatile sans serif free font was created by Sora Sagano, a designer with Tipotype. This font looks like a neo-grotesque that sits somewhere between the look of Helvetica and the look of Univers. This font was designed around creating a strong sense of visual comfort. It can be found in 16 weight, ranging from ultralight to black. Aganè
This is great commercial use font for anything you want to be readable at an angle. It was originally designed for wayfinding signs by the Swiss graphic, UI, and type designer Danilo De Marco. It was inspired by FF Transit by Erik Spiekermann, Frutiger by Adrian Frutiger, and Noorda Font by Bob Noorda. It is free for both personal and commercial use. Aleo
Aleo is a stylish yet readable font. Designed by Alessio Laiso, a designer at IBM Dublin, this font has semi-rounded details that combine pleasantly with its overall sleek letterforms. This font has six styles, with the light, regular, and bold weights and italics in all of weights. This font was published under the SIL Open Font License and can be modified, used, or shared freely as long as you’re not going to sell the font files. Amatic SC
Designed by Vernon Adams, then revised by Ben Nathan and Thomas Jockin, this free font is a hand-drawn font that works very well for smaller bits of text. It has a naïve look that has made it increasingly popular. Over 2, 400, 00 websites use it. Arabella
This calligraphy font looks great for any text you want to look elegant and striking. It works very well for signatures, headings, wedding invitations, logos, labels, posters, t-shirts, badges, and almost anything else that you want to make a statement. Argon
Argon is a free to use font that has a design that can be bith modern or retro depending on how you use it. Every letter is composed of three lines that fit together like an elegant puzzle. It is only available in capital letters. Audrey
Audrey is an elegant royalty free font designed by Cristina Pagnotta. It’s named after Audrey Hepburn and is meant to evoke the actress’ legendary elegance. Its sweeping curves and straight lines come together for striking effect. Audrey comes in three weights, normal, oblique, and italic. You’ll notice that the designer’s profile will only mention the normal and oblique weight, but the ZIP archive includes the italic weight as well. You can use Audrey for free for personal and commercial use in print. You’ll need to obtain a license if you want to use it online. Bauru
Created by Pier Paulo, a Brazilian art director and illustrator, Bauru is a great choice to evoke a retro and nostalgic feel. BEYNO
This uppercase free to use font has a hypermodern and interesting style. It will catch the eye of any reader who sees it. Use it to great effect for headlines and posters. BEYNO was made by Fabian Korn. Brela
Brela was created for editorial design by Makarska Studio, a Spanish creative agency. It’s a very legible font at all sizes with a large x-height. You can use it small text or as a large bold headline font. It is abailel in regular and bold weights. Brotherhood
This is a hand-written, calligraphy inspired free font that is excellent for classical, striking titles or short bits of text that you want to stand out. Butler
This is a free font created by Fabian De Smet. It’s a serif font inspired by Dala Floda and the Bodoni family. The designer wanted to create a modern serif font. This font offers a lot of options. It has 334 characters, seven regular weights, and seven stencil weights. There are also ligatures, fractions, and text figures. It can work with a number of different languages because there are numerous additional glyphs. This is a great free to use font for titles on posters, books, or anything else. It looks both very fancy and very modern Charming
Charming is a hand drawn font that resembles American vintage folk lettering. It works great for signs, logos, ads, posters, and quotes that you want to highlight. It comes in OpenType format and supports Latin, Cyrillic, and Greek characters. It is free for both commercial and personal use. Cheque
Originally the student project of Mirela Belova of Fontfabric, this free font is a great choice for headlines that you want to have a vintage, geometric look. Chivo
Chivo works great for headlines and other text that you want to really capture readers’ attention. It is a grotesque typeface that has an elegant confidence. This free font comes from Héctor Gatti and the Omnibus-Type Team. It comes in four weights and matching italics. Cormorant
Inspired by the font Garamond, this font is a serif font. It was designed, hand-drawn, and produced by Christian Thalmann. He describes his work as having “scandalously small counters, razor-sharp serifs, dangerously smooth curves, and flamboyantly tall accents”. It work very well for larger text, like titles and large poster text. It also looks very good in print and on screens. Surprisingly, it is still legible at smaller sizes. Cornerstone
Interestingly, Cornerstone is one of those free to use fonts that started out as a school project by Zac Freeland. It grew into a free typeface with a non-nonsense look that can be useful for a lot of different kinds of projects. Crimson Text
Crimson Text was developed by Sebastian Kosch, a German-born, Toronto-based designer. He was heavily influences by the works of Jonathan Hoefler, Jan Tschichold, and Robert Slimbach. It’s a Garamond-like font, created for book production, and has an older look to it. It is a nice sophisticated alternative to a lot of other older-looking Garamond-derived fonts. It comes in all the basic weight options, with a very expressive italic. It looks good even when paired with more modern sans serif fonts. Curely — Free Typeface
This free font is a handmade decorative font with a distinctively feminine style. Use it for titles, posters, or any text that you want to look both cute and bold. It is only available in capital letters. Cute Punk
Vibrant, geometric, and youthful, this modern–styled handwriting font was created by Slou, a designer from Bratislava, Slovakia. Fenix
Fenix was designed by Fernando Díaz, from the at Uruguayan type foundry TipoType. It was inspired by calligraphy. It works for both titles and body text, with a pleasant rhythm created by its strong serifs and rough strokes. Don’t be afraid to use it in longer passages. Futuracha
Designed by holy, this handwriting-type free font is an excellent display typeface. Fina
This free font is ultra-thin and modern. The capital letters have an almost art deco feel to them, with dots and points accented the clean thin lines. The lowercase letters are sleeker. Hamurz
Hamurz has numerous curling and wavy shapes. It is a highly creative font that is freely available for both personal and commercial use. HK Grotesk Hanken
This san serif free to use font was inspired by classic grotesque fonts like Trade gothic, Akzidenz Grotesk, Univers, and Gill Sans. It was designed to be a unique and friendly font that works for smaller text. It was created by the Hanken Design Co. Recently, it has expanded the number of language it supports, adding in Cyrillic characters for use in Russian, Bulgarian, and Serbian. Ikaros
Ikaros is a sleekly modern sans serif font created by Matt Ellis. It has a pleasant but fun minimalism that works for body text of many sizes and larger text as well. JAKARTA typeface
If you want an ultramodern look, this font is a great option. It is a very lightweight font that looks great for graphic design and logo design. Jura
Designed by Ed Merrirt, a UK based designer, Jura has rounded wedge-based serifs. It is an elegant typeface that looks very good at larger sizes, yet can still be read at smaller sizes. League Gothic
This font is a condensed sans-serif free font. It was inspired by Alternate Gothic #1, a classic typeface that was originally designed by Morris Fuller Benton for the American Type Founders Company in 1903. This modern version was created by The League of Movable Type. It’s open source and has had contributions from Dannci, Micah Rich, and Tyler Finck. Libre Baskerville
Libre Baskerville is a web font that has been optimized for body text. The best size for it is 16pt. . This font is an open source project that is led by Impallari Type, which is a type design foundry from Rosario, Argentina. It was inspired by the 1941 American Type Founder’s Baskerville. The Libre Baskerville font has a taller x-height however, with wider counters and a touch less contrast. This means it reads very well on a screen Long shot
Smart and modern, Long Shot is a free to use font with a sharp and fierce style. It looks great for banners, headlines, and posters. While it might seem long an uppercase only font, it includes some great lowercase letters, as well. Lora
Lora is a free font based off of calligraphy, created in 2011for the type foundry Cyreal. A Cyrillic extension for the font was added in 2013. This font has brushed curves and driving fonts. It has a very contemporary and balanced style. It comes with four weights, regular, bold, italic, and bold italic. Lora is optimized for web use, but also looks good in print. LOT
This stylized block font comes from the type foundry FontFabric. It is a big, bold choice that’s great for headlines and posters. Luthier
This is a royalty free font that can be used in a number of diverse ways. It has a very intellectual look that can be used for headlines and body text alike. It’s the work of Adrià Gómez, a designer based in Barcelona. It has sharp serifs and high contrast. This free font comes in two weights and comes with italics. Mightype
Originally, this was not one of the commercial free fonts, but the designer AF Studio opted to release it separate from its original commercial package for free use. The unique shape of this font’s design were made using traditional media, including brushes, drawing pens, marker, and pencils. There are some limitations to this font’s use, all of which are described in the publisher Creative Market’s SimpleLicense. It is still among the commercial use fonts you can use for most projects, however. Moabhoers Typeface
Fun and grungy, this free font is an all capital font. This is a great vintage style that creates some eye-catching text. Nickainley
This free font is a great choice if you want a typeface that looks like handwriting. It has a classical and vintage look in its uppercase and lowercase letters. This font was made by Seniors Studio, an Indonesian agency. Noto Sans
Designed by google, Noto Sans is a family of royalty free fonts. It supports over 100 writing systems and 8000 languages with hundreds of thousands of characters. This free font family is meant to be visually unified across multiple languages. All characters have compatible stroke thickness and heights. Noto Sans was derived from the Droid font and has a serif font version, Noto Serif. It includes regular, bold, italic, and bold italic styles. Olesia Font
Oleisa is a script typeface that has extra loops and curling swashes on letters like E and b. this creates a charming and care-free look that may be just the thing your project needs. It is difficult to read at smaller sizes. ONE DAY
Simplistic and modern, this all-capital font was designed in one day, hence the name. It’s geometric lines come together to create striking lines that look good for titles and other short pieces of text that you want to stand out. Pacifico
This free to use font was inspired by American 1950s surf culture. It was created by Vernon Adams and is an open source font. Panama Light
Fun and sleek, Panama Light is a modern sans serif free font created by Adrien Coquet. It’s great for ads or titles and pairs well with big, bold colors. You can also pay for the Panama Bold at the designer’s website. Paralines
This free font looks retrofuturistic yet modern and minimalistic. It was derived from both retro design and modern fonts. It’s a great choice for headlines and logos that you want to evoke an old school sci-fi feel. It’s very legible and only comes in capital letters, making it unsuitable for body text. Playfair Display
Inspired by late 18th Century European Enlightenment designs and the work type designer john Baskerville, this font is a serif typeface. The letters have delicate hairlines, mimicking the effect of pointed steel pens. It’s very distinct among copyright free fonts. It’s both readable and has an old-fashioned look. September
This commercial free font has a sleek look that works for larger and smaller text. September is a font based on old-school knuckle tattoos. It is available for free in a number of styles and weights. Shadows into Light
Designed by Kimberly Geswein, this free font has clean characters and nicely rounded edges. It adds a personal touch. It is only available in one style. Slabo
This incredibly popular font (currently number one on Google Fonts) was designed by John Hudson, the co-founder of Tiro Typeworks foundry. Slabo is actually a collection of free commercial fonts designed specifically for the web. So far, there’s Slabo 27px and Slabo 13px. These fotns have been fine-turned for use at those pixel sizes and look absolutely amazing. There’s a blocky look to their ligatures that ass a modern twist to their serif style. Soda Fountain
Soda Fountain was inspired by the signs found in 1950s diners. It has an unmistakable vintage style. It only comes in uppercase letters and works best for headlines. It adds a vintage, smooth feel to whatever text you use it for. You can use this font freely for both commercial and personal projects. Source Sans Pro
This free font to use has an impressive pedigree. It was created by the principal designer at Adobe, Paul D. Hunt, and was published by Google. This is a sans serif font that was made for user interfaces. It’s versatile enough that it also works well for long chunks of text. Every letter is as simple as possible. There are only a few small tweaks and additions that differentiate different letter shapes. You can get it in both a regular weight and italic. This is another font published under the SIL Open Font License, allowing for use, modification, and sharing so long as users aren’t trying to sell the font files. You can also get this font’s serif cousin, Source Serif Pro. Streetwear
This sporty retro font is the work of the Indonesian studio Artimasa. Raleway
Designed by Matt McInterney, who previously worked at Pentagram, Raelway is a san-serif free font with neo-groesque look. It has standard and discretionary ligatures and a nice set of diacritics. It includes lining and old-style numerals. Raelway is available in single thin weight. There is also a geometric-inspired alternate available. Timber
This free font has an amazing vintage rustic look. All the lines in the letters connect perfectly, so don’t worry about them looking jagged. The uppercase and lowercase letters look notably different and you may want to try both out. Titillium Web
Titillium began as the work of a students at Italy’s Accademia di Belle Arti di Urbino. Every year, a dozen students at the school work on the font. They develop and fix issues in it, then they request that all designers who use the font in their projects email them examples of the typeface in use. They use these to continue refining the project. Ubuntu
As you might have guessed form the name, this font was originally created for the Linux operating system for personal computers, smartphones, and tablets. It’s meant to complement the voice of Ubuntu. It was created by the font foundry Dalton Maag. Ubuntu font uses OpenType features. It’s been manually hinted for clarity on all sizes of screen, whether desktop or mobile. Yellowtail
This free font recalls 1930s typefaces like Kaufman with its flat brushstrokes. It was created by the typography institute Astigmatic. It is very legible and has a nice retro look. Zefani
Zefani Stencil is a stencil font that now features lowercase letters, while Zefani Sans is sleeker, and has three different weight available. If you liked this article with fonts free for commercial use, you should check out these as well:
The post Download These Fonts Free For Commercial Use appeared first on Design your way. from http://www.designyourway.net/blog/resources/fonts-free-for-commercial-use/ Do you operate an automotive-related business? Perhaps you represent a car dealership. Maybe you run a used car lot, or a car rental business. Perhaps you run a car listing/automotive classifieds business. Whatever the case, you need to ensure that you have a website that supports your unique needs, and those of your customers. The new Motors theme is an ideal option for exactly that. Designed from the ground up for automotive-related business needs, this theme offers powerful performance, in-depth customization possibilities, and a great deal more. What should you know about this car listing WordPress theme? Six Themes in OneWhile some themes offer a limited amount of customization to support different business models within the same industry, Motors is not among them. This theme is really six different themes in one. It’s designed to meet the demanding needs of a wide range of different business types within the automotive industry, including:
Powerful Features Speak Directly to Your Customers’ Needs
Let’s face it – the needs of a car dealership’s customers and those of someone shopping for something else, say a sweater, or a new brand of dog food, are demonstrably different. So, it follows that your website should deliver the features that your customers actually need. This car listing WordPress theme delivers exactly what they want and need. Advanced Search: One of the most important features available through this car dealership WordPress theme is the selection of four different advanced search options.
Each of these can be easily configured, and you can choose which fields to display, and the specific data that will be displayed in each field. Whether you’re providing your customers with a way to choose their rental car type, the new or used vehicle they want to buy, a part for a specific make and model, or the type of service they need, you can do it all easily, in just minutes with this theme. Grids and Lists: If you’re part of the automotive industry, then you need to provide your customers with access to a wide range of inventory options. That’s true whether you sell auto parts, new or used cars, rent cars, sell motorcycles, or something completely different. The Motors car listing WordPress theme offers both grid and list layout methods.
In addition to allowing you to display your inventory as you see fit and to its best effect, you will also find that both template methods offer meta boxes to ensure that everything can be filtered accurately, and so that your customers can sort their options according to their specific requirements. Just add the meta details, and your customer will have click-to-sort functionality. It’s that simple. Your Inventory Details, Your Way: While you might be part of the wider automotive industry, you have a specific brand that needs to be promoted and maintained throughout your website.
That includes everything from using colors that tie into your logo and ethos to highlighting your inventory in the right way. The Motors car dealership WordPress theme allows you to choose how you want your vehicle (or part) information displayed from a wide range of customizable, easily accessible templates. Highlight overviews, vehicle/model specifications, photos and videos, technical data, options and more.
This ensures that you can configure how the information about those inventory items is displayed, how images display, how many images are shown, the position and type of data offered, and a great deal more. You can even choose what additional forms and boxes are displayed on the page with your inventory, such as dealer contact forms, financing calculators, quote requests, and more. Comparison Capabilities: Whether your customers are comparing different vehicle makes and models, different parts from different manufacturers, or something completely different, you can give them the ability to make an informed decision using the Motors car dealerships WordPress theme.
The compare features page template allows you to provide your visitors with comprehensive comparisons of whatever they want. That makes it simpler than ever for them to make an accurate decision based on factual information like price, fuel economy, performance, warranty, engine size, transmission type, drivetrain type, color, production year, trim level and just about anything else they might want to consider. Finance Calculator: Add a finance calculator to any page on your website, and provide your customers with the ability to immediately find out how much a purchase might cost them on a new or used vehicle loan. This increases the chance of a customer buying through your company – if they can gain access to accurate cost information immediately, they are far more likely to contact you to close the sale than to go elsewhere and start the process over. Listing Layout: This powerful car listing WordPress theme gives you the ability to provide vehicle sales listings to your users. Allow them to list their make and model, and other pertinent information, or build your own ad for vehicles in your inventory that need to sell.
Subscribe: Building a website that requires membership? The Motors theme supports both free and paid membership models with a built-in subscription capability. This includes the ability to create general user profiles, as well as dealership profiles for listing sites. Additional Features of Note: Motors lets you use listing maps for classifies, or integrate with Google Maps right off the bat. There is also a convenient built-in currency converter, integration with Google Places, inventory listing settings, PayPal integration, and more. In ConclusionUltimately, Motors is a powerful, comprehensive car dealership WordPress theme that works equally well as a car listing WordPress theme, for repair and body shops, for car rental companies and more. If you are in the automotive industry, this theme delivers the features and capabilities you need to build a positive online experience and engage your audience on a deeper level. The post The Motors Theme: An Ideal WordPress Theme for Car Dealerships and Automotive Industry Use appeared first on Design your way. from http://www.designyourway.net/blog/misc/the-motors-theme-an-ideal-wordpress-theme-for-car-dealerships-and-automotive-industry-use/ Is part of your freelanced design time devoted to juggling projects and deadlines? Maybe you are always planning sessions and meetings? Then, you are already aware that staying organized is paramount to success. Being well-organized is also one of the keys to greater productivity. But, re-inventing the wheel to be able to stay in that mode is counterproductive. What you need of course is a tool or app that does most of the organizing for you. If a tool promotes transparency, team collaboration, and sharing, so much the better. A challenge you might face is finding a productivity app that suits you! it should not require hours of effort to make it work the way you want it to. What you want, is one that works for you! Many such productivity apps are readily available. These are among the very best: monday.com
If you haven’t heard much about monday.com, it isn’t because this team management tool hasn’t made anyone’s Top 5 or Top 10 list, or because it hasn’t made an appearance in Forbes, Business Insider, or similar websites of publications. It has, but under the name of dapulse. Not only did the name of the company responsible for developing this amazing app change to monday.com, but the product underwent some significant improvements as well. Time is money, and this also applies to the speed of team management tools. In terms of speed, monday.com has gone from speedy house cat to cheetah. It’s project tracking board is faster and easier to work with than ever; and by extension, more transparent than ever – something your entire team will appreciate. monday.com is an all-in-one team management tool that a pair of freelancers working together, or a huge enterprise, will feel equally comfortable with. monday.com is equally popular with non-tech organizations. Its dashboard or “Board” centralizes everything. It’s simple, colourful, and easily searchable and editable. 4 plans, each offering a free trial, are available. Taiga
Taiga is especially suited for Agile designers, developers, and project managers looking for a tool that can make work fun again. In addition to what Taiga can do to help you organize and carry out your project tasks, it’s free, it’s Open Source, and it’s extremely simple to use. While there are plenty of project management tools, systems, or approaches that can get the job done, many of them have one or more shortcomings – you must adjust your project workflow to fit the tool to realize its full potential. Taiga is customizable and can easily be configured to fit each project’s personality. Some examples: Taiga is ideal for those who follow Scrum product development methodologies. Kanban methods can be employed to divide projects into meaningful stages. And, Epics on Taiga creates a host of planning opportunities for managing interrelated, multiple projects. Taiga offers a Free plan, a Premium Plan, and an Enterprise plan. Mason
Mason is a product design and development tool with a collaboration-focused twist. Instead of simply allowing co-workers to comment or provide feedback on the design or development of a project or one of its components, it takes a more radical approach. Mason takes you and your coworkers down to the feature level of a product under design or development (or one that has already launched) and allows you to manipulate, edit, and deploy changes without downtime. With Mason, teams can work together to deliver beautiful web and mobile features on demand. The visual editor lets team members change colors, fonts, button styles, images and text to place greater emphasis on product brands, or for any other reason. The Auth Feature provides the authentication functionality necessary to enable users or logon or register. The Feed Feature consists of an ordered collection of product related data items. Select the Free plan (2 users), the Small Team plan (up to 10), or the Enterprise plan (up to 25). Active Collab
ActiveCollab provides a project management solution for creative professionals. With ActiveCollab, you can avoid those tasks that tend to make team collaboration a chore – email, meetings, file sharing, etc. Comments and feedback are kept in one place, roles and responsibilities can be established, and tasks are organized and tracked to fit your desired workflow pattern. ActiveCollab gives you complete control over your projects and team collaboration. ClickTime
ClickTime provides the same project management features that other top-of-the-line software management tools of this type do, plus several features that you won’t find in many or most of them. You can easily track and manage employee time, see who is available to work on tasks, manage time off, and even approve employee expenses. ClickTime will also save you money by showing you the hours remaining on a project, project’s billable hours and costs. RunYourMeeting
Calculating the time wasted (hours x number of participants) when meeting participants show up unprepared can yield some scary results. RunYourMeeting was designed to ensure that what you want to accomplish actually gets done. This productivity app offers an efficient and effective way to prepare and conduct meetings and follow up minutes and actions. RunYourMeeting keeps to-do lists updated and automatically issues email reminders and push notifications. Futuramo Visual Tickets
One of the areas that can be improved is the flow of information in cross-team projects. Teams of designers and developers would benefit from using Futuramo Visual Tickets, a bug tracking and reporting app that lets teams communicate in a more visual way -- by sending annotated screens included in the tickets. Equipped with a powerful annotation tool, Futuramo Visual Tickets makes it easy to exchange tickets with issues, requests, and feedback in a fast and user-friendly way. This app is free for up to 3 users. Nutcache
This appropriately named app saves and stores away important information until it is needed. Nutcache is both a business-oriented Agile project management tool and an online team collaboration tool. No matter the size of your business, Nutcache gives you an effective and efficient way to manage the total project lifecycle within the Agile set of principles. You can also organize and track ideas, memos, and other diverse collections of information. ConclusionIt does not matter which of these productivity apps you pick. You’ll see that managing your project(s) and collaborating with team members just got a lot easier. One of the great features these apps have in common is they are easy to use. So you don’t have to reinvent the wheel as you move from project to project. Give several a try, pick the one you want, and give yourself a pat on the back for making a wise choice. The post A Selection of the Top Productivity Apps for Designers in 2018 appeared first on Design your way. from http://www.designyourway.net/blog/misc/selection-of-the-top-productivity-apps-for-designers-in-2018/ Great graphic design has its easy day and its hard days. It can be hard to find inspiration for your graphic design ideas. You can get creative block or just find your current design lackluster. The busyness of your everyday life can be overwhelming. There’s dozens of reason why graphic design project ideas can stagnate. It happens to everyone. What you need to do is figure out how to kick your brain into gear. Here’s some ideas for graphic design inspiration to get your ideas flowing. Time Your Work Well
A lot of people find that late morning is the best time to get creative work done. After lunch, people tend to be sleepier and less productive, making morning a much better time to work. The first day of the work week isn’t very productive either, though you can use Monday mornings to throw ideas in catch-up sessions.
This are general guidelines about productive times to work, and there are a lot of people out there who find afternoons more productive and Mondays to be the day that’s the best to get things done. It all depends on you. The key is to pick a time to do work that works best for you. Look To New Things for Graphic Design Ideas
While graphic designs trends can be helpful in figuring out what direction you need to go, you can also find inspiration in things outside of design trends. Relying solely on current design trends can result in designs that are unoriginal and highly derivative. Those designs can also become dated very quickly.
Look for other sources for inspiration, from the great outdoors to the forms you see around you to your children’s drawings. Anything can give you good new graphic design ideas. Tell Your Team Everything They Need
Everyone involved in the project should know everything that in the design brief. Be very transparent and don’t hold anything back. Let your team know it all, even things that don’t seem important.
Just make sure they know that it is secondary information. Full disclosure of the details of the project creates a sense of trust and also can open up the floor for new ideas from everyone. Sometimes an off-hand comment on something can give you a new graphic design idea. Ask Questions about the Brief
Part of coming up with new ideas is analyses. Ask questions of every element of your design brief. This may seem to add time to your design process, but it can be an important element to polishing the design brief or giving your chance to bring some new life to it.
Some example questions: does this completely answer the brief? Is this a good solution? Are we being objective? Take the time to see your own subjective biases in the brief and do some serious analyses of your final design brief. Sit Around a Real Table
A proper table can make a big difference to the productivity of a creative graphic design team. Don’t have everyone sit around a coffee table. While it might be fashionable to hotdesk and sit in easy chairs, it’s not really helpful to getting things done for your graphic design idea.
Scattering your team like you’re working out of a living room is not a good idea. Conversation gets broken up and ideas become fractured between sections of the team. A real table meeting brings everyone closer together, allowing for graphic design ideas to flow freely between them. Encourage Design with Physical Creative Elements
While clutter-free, minimalist graphic design studios are in fashion in modern graphic design, try including items like paint, brushes, paperboards, and scalpels. Give your team something that they can use with their hands as they work through graphic design ideas. Offer your team different textured papers and other similar elements for them to see what they are actually like.
Different colored paints can call to mind what colors look like when not on a computer screen. Having graphic design become something solely generated by a computer can make the process seem unreal and disconnected from the physical world. Offering these physical design tools helps everyone remember that graphic design is a physical experience. Be Honest With Your Team
Let people know what you really do think of their suggestions. If someone is very much behind an idea and they know no one else is, this atmosphere of honesty is going to make sure it is really a good ideas before bringing it to the table.
Communication should always be polite and professional. A lot of how people will take you letting them know a graphic design idea is not optimal will come down to how you communicate with them. Use Word Games to Stimulate Creativity
Use what are often called ‘essence words’ to generate a list of ideas. These words should summarize the personality, spirit, and message you’re trying to communicate with your graphic design idea. Some of these words might seem crazy.
Temperature words like ‘cold’ or ‘warm’, for instance, might be a good fit for what you’re trying to convey, but they might also seem strange for a list of words about graphic design. Put them down on your list of essence words anyway. In a day or two you might find that they resonate with your graphic design ideas. Take a Break
Sometimes, the best thing to do is step back from your graphic design project and let everything sink in. If you have the time, share ideas, then give yourself and your team a few days to sleep on them. This gives everyone a chance to turn the ideas over in their heads and properly evaluate them.
The following brainstorming session is usually much more productive. There is also often more visual material to work with, allowing for better communication of the graphic design ideas. What Are Some Current Graphic Design Trends to Look At?
While trends come and go, knowing what’s hot can be a big help in finding inspiration for your graphic design project ideas. Here’s a list of some of the most recent graphic design trends. 80s Inspired Graphic Design
Retro graphic design has been a staple of the past decade. This graphic design trend taps into nostalgia, often blending with recent technological advances for a really amazing look.
The bold and lively color palette of the 80s has seen a recent rebirth. Neon colors and dark colors are both optimistic and boldly in your face. The 80s was a boom decade, a period of arcades and sci-fi movies that look retro and wildly imaginative now. There’s a childhood comfort and futuristic optimism to these 80s inspired graphic design ideas. Arts and Craft Styled Patterns
The sleek, flat designs of the past decade are about to give away to more individualized design. Consumers are getting tired of the simplified layouts that have saturated the market in the past few years.
Include patterns, prints, and an overall arts and crafts inspired feel. Combing these elements with flat design can create products that are both vibrant and ultra-contemporary. Expect to see nature-inspired patterns like plant patterns and marbled patterns. Use painterly patterns next to simple text in printed media for a great look. Bold Colors
Light and neutral colors like gray and black are giving way to more bold bright colors. Pantone has declared this year the year of Greenery, so you can expect to see that color show up in many graphic design portfolio ideas.
To make the best of this change, use colors found in nature and crank up their intensity. Use these bright colors against traditional neutral backgrounds to give your graphic design ideas a fresh new look that doesn’t deviate too far from tradition, especially if you’re working with an established and successful brand. Color Transitions
Multi-colored transitions of color in the register is becoming increasingly common, even in small graphic design elements like logos and buttons. Color transitions are much more visually interesting and eye-catching than flat colors.
A lot of major companies and brands have started adopting the use of color transitions for just about everything, so expect to see a lot of it in both print design and web design. Asymmetric Layouts
As a part of the pushback against minimalist layouts, asymmetry had begun to feature prominently. More often than not, graphic designer break the rules of symmetry to create deliberately unbalanced designs. If you were to draw a lien between the two halves, they would not look the same, which has been common or a very long time in graphic design ideas. These graphic designs are fascinating to look at and have lively aspect to them, especially in combination with interesting patterns and vibrant colors. Duotone CompositionThese designs consist of two bright colors. They are very noticeable, and pulling them well off can require quite a bit of skill. The end result can be absolutely amazing. You can use any two colors you like for a good look, but for an even more striking effect, use two contrasting colors. Low-Poly DesignsInspired by graphic design in video games, this graphic design trend has now found its way into all fields of graphic design. You’ll find it more and more on ads, banners, business cards, flyers, and even clothing. It’s a very cutting edge for of graphic design, since it uses geometric shapes and colors to create the look and feel of a 3D design. What Are Some Good Graphic Design Portfolio Ideas?
When it comes to your graphic design portfolio, make sure there is a lot of diversity in the ideas you present. Only show off your best work, especially the designs that have been a big success.
Make sure the images are clear, high resolution, and are presented so they look their best. Black background usually work better for mage galleries, since they help the colors of the images stand out better, but you should experiment to make sure. Ending thoughts on graphic design ideasIt’s far too easy to let yourself fall into a graphic design rut when you’re having a hard time and inspiration dries up. Try our ideas and inspirations to help you get back into your graphic design groove. If you liked this article about graphic design ideas, you should check out these articles as well:
The post Graphic Design Ideas To Inspire You For Creating Great Designs appeared first on Design your way. from http://www.designyourway.net/blog/graphic-design/graphic-design-ideas/ |

AuthorPleasure to introduce myself I am Jamie 27 years old living in Searcy, AR. I am web developer and have developed over 50 sites for clients. Now a days I am focused on designing as I feel I am lacking it. Archives
April 2019
Categories |
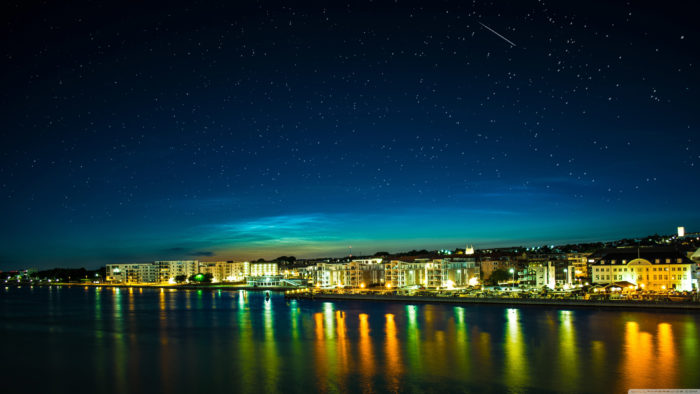
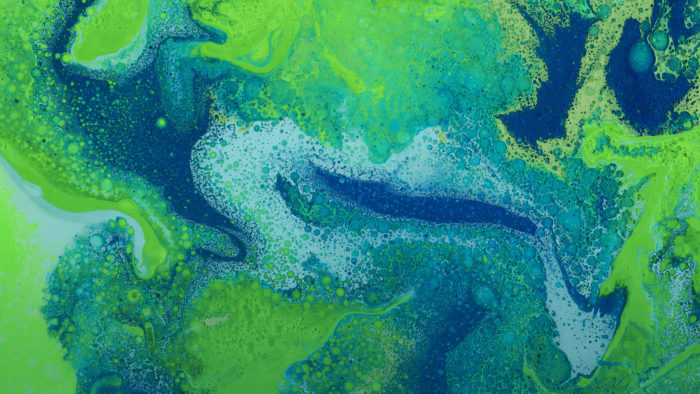

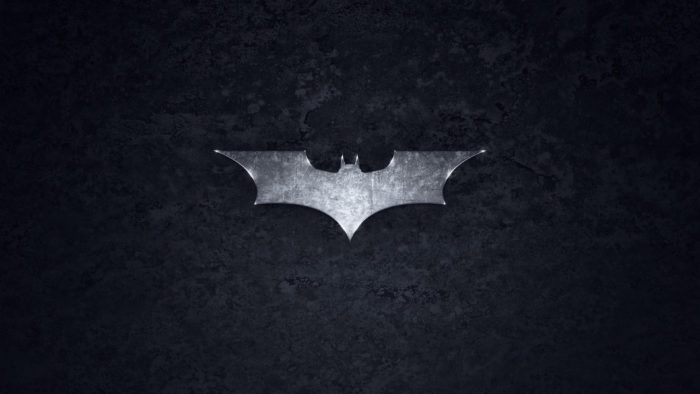
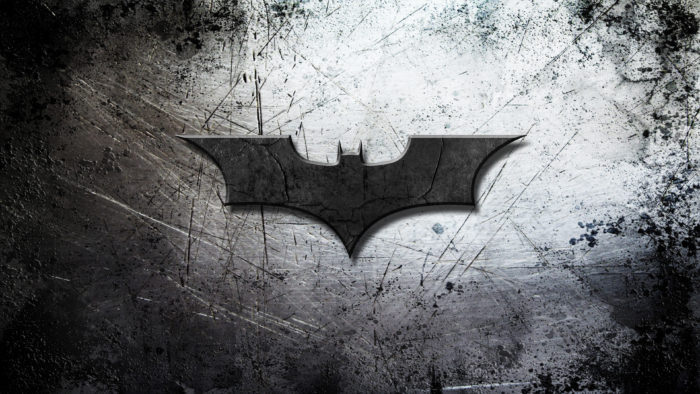
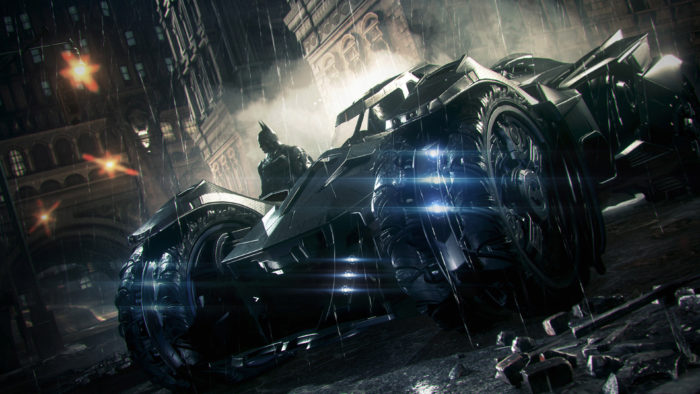
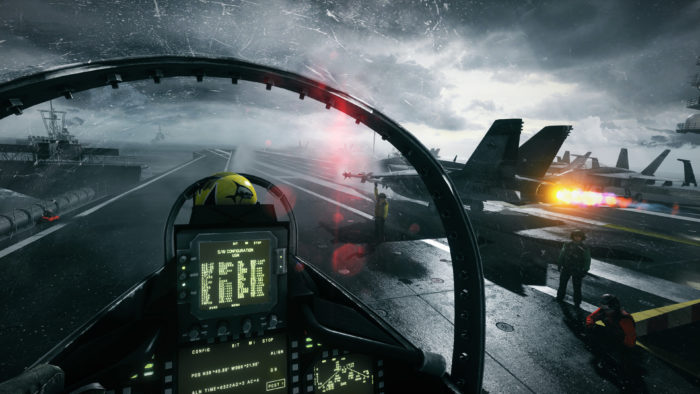


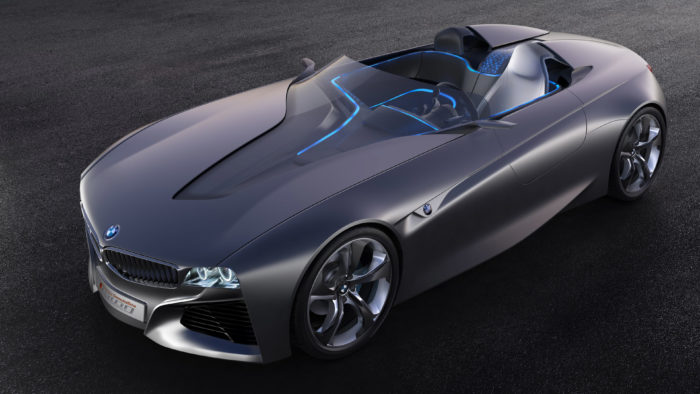

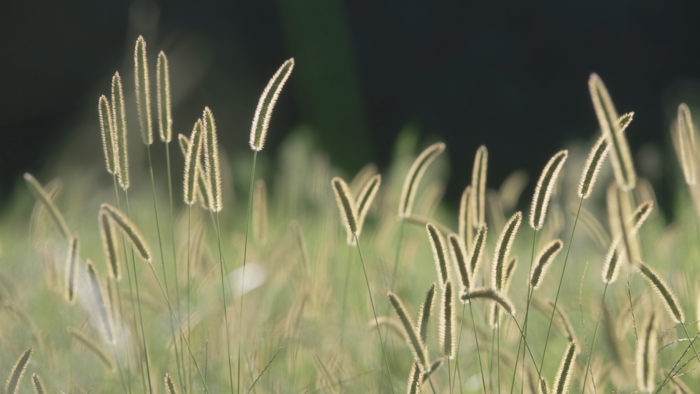


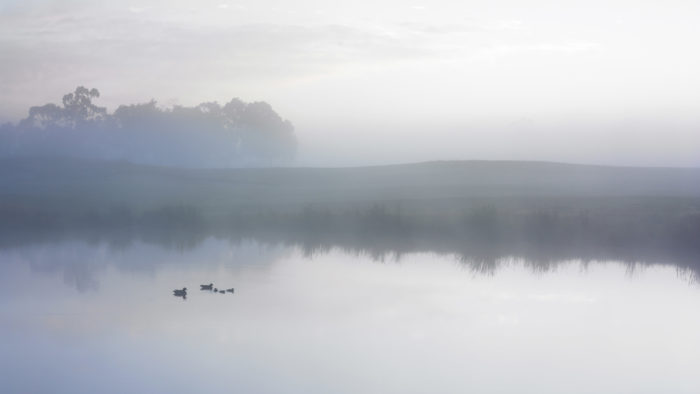

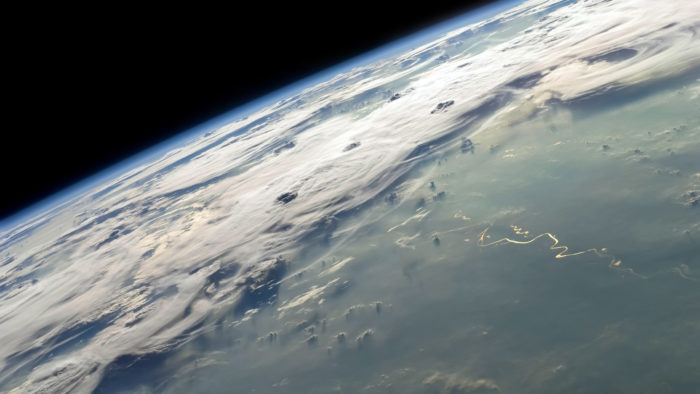

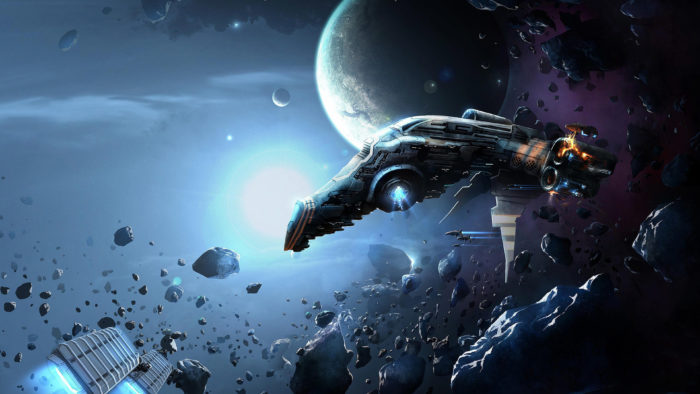
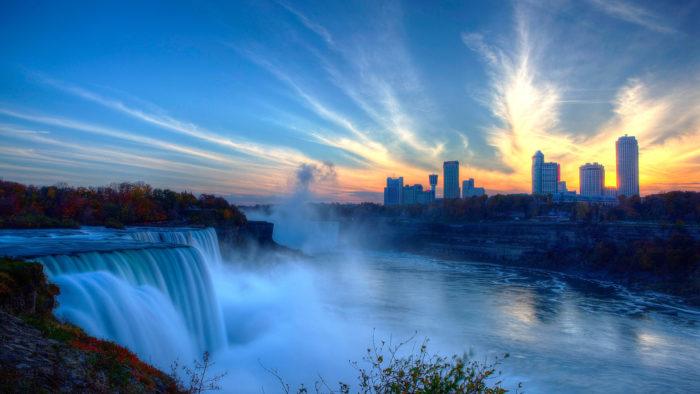
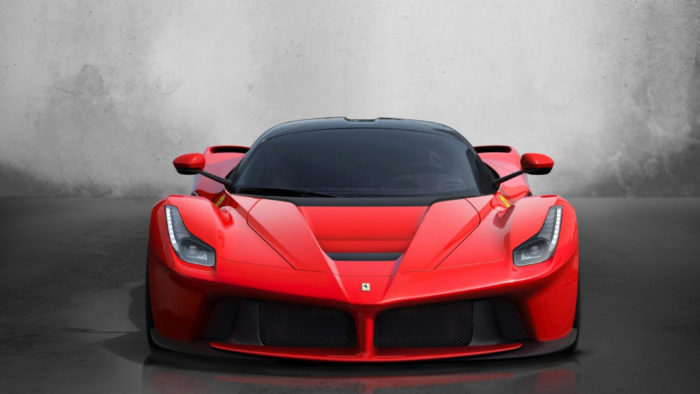
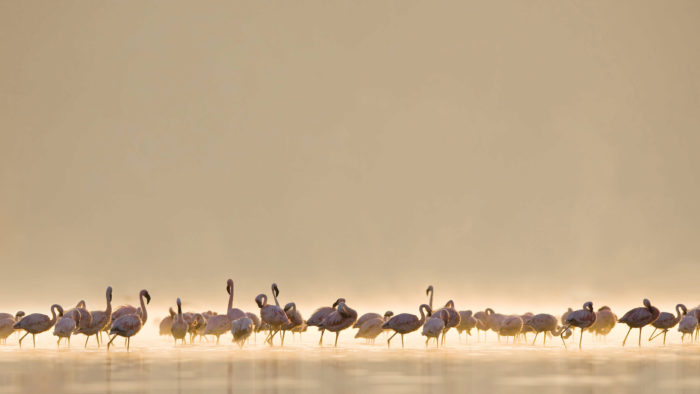
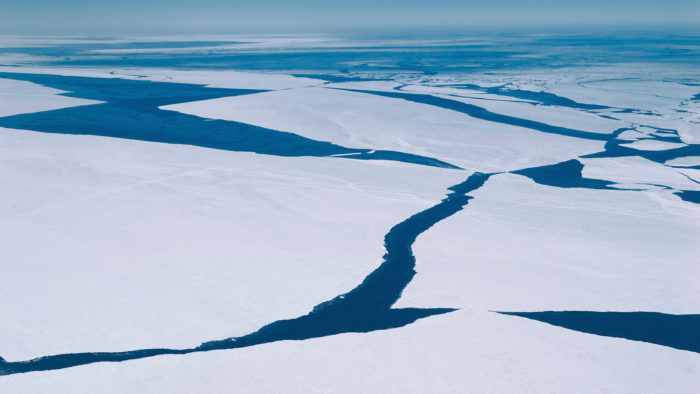


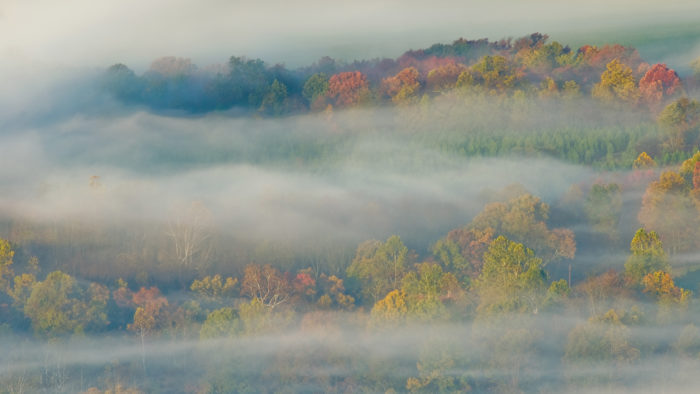


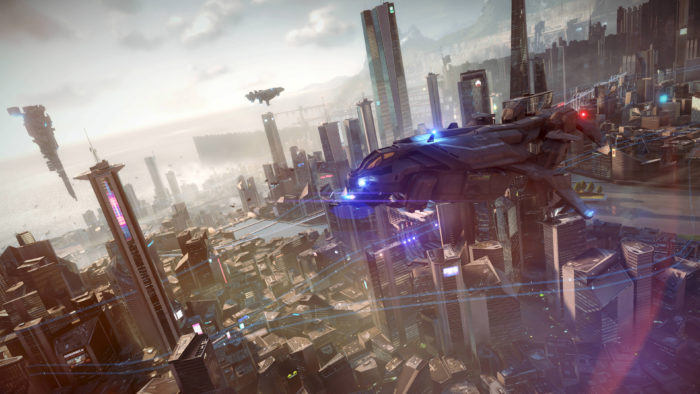
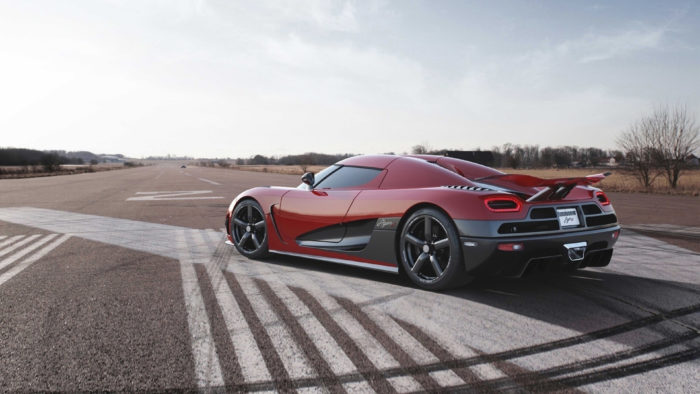
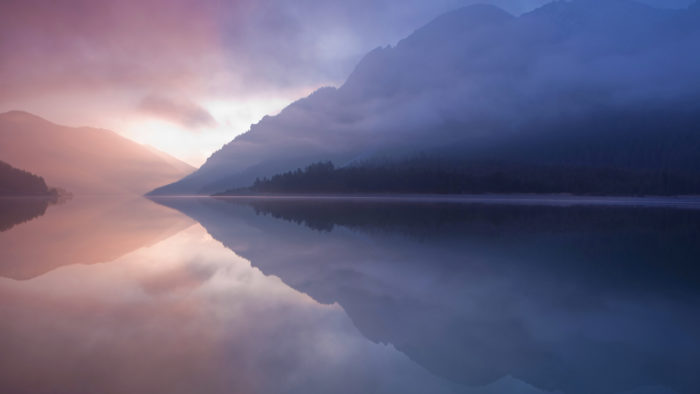
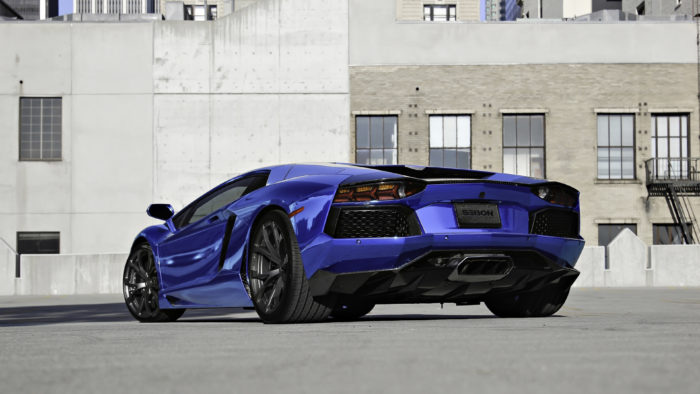
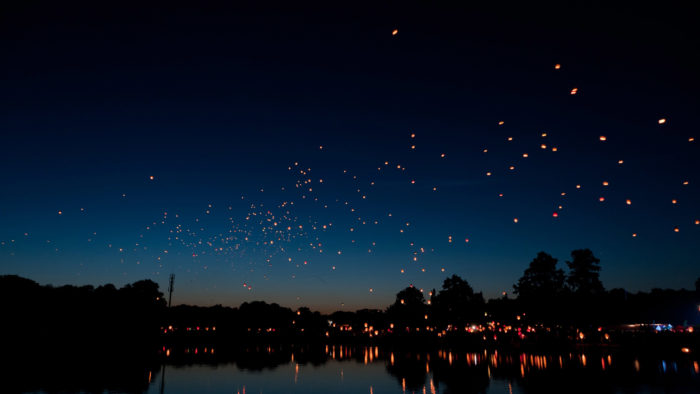
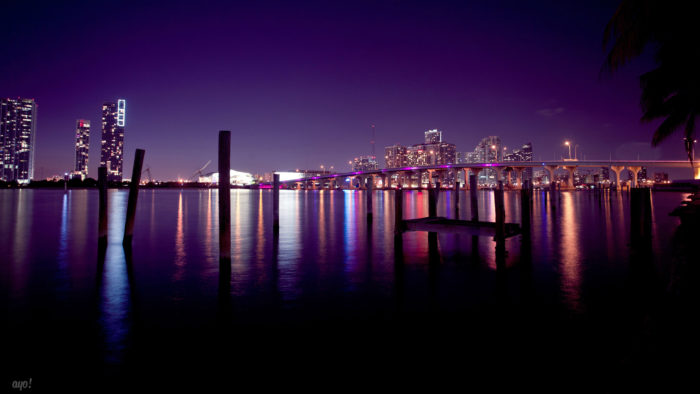


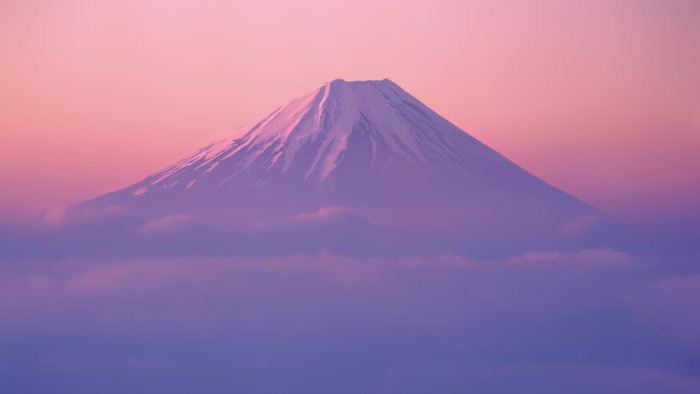
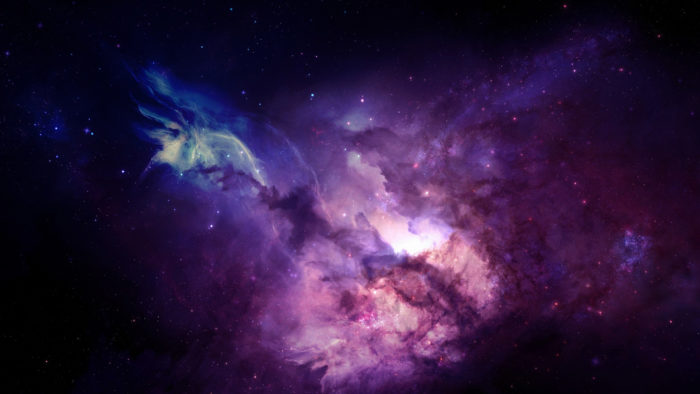

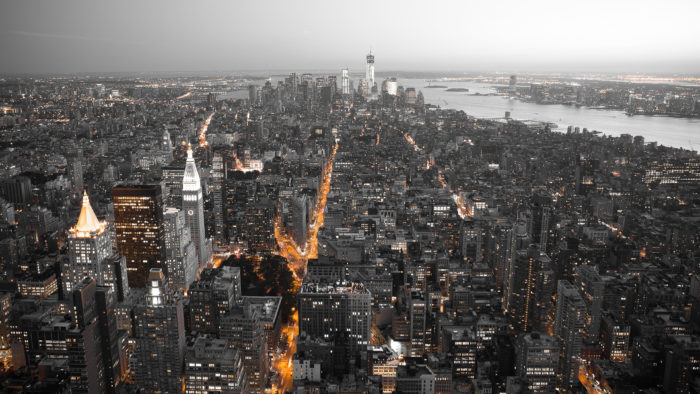
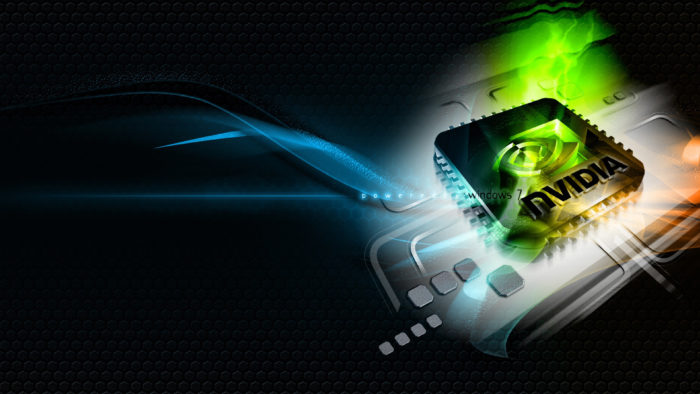

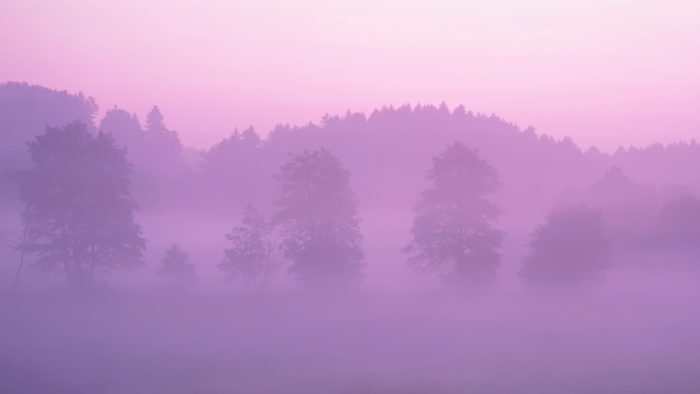
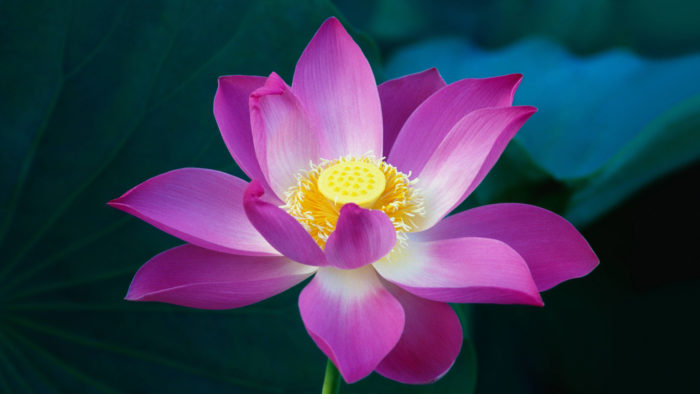
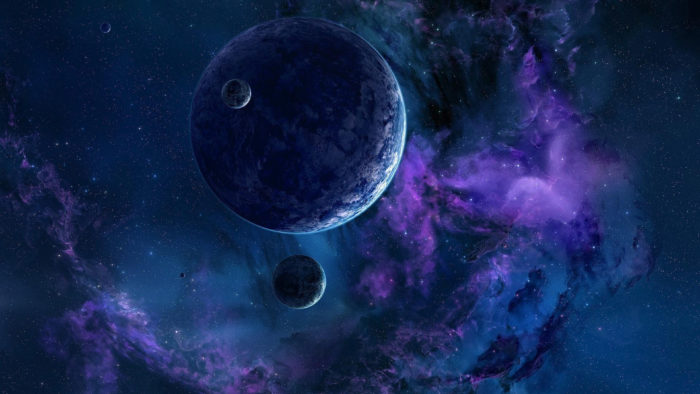

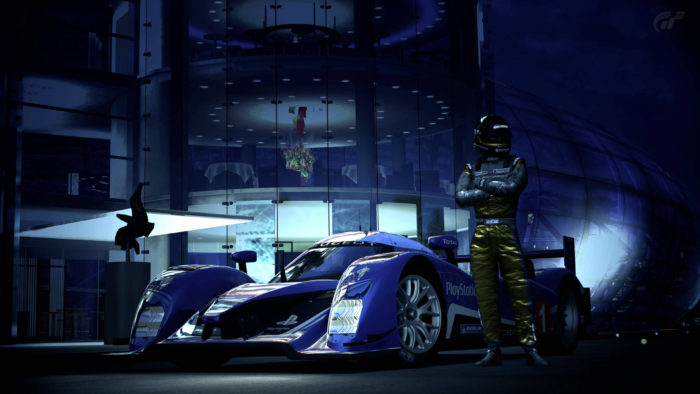

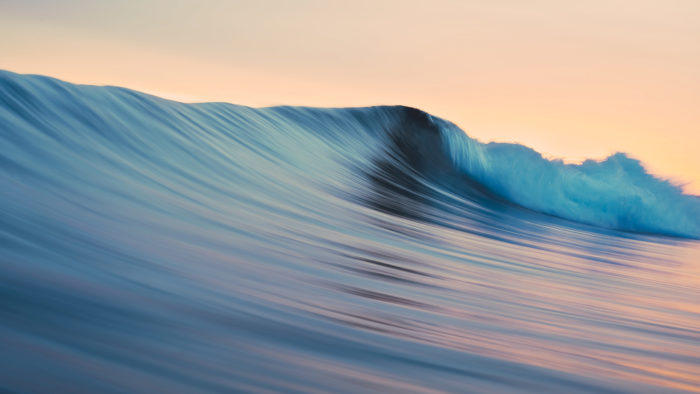
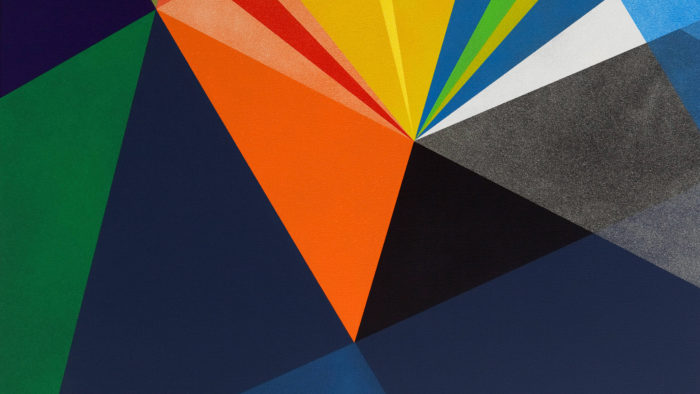

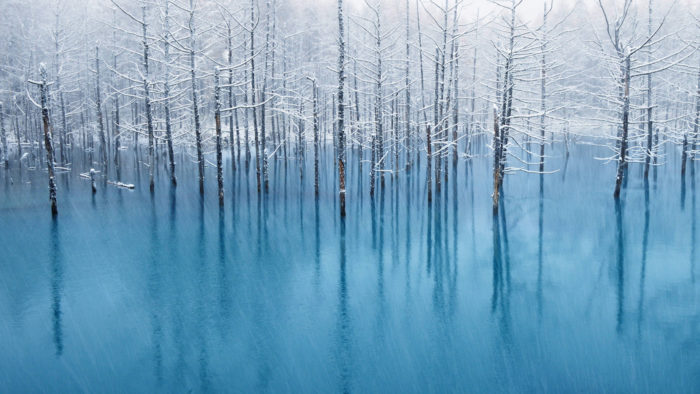
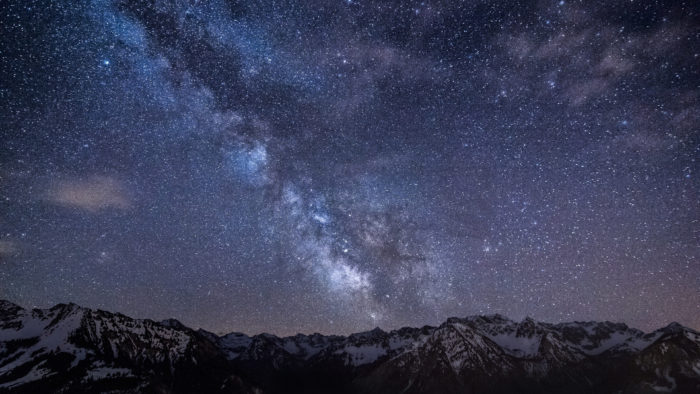
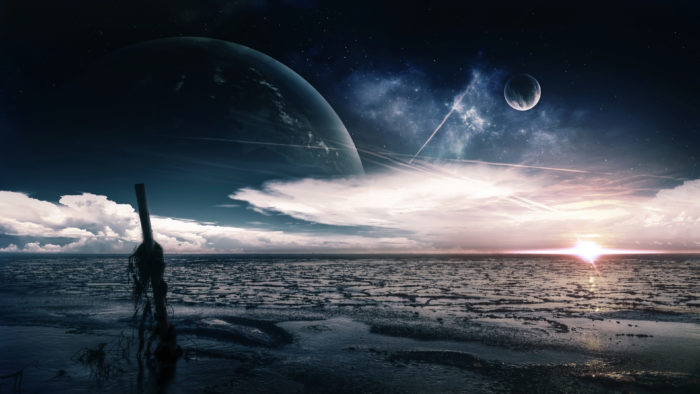
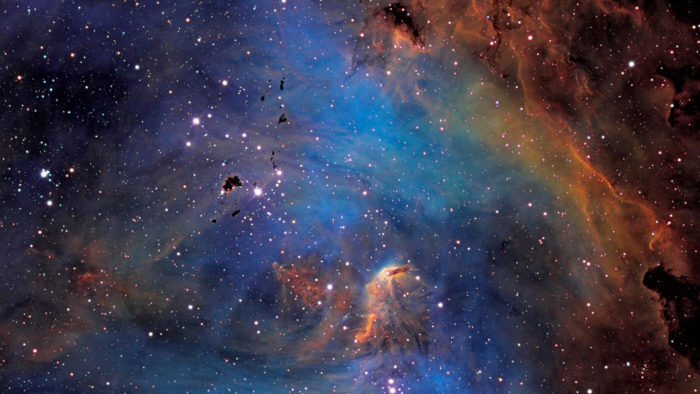
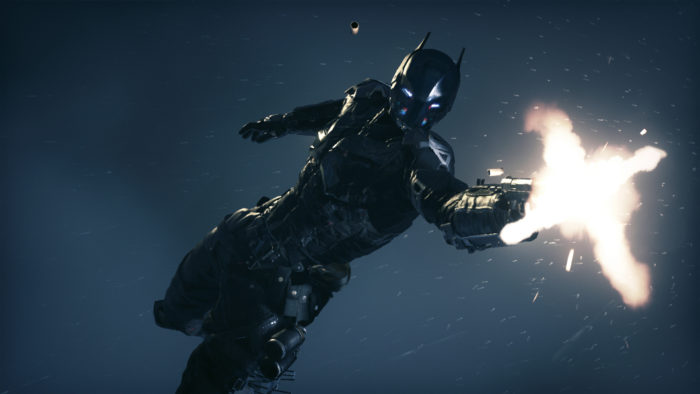


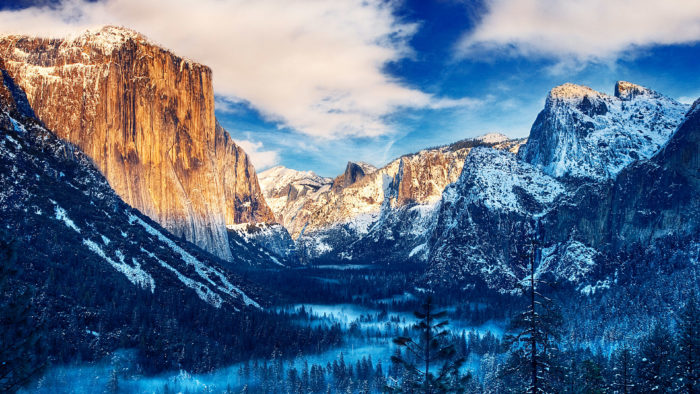
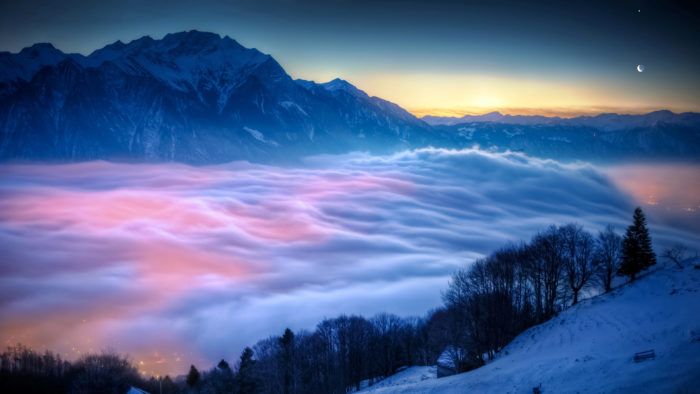
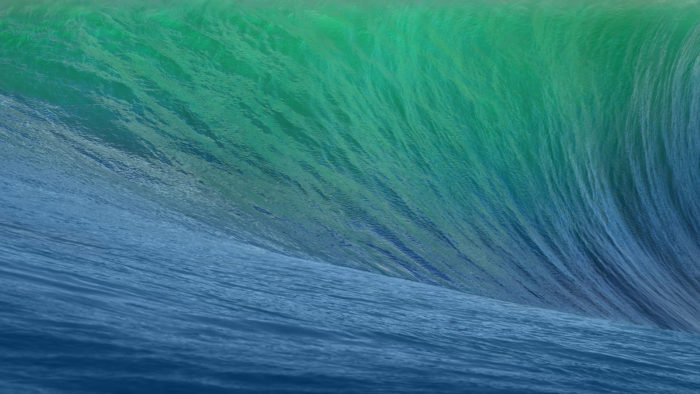
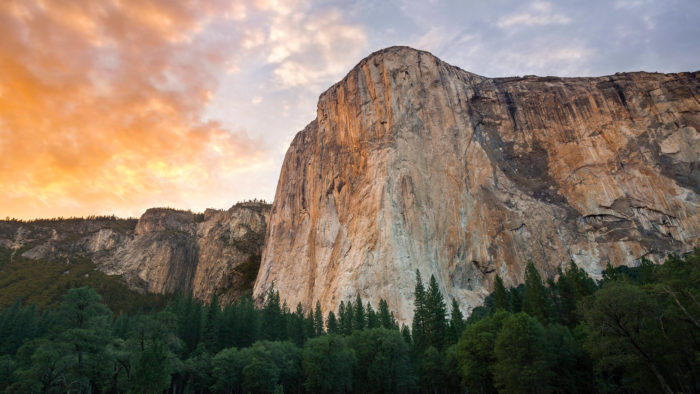
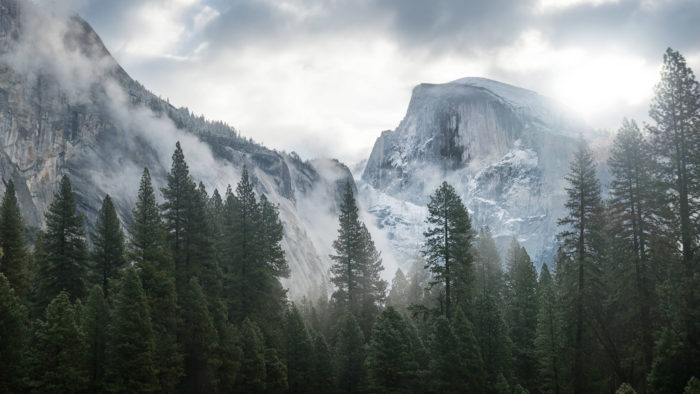
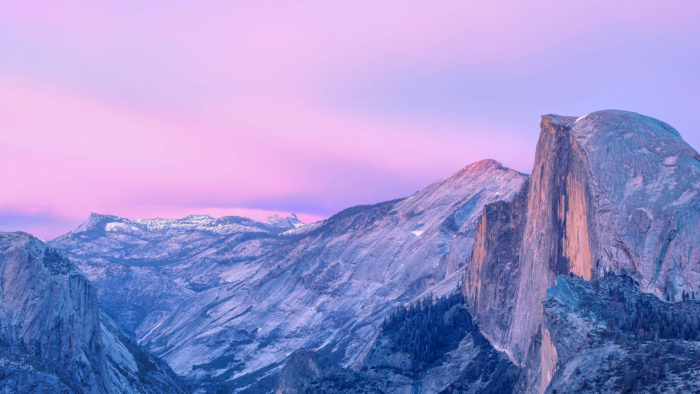

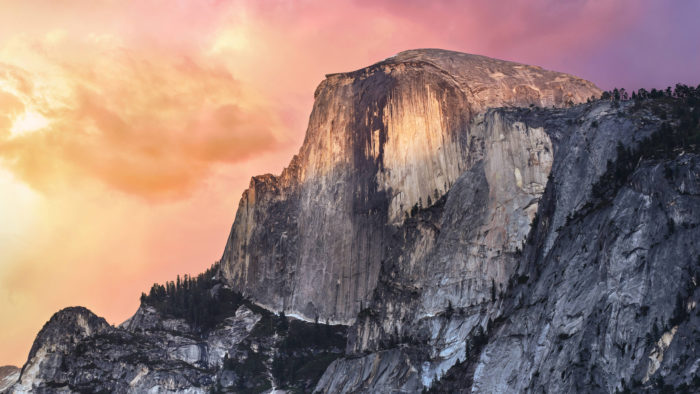
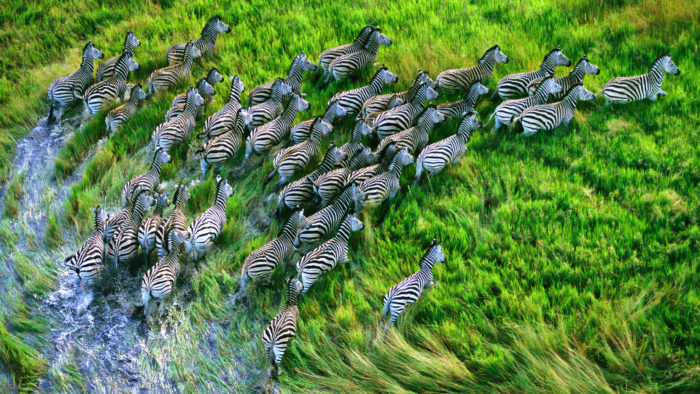
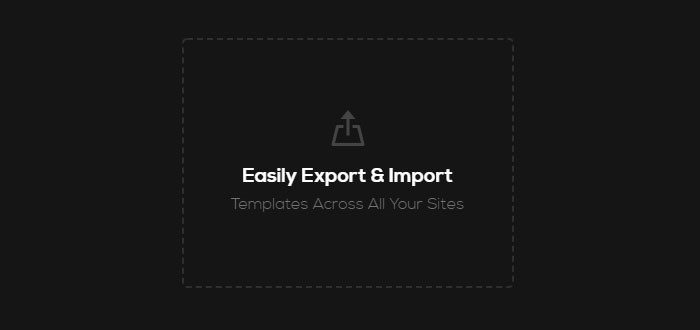
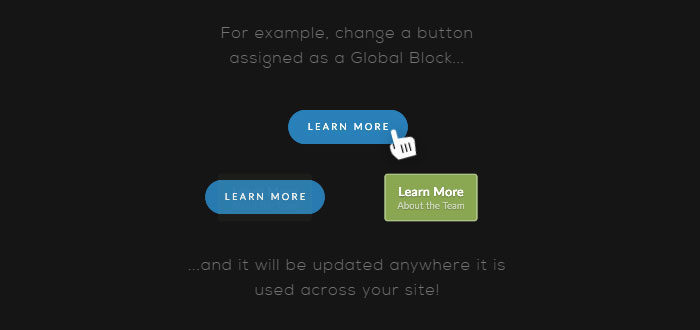
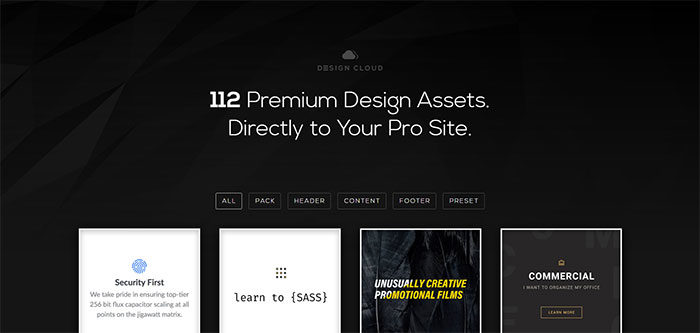
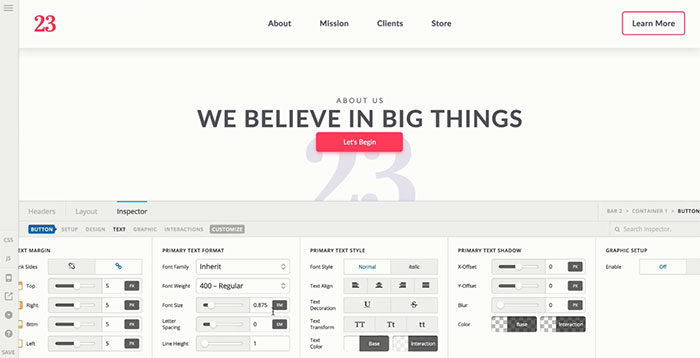
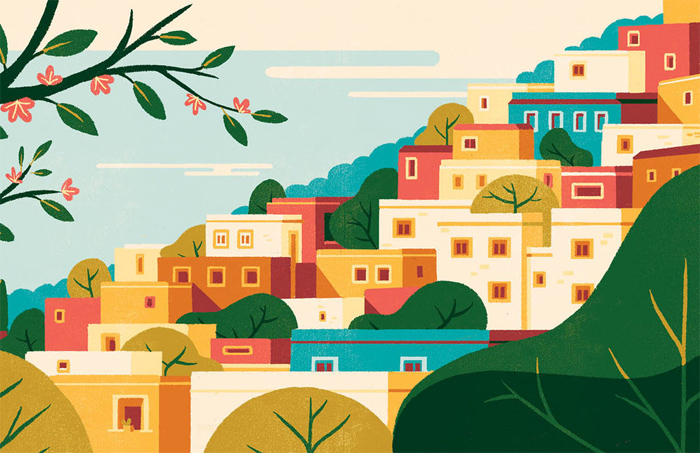
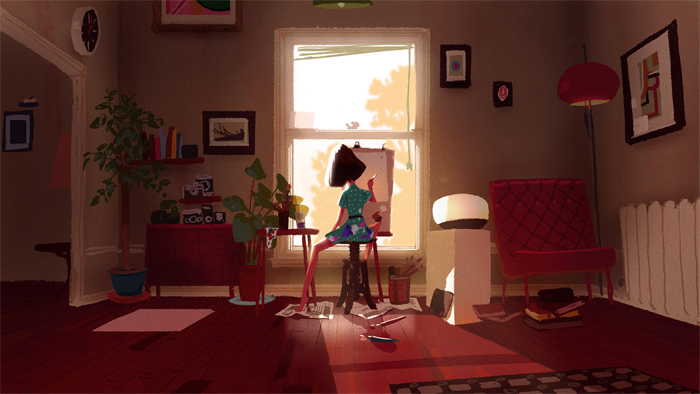
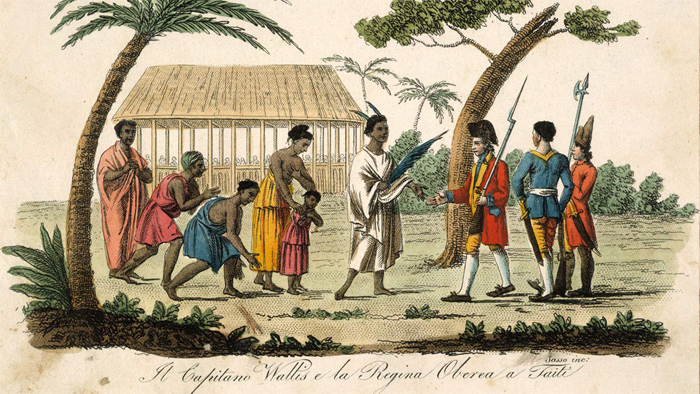
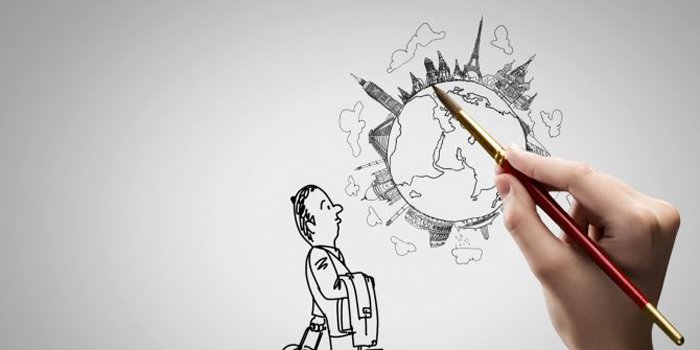
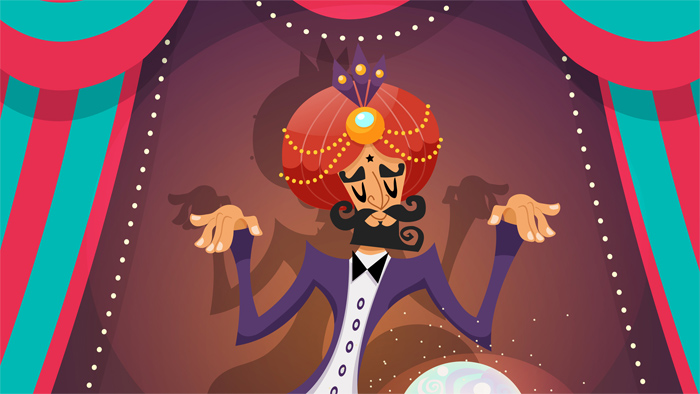
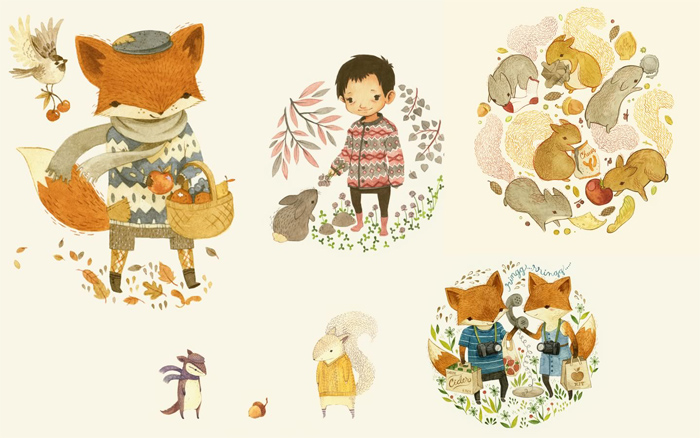

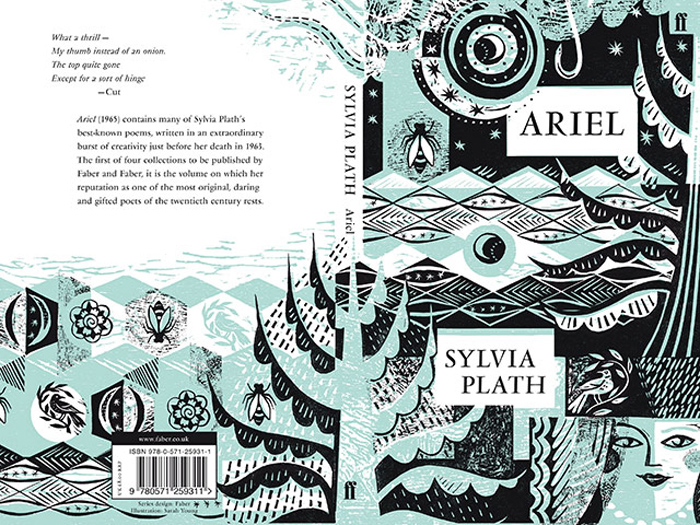
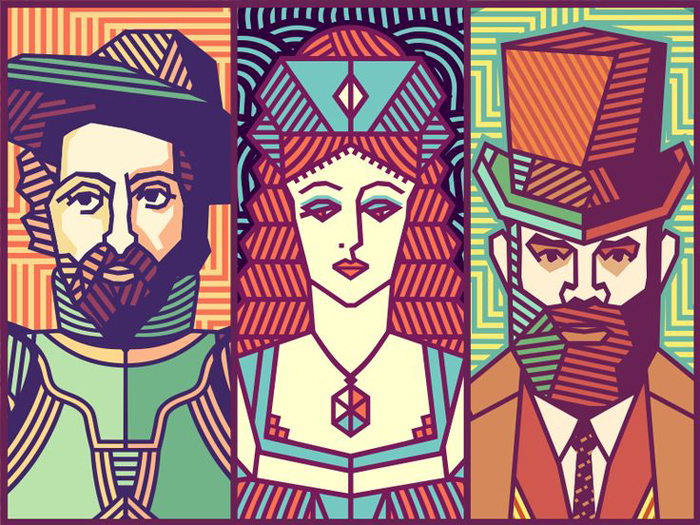
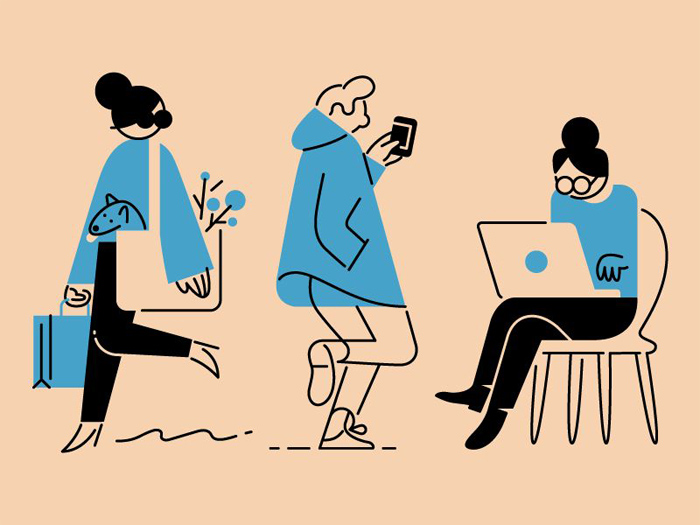
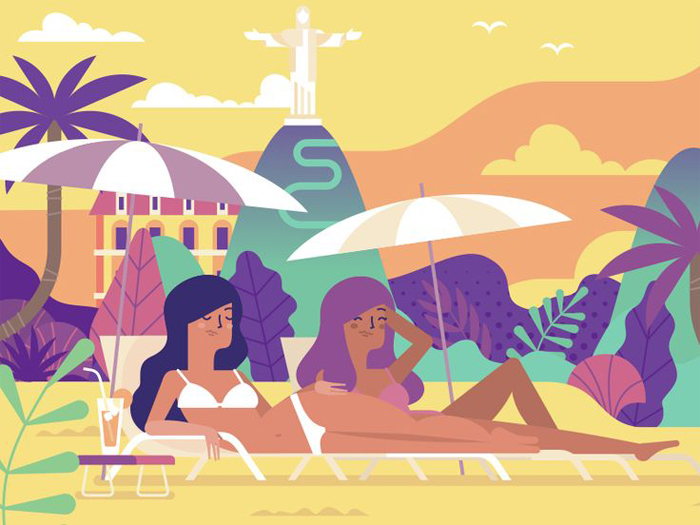


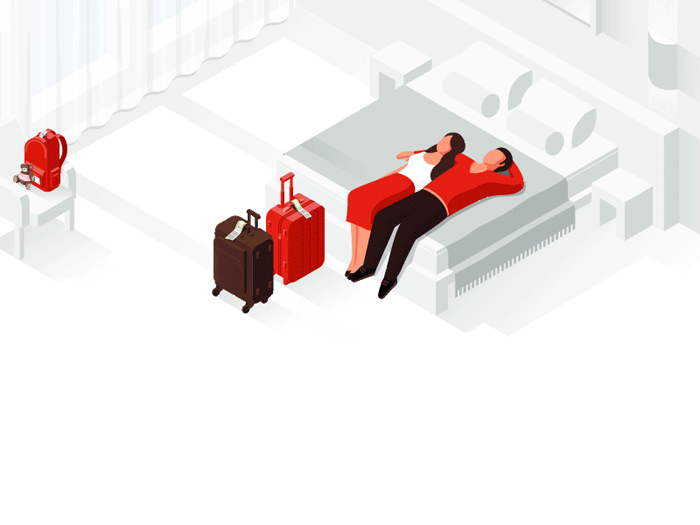
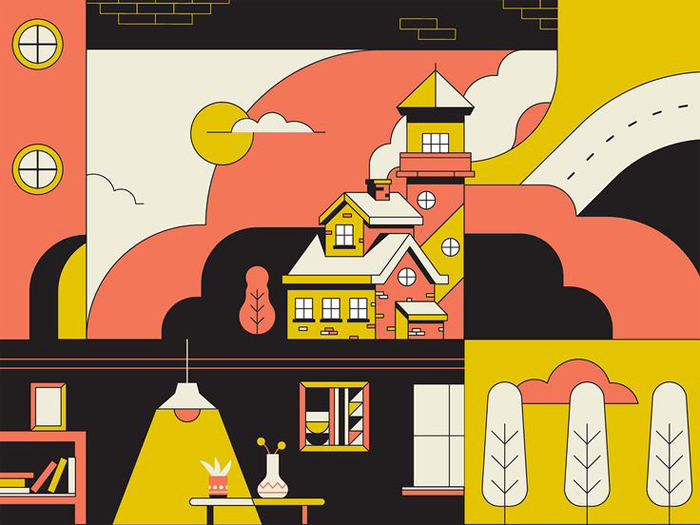

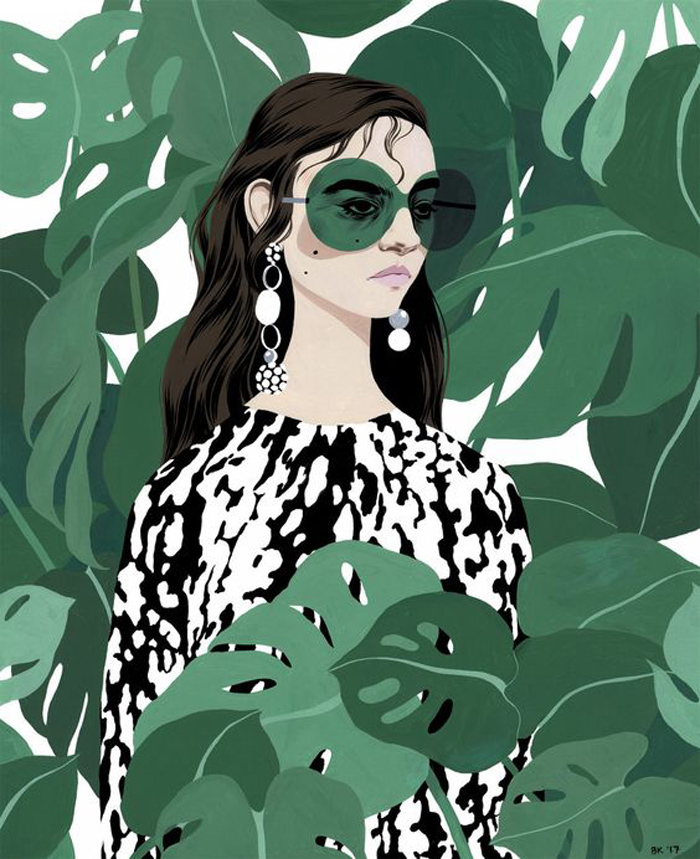
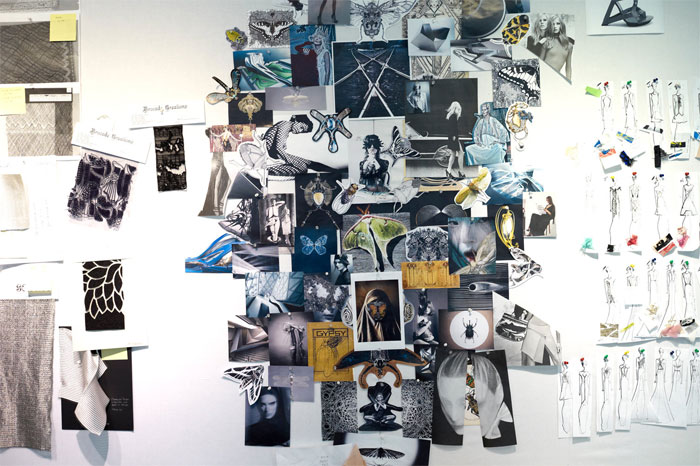
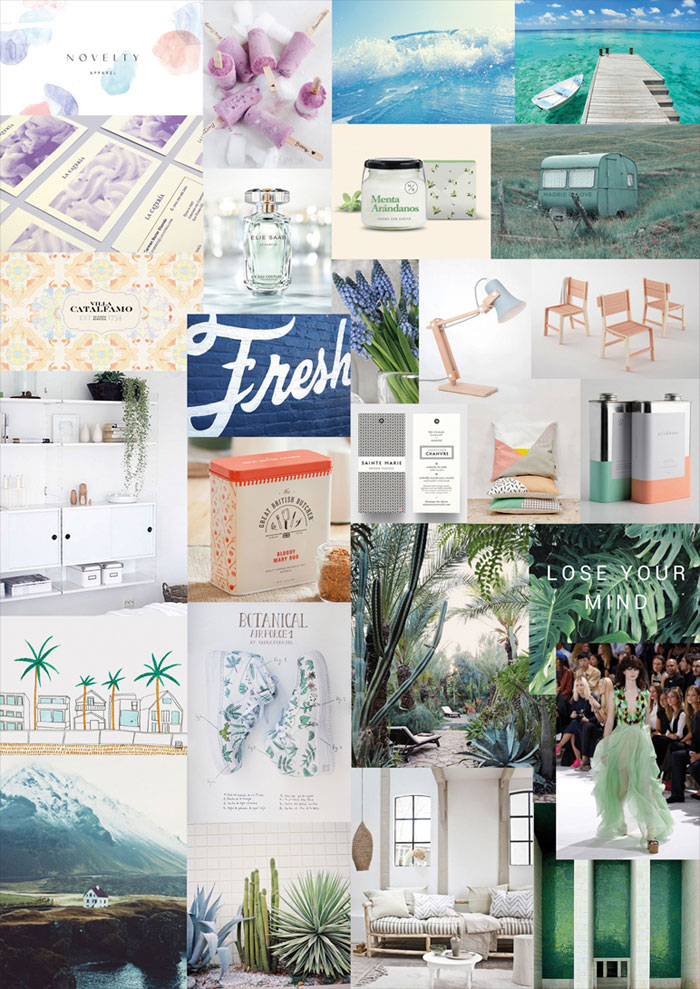
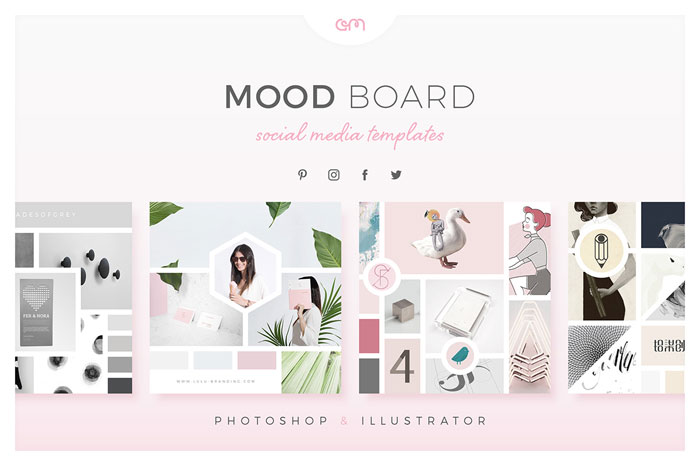
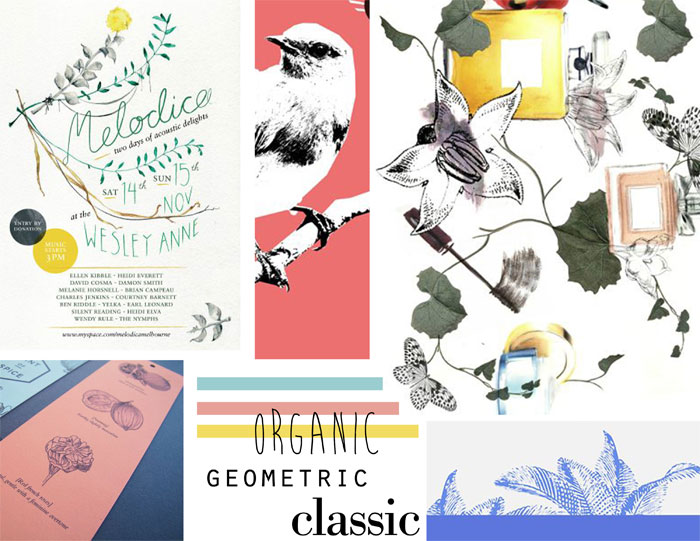

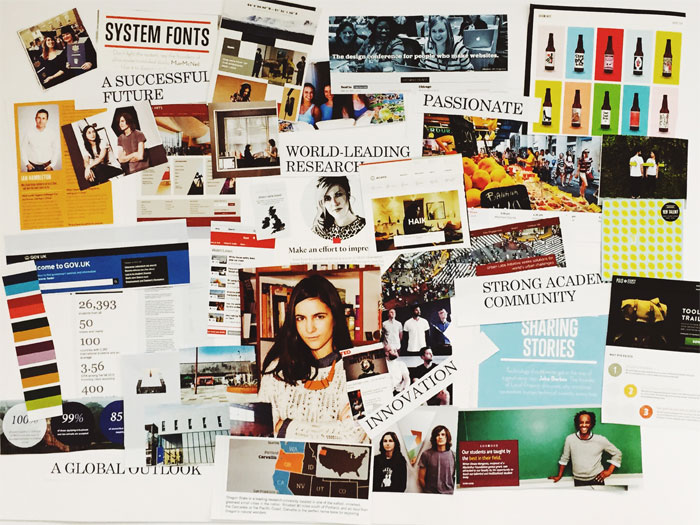
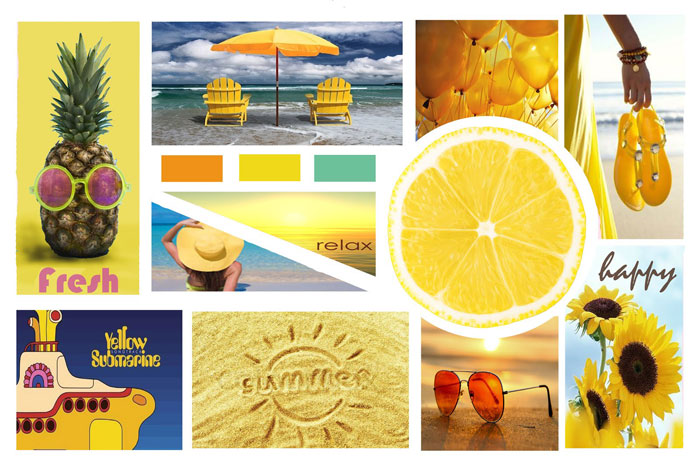
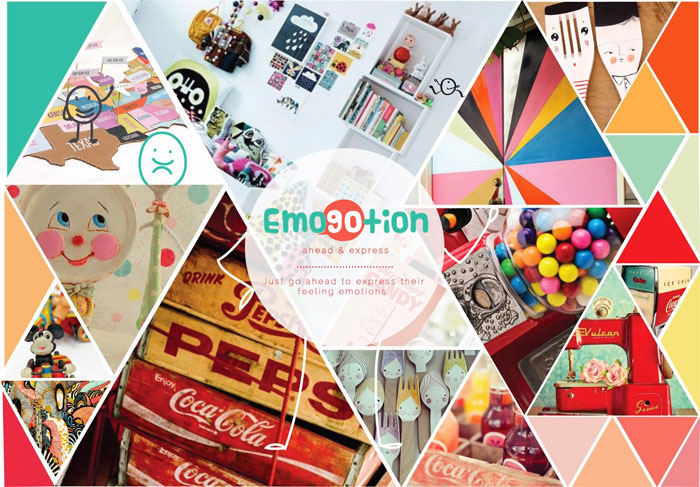
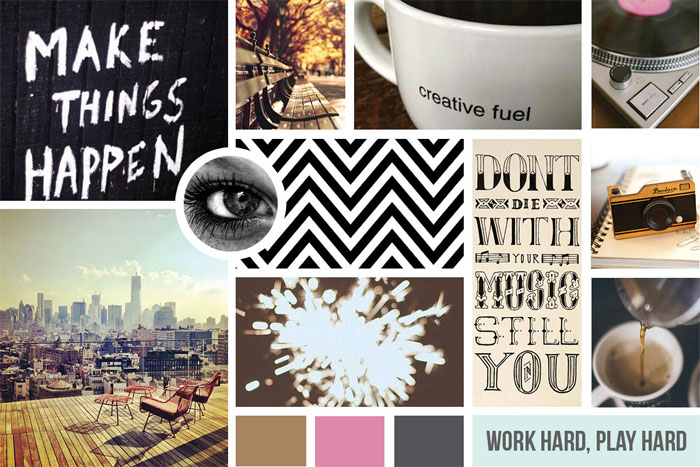
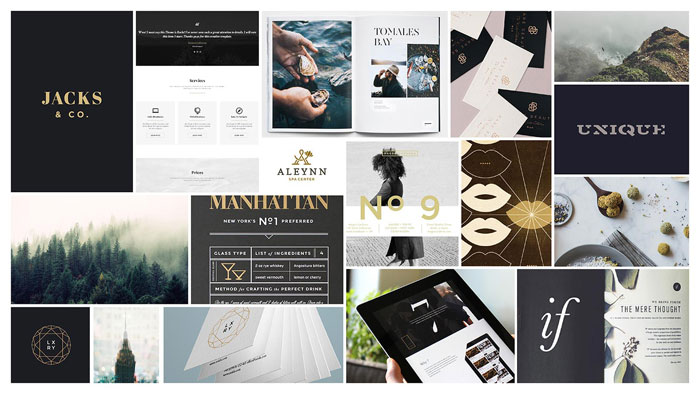


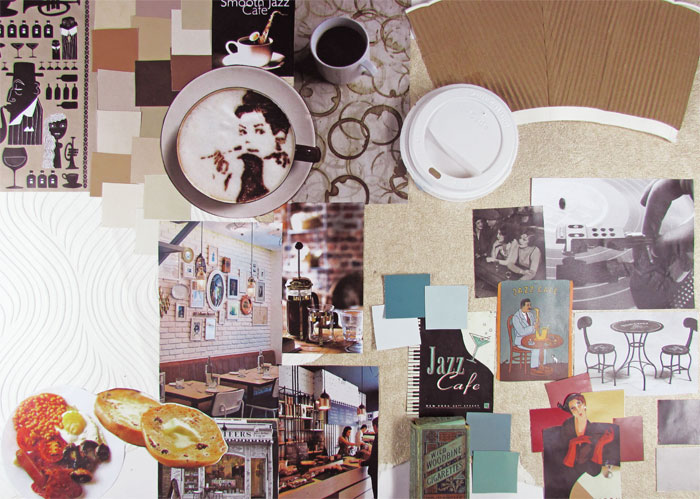
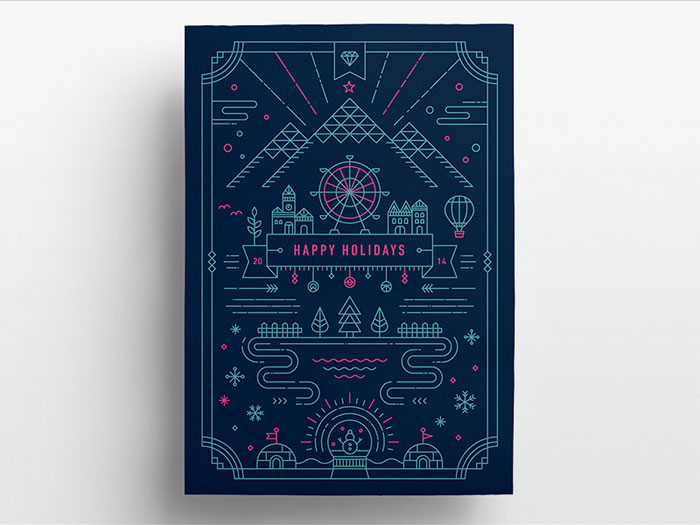
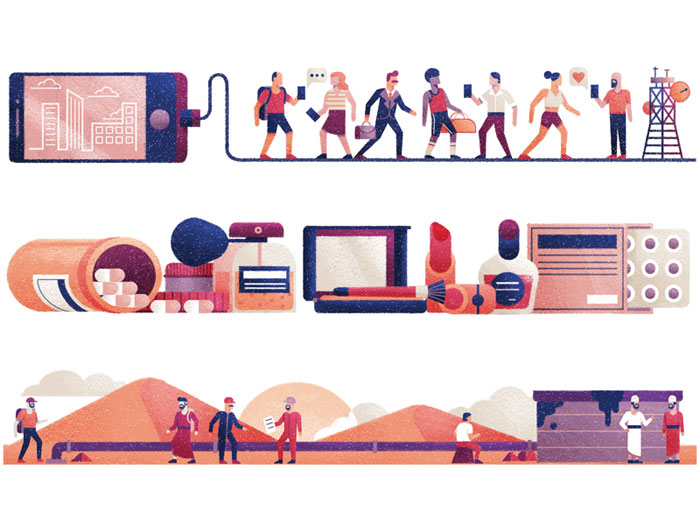
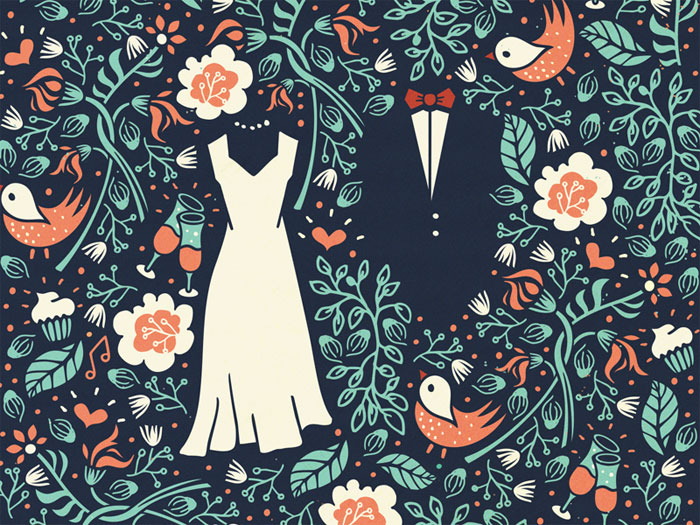
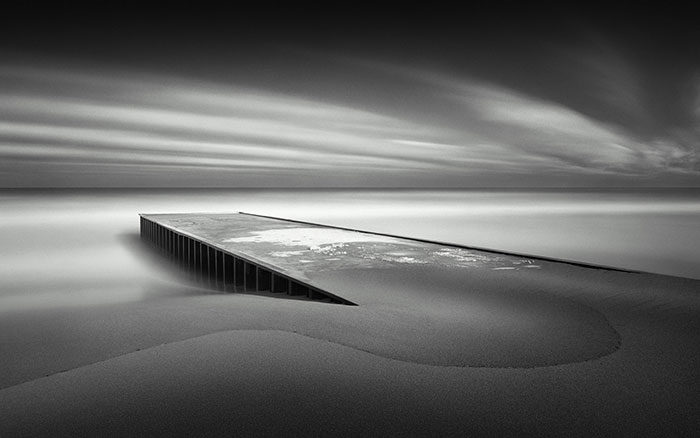
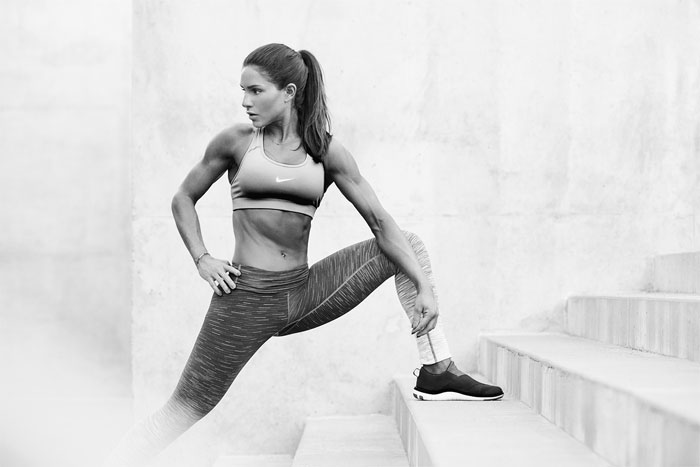
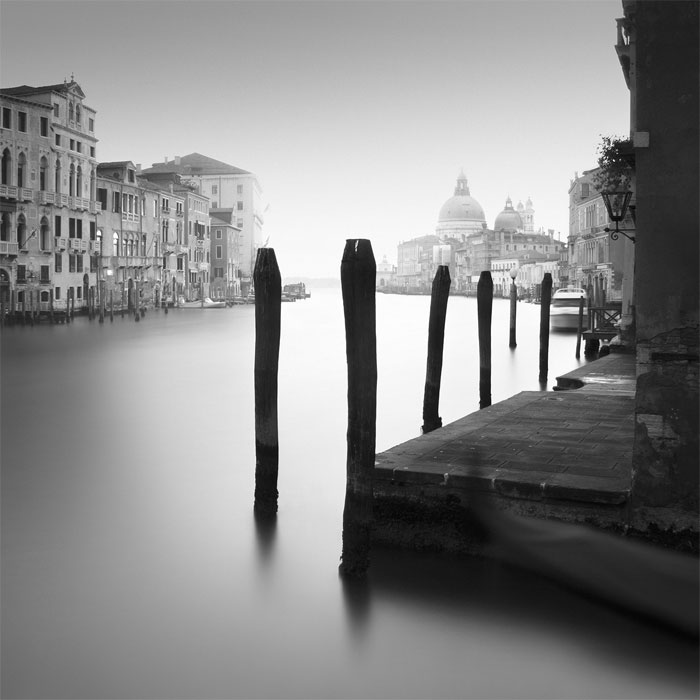
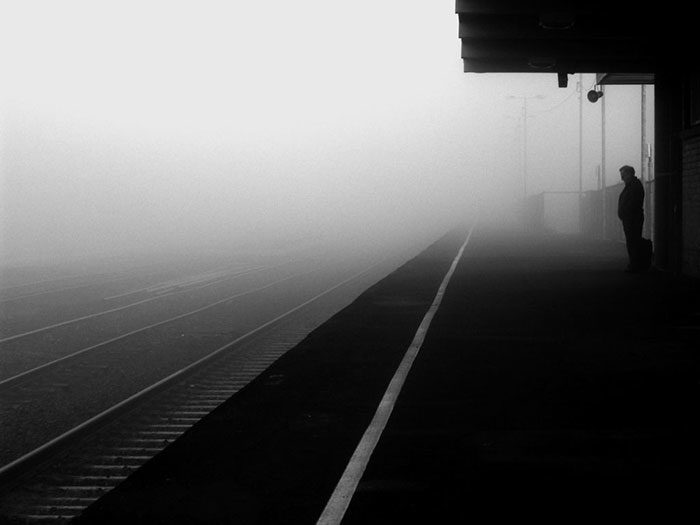
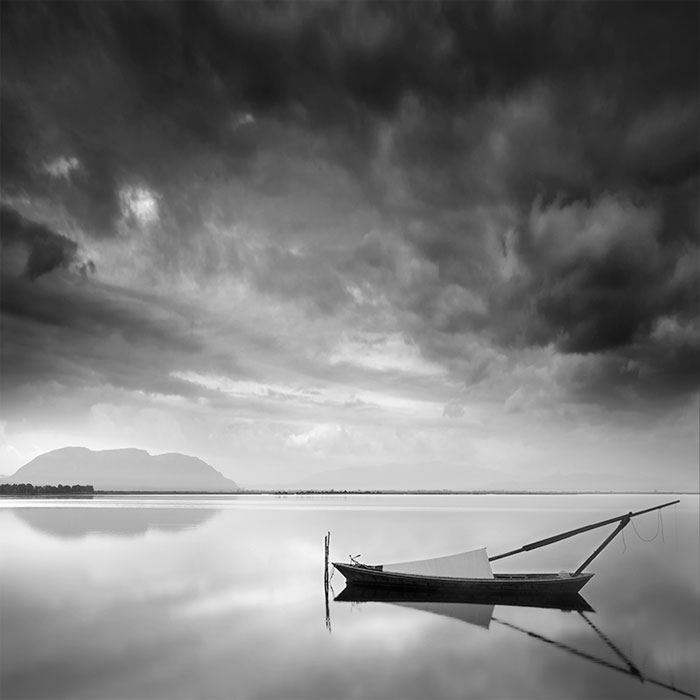
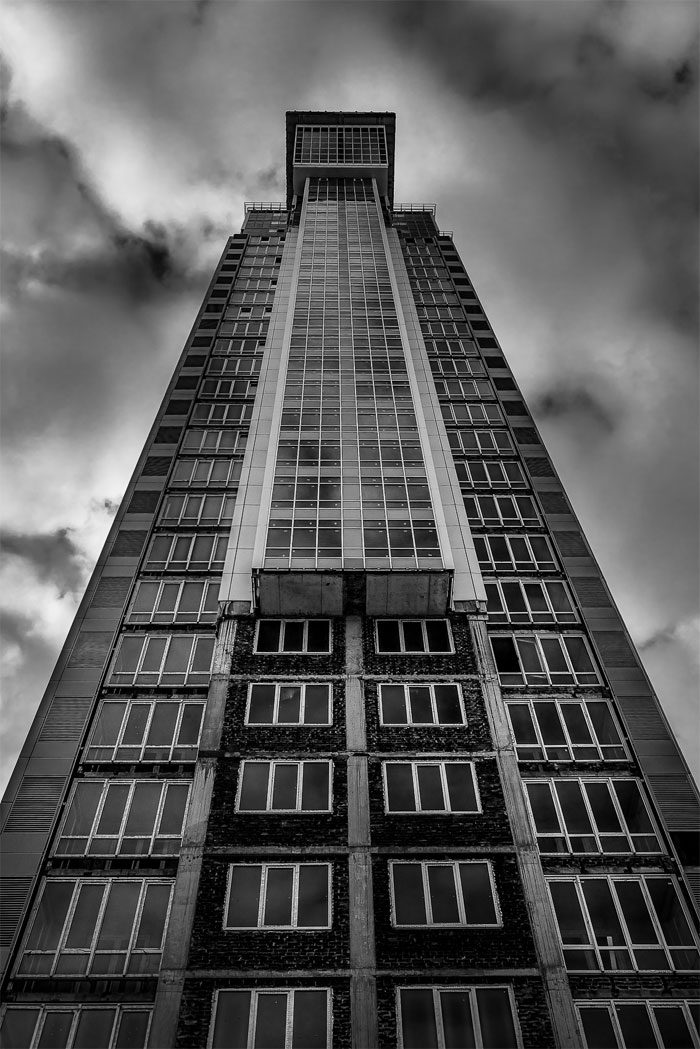
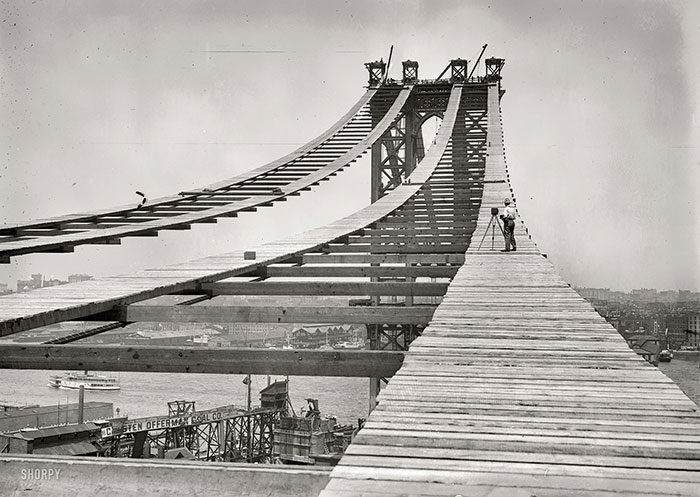
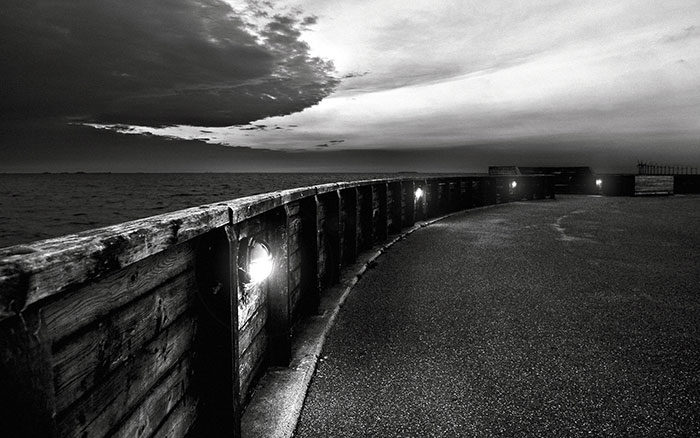
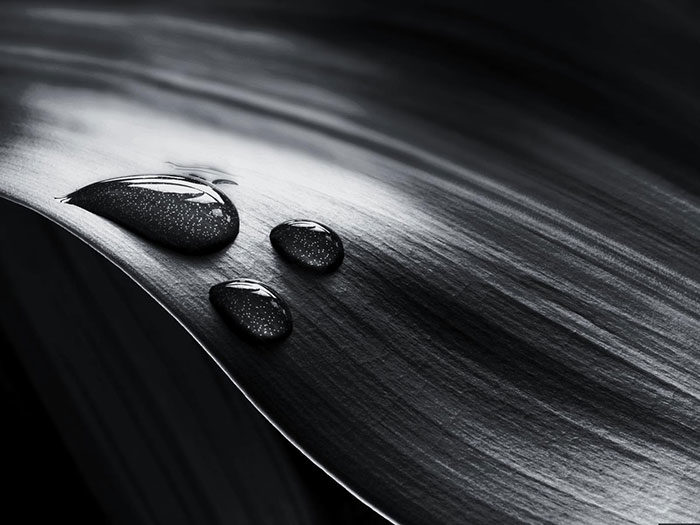
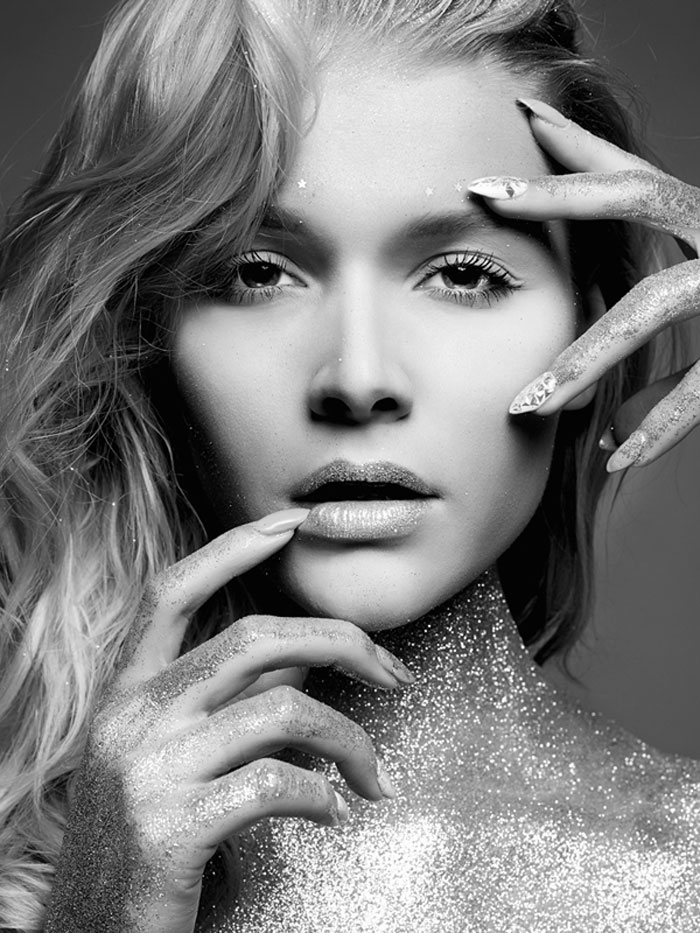

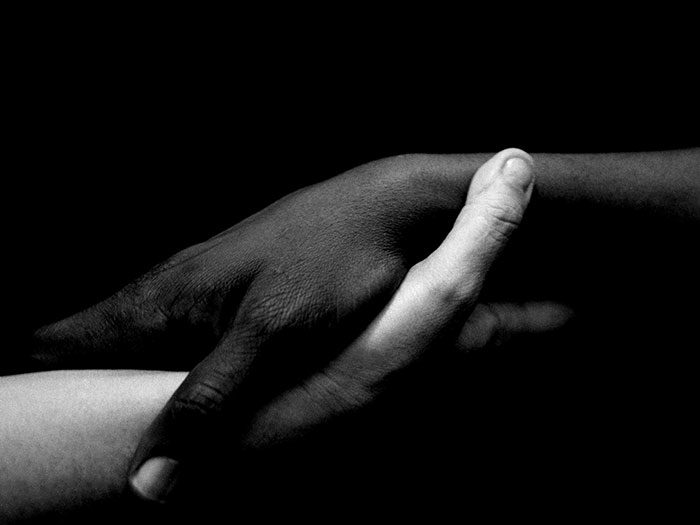
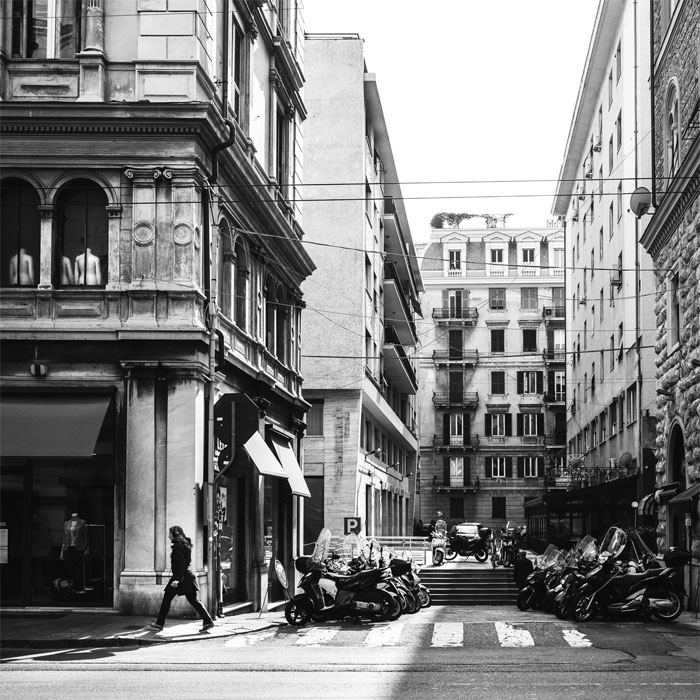

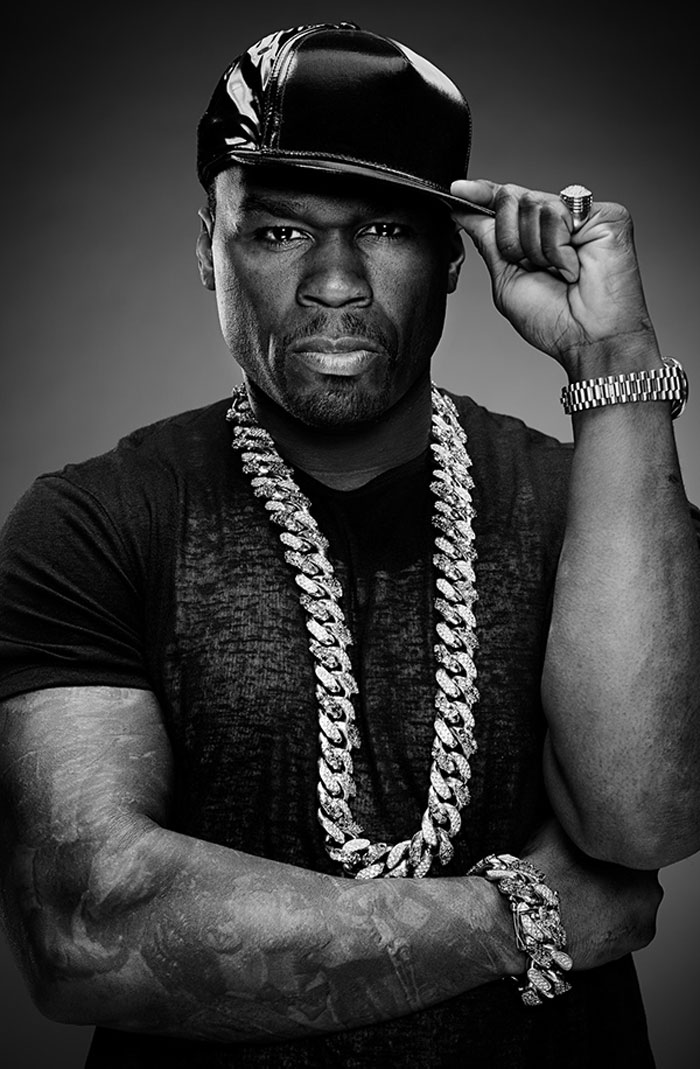
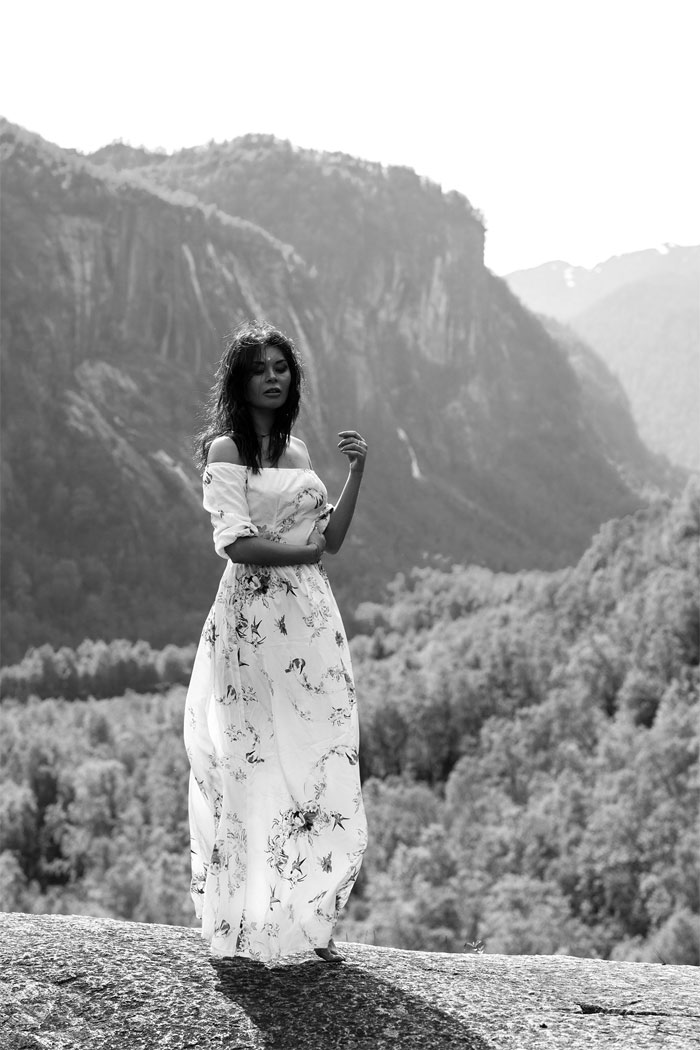
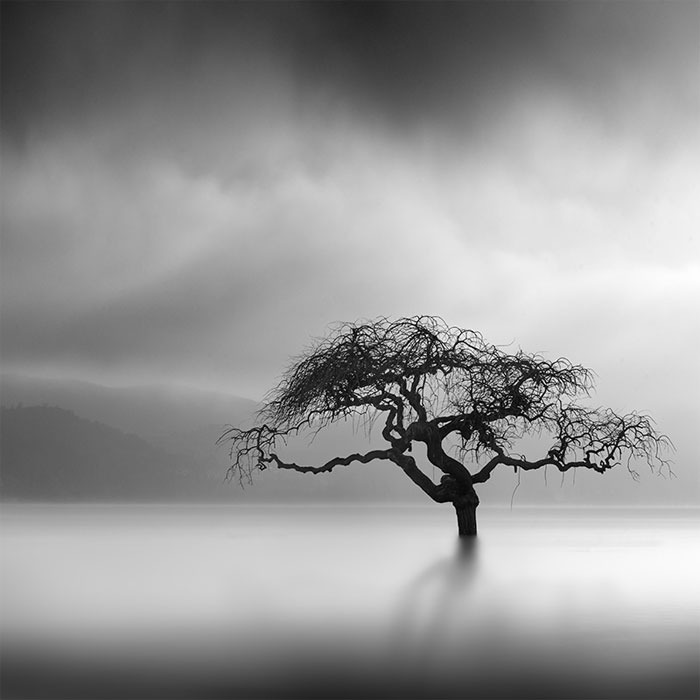
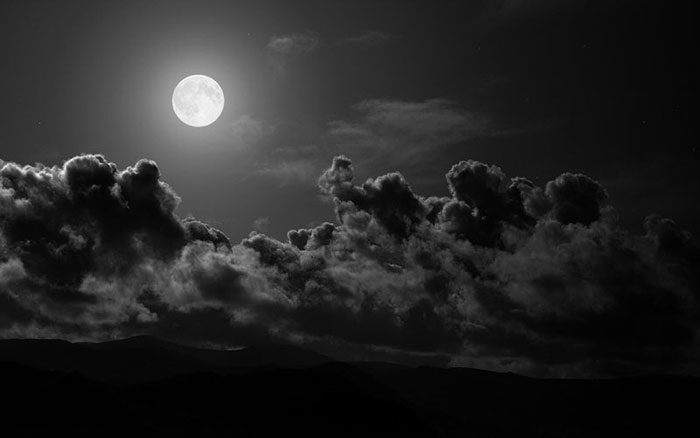
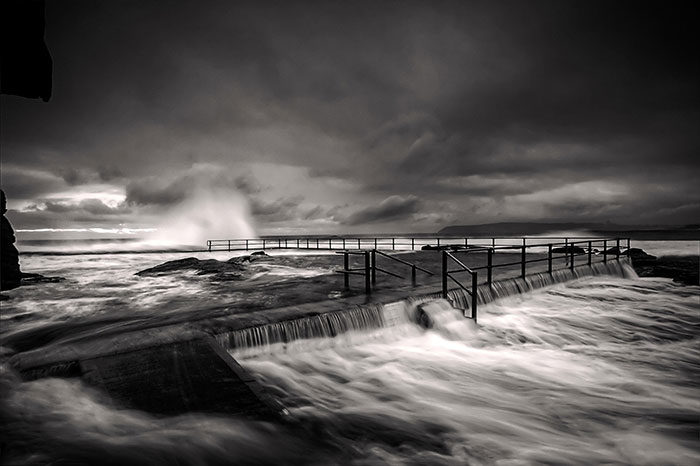
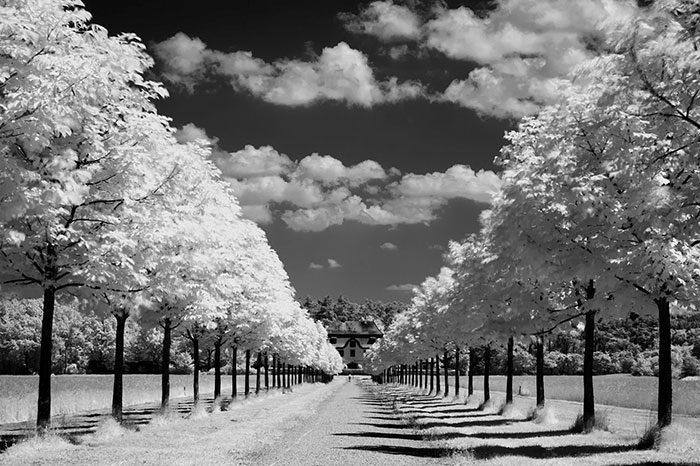
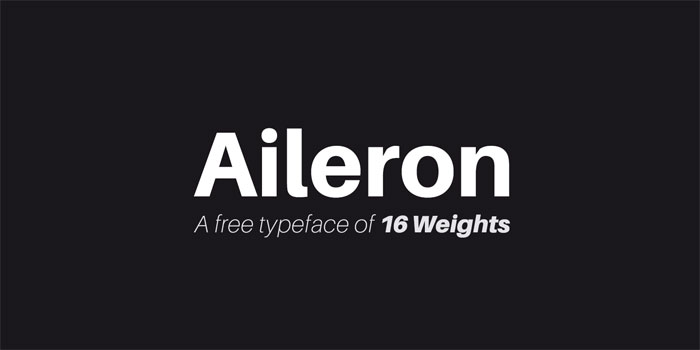
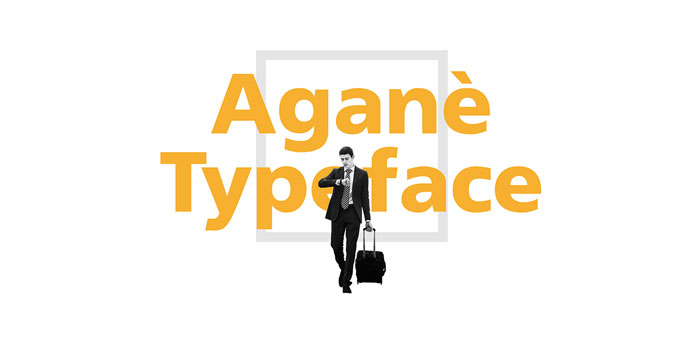
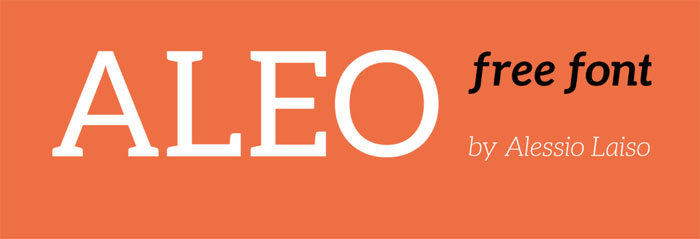
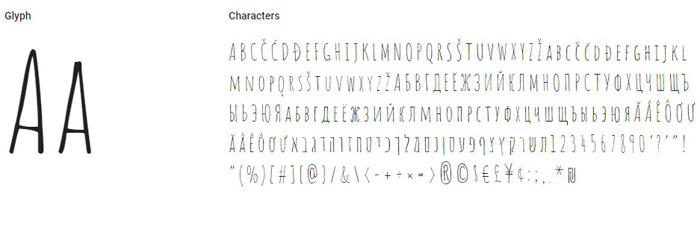
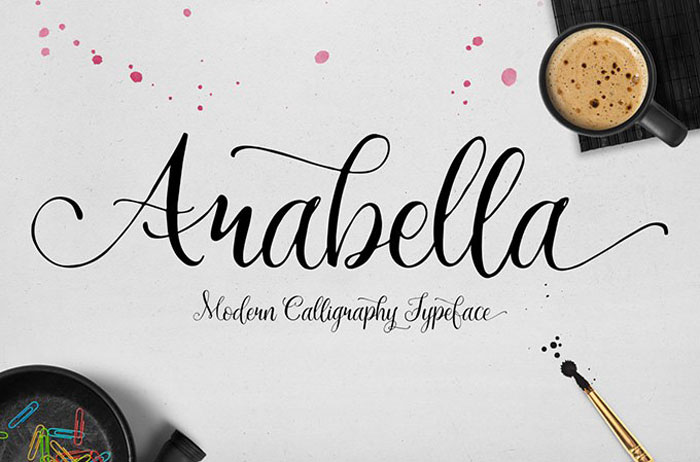
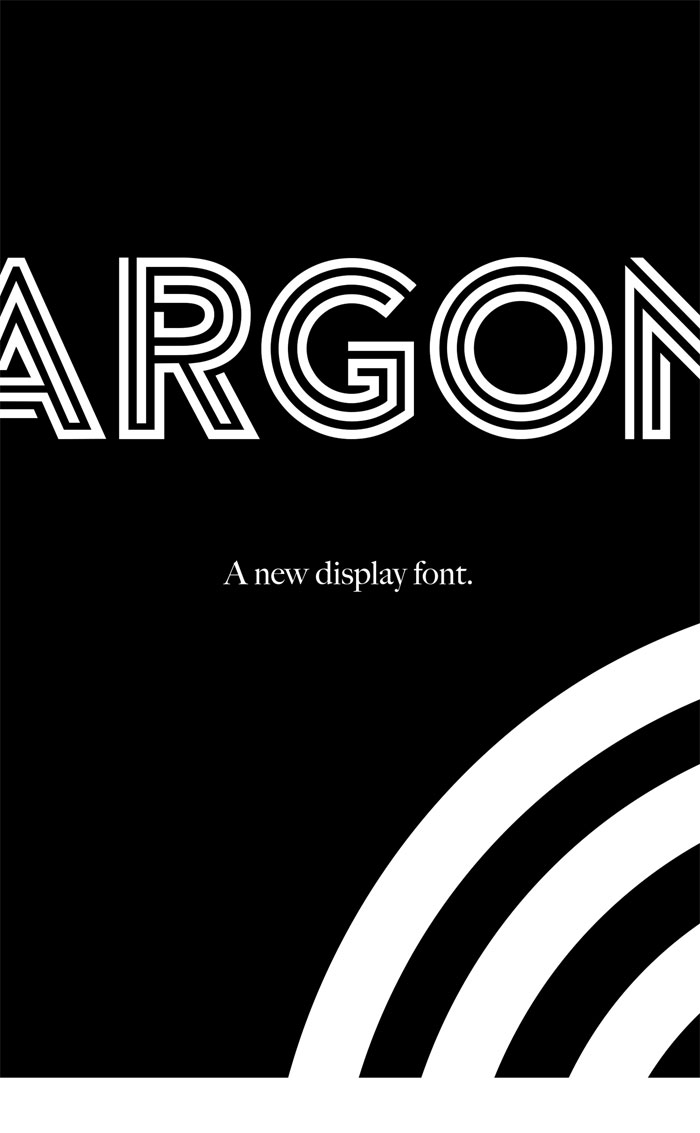
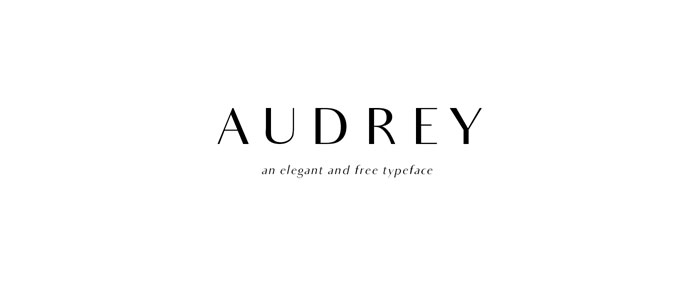
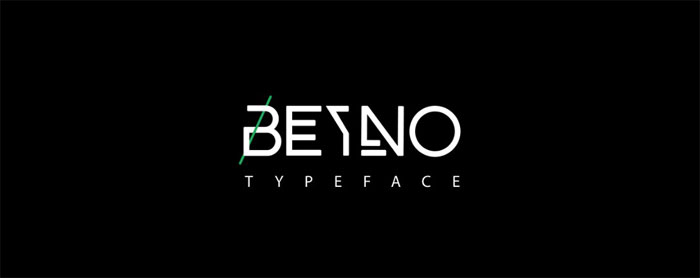

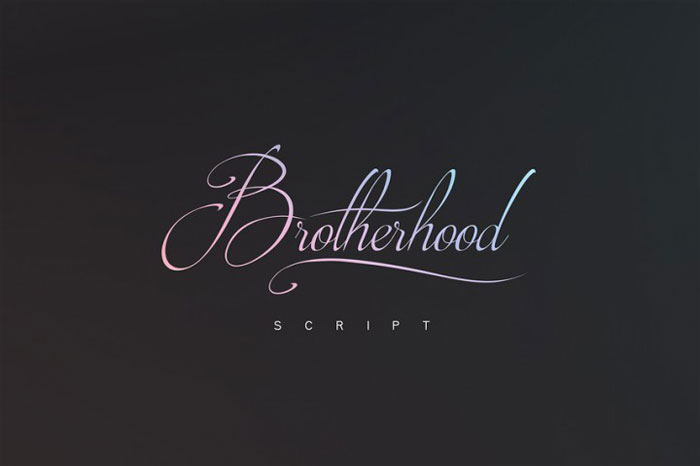
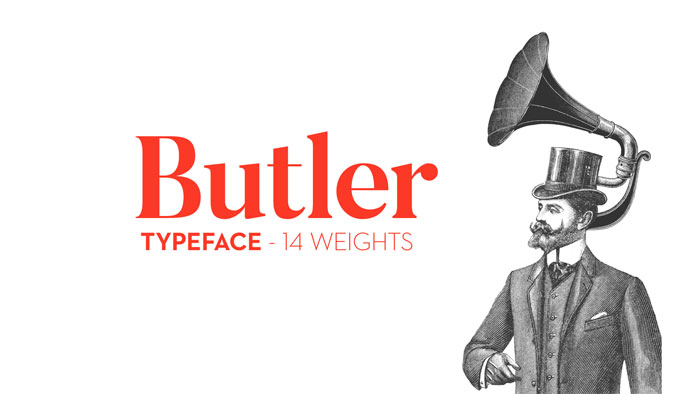
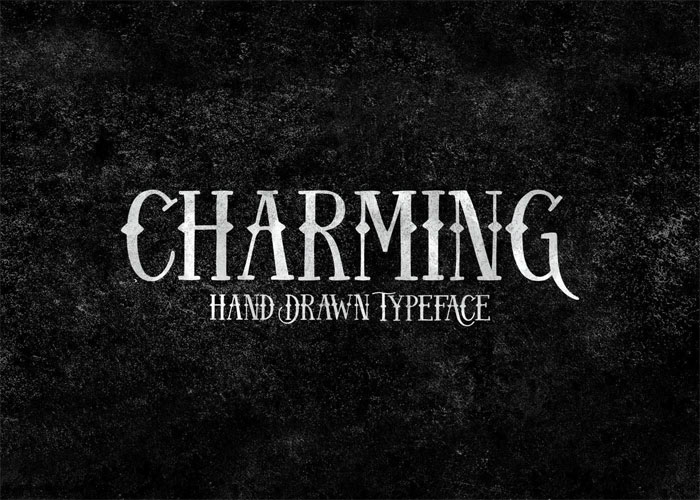

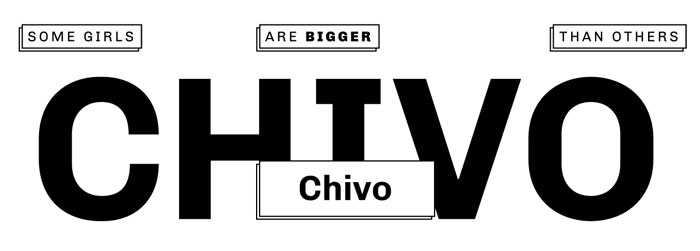
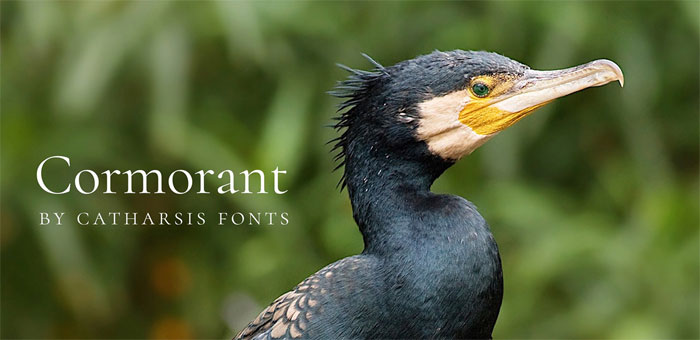
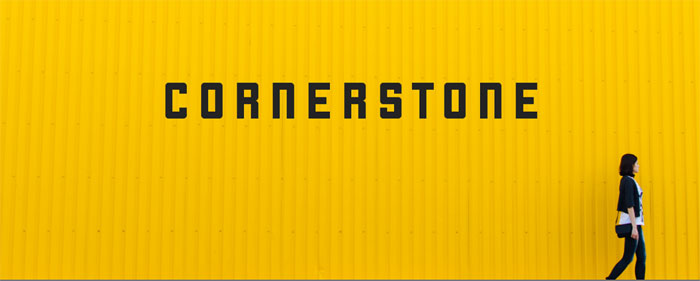
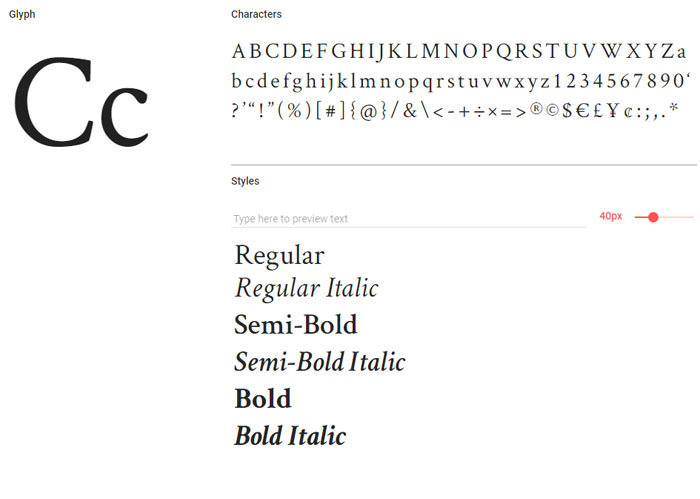
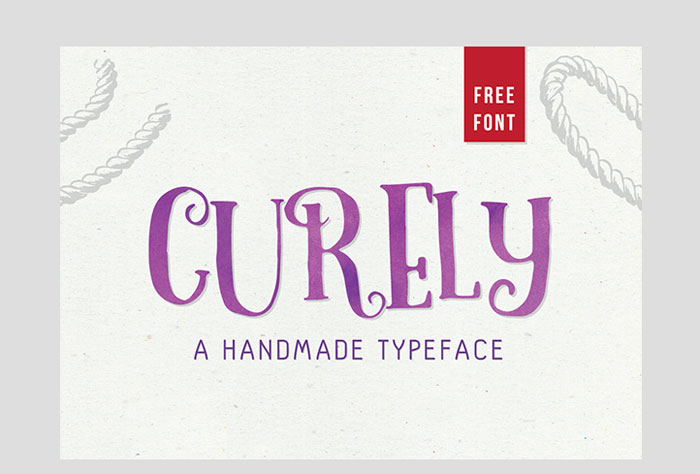
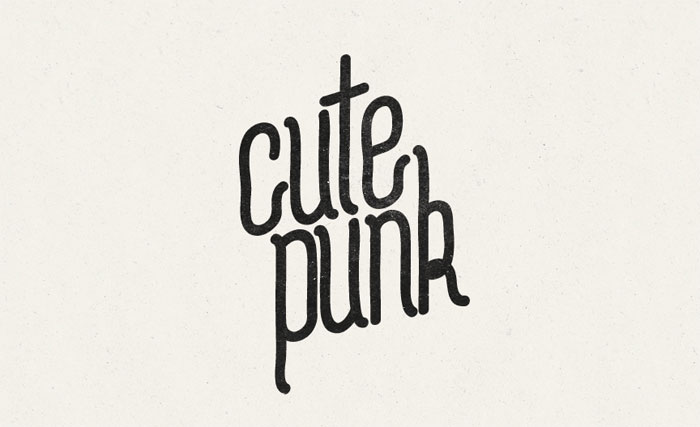
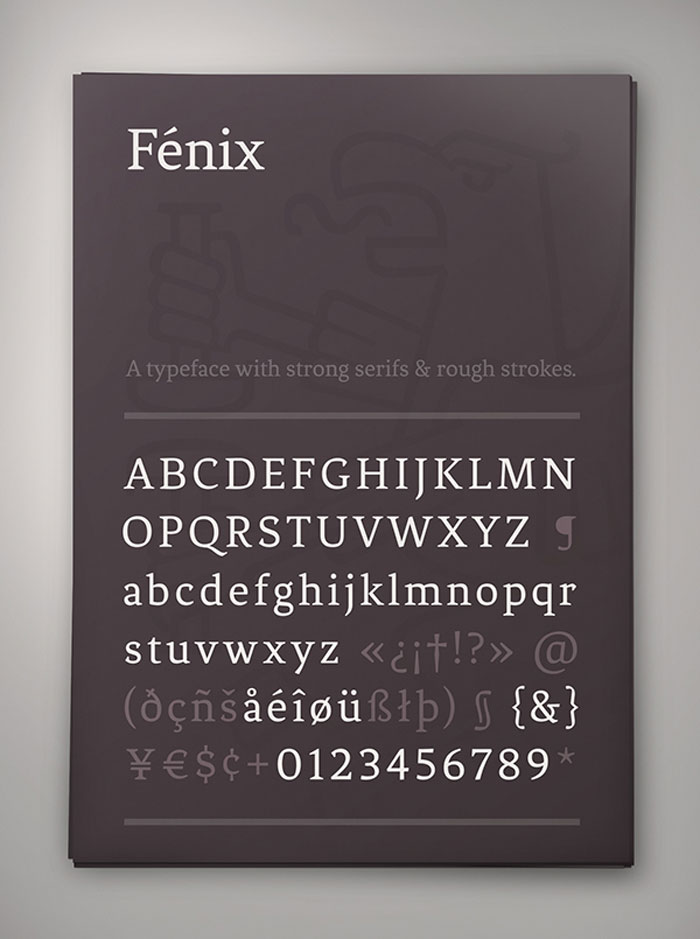
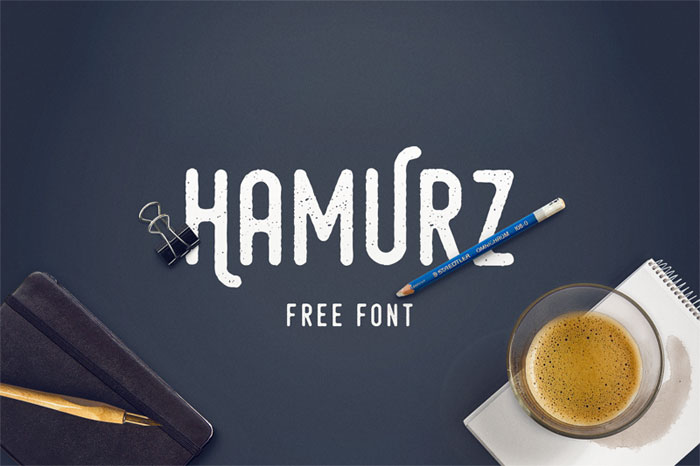
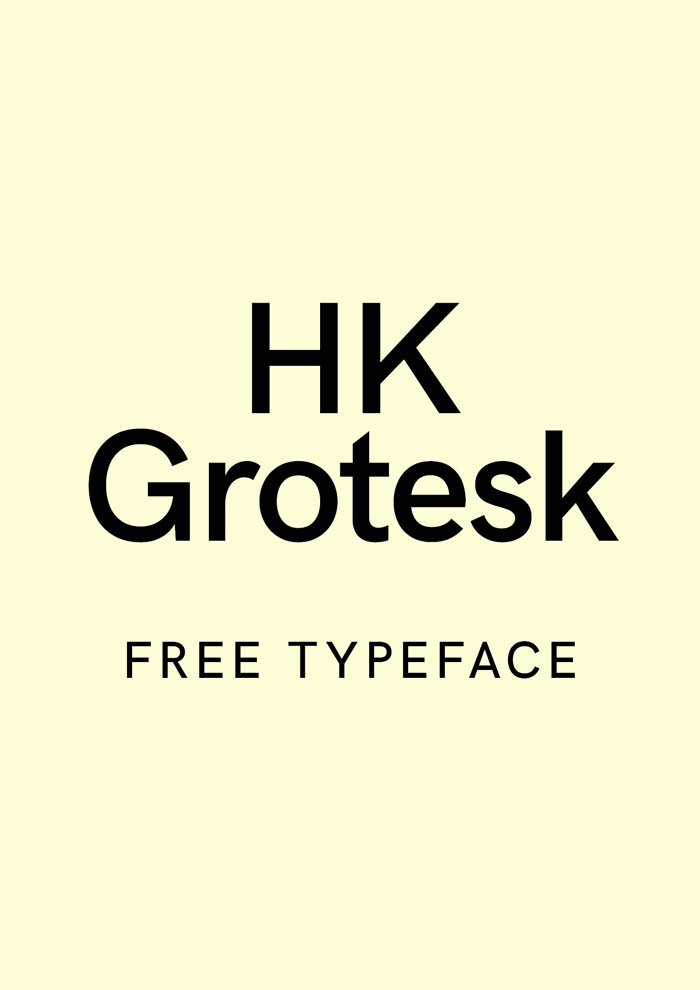
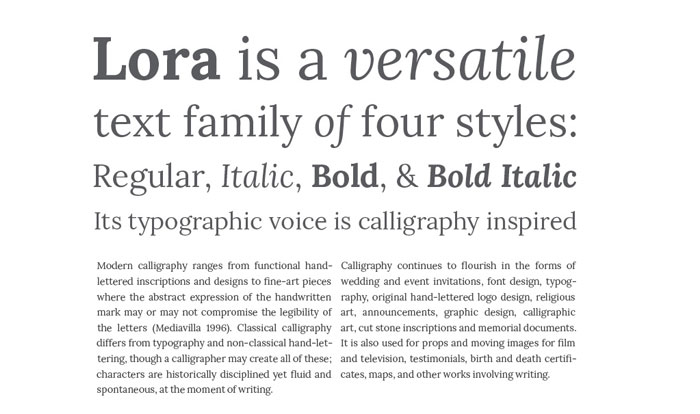
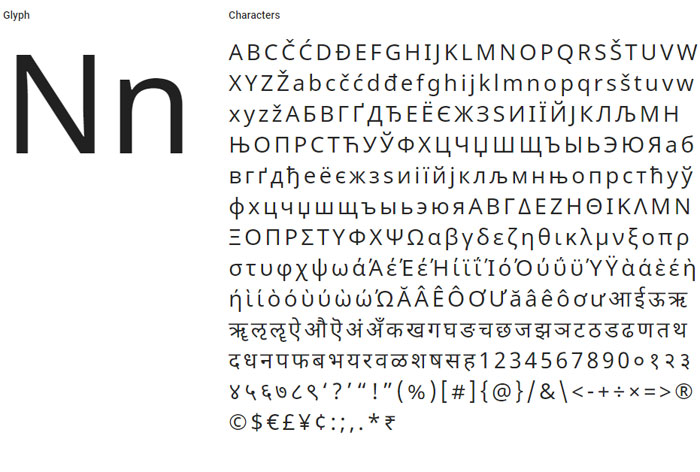
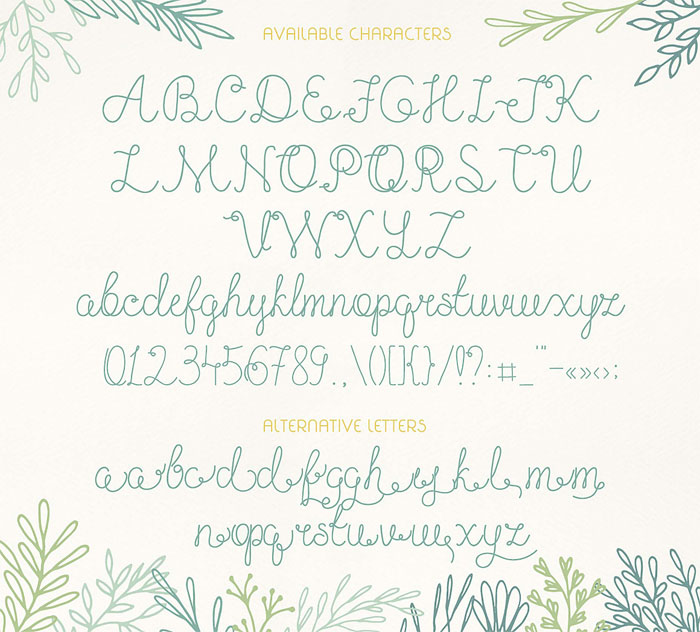
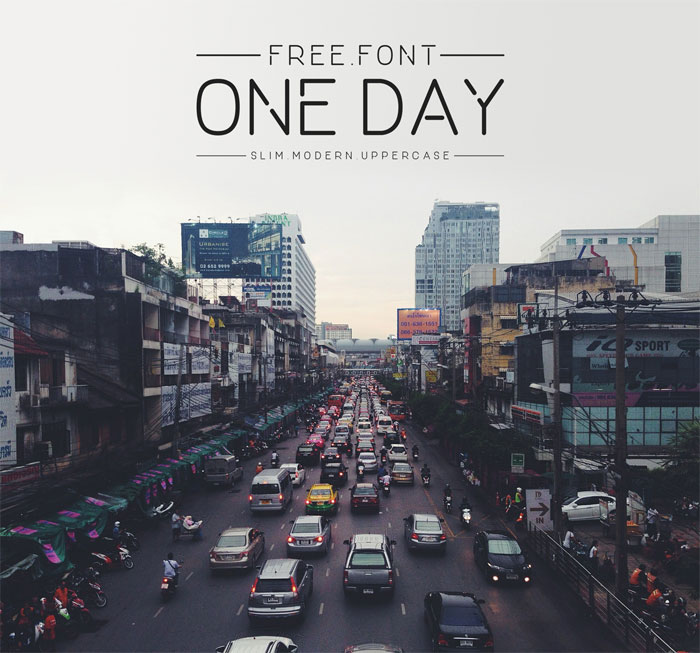
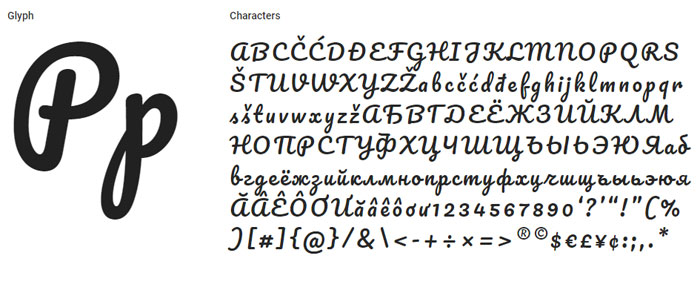
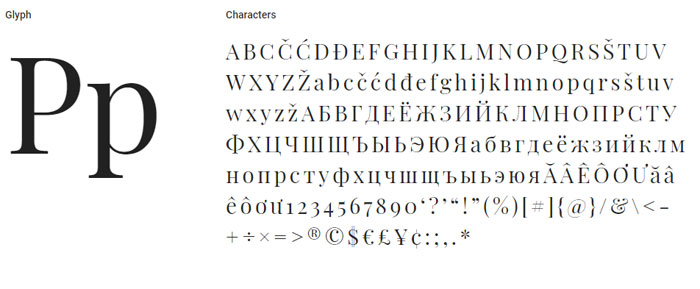
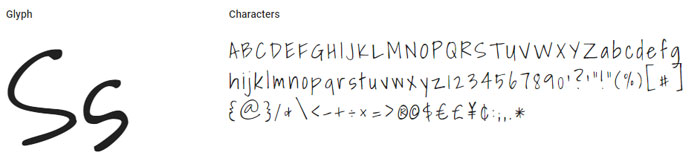
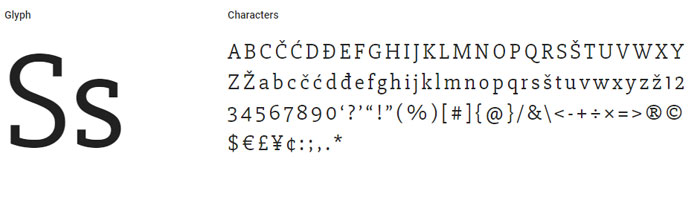

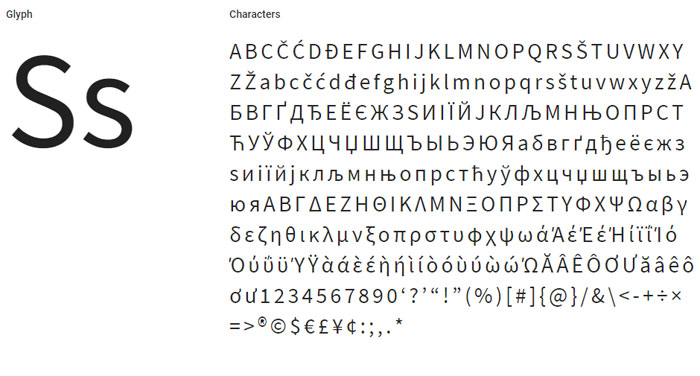

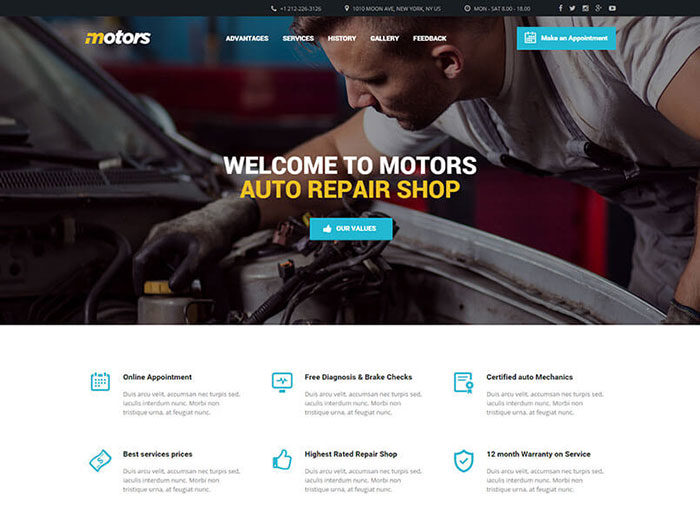
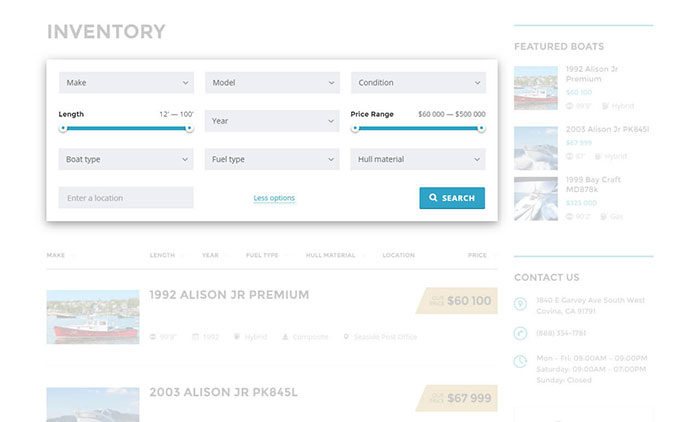
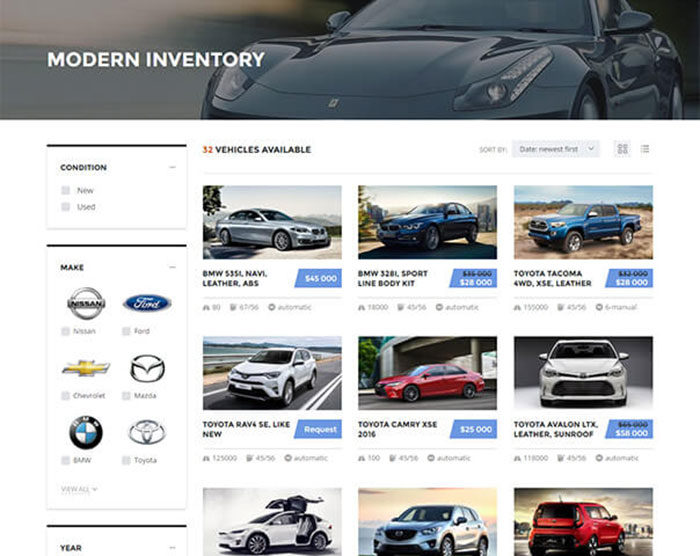


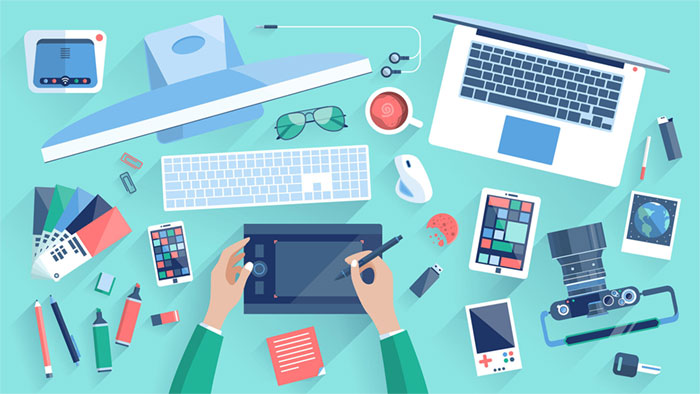
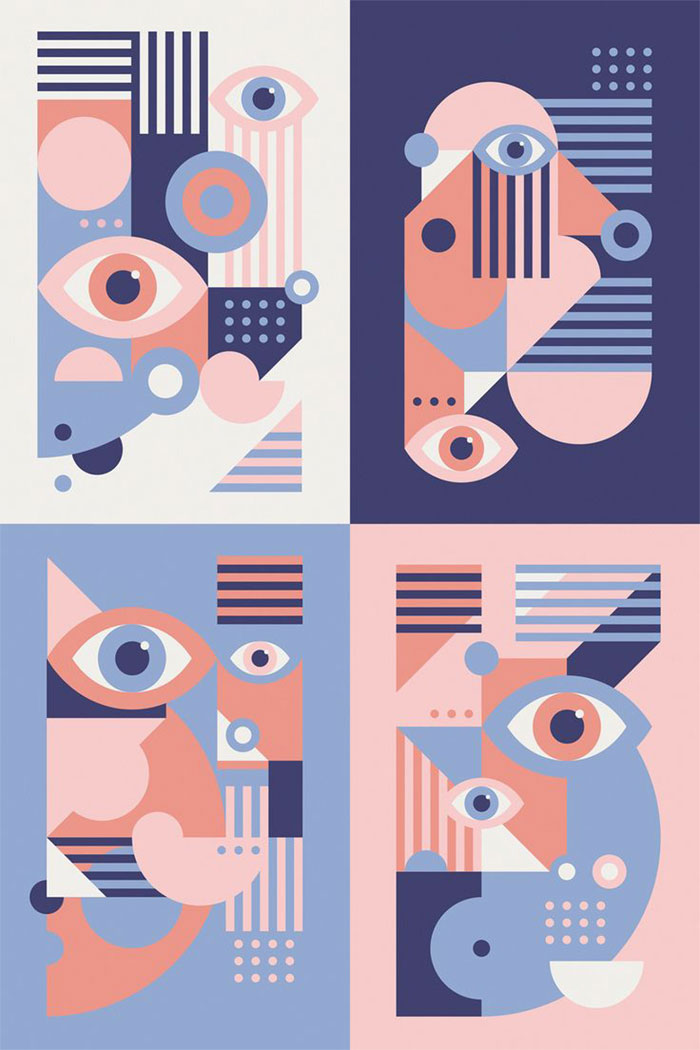
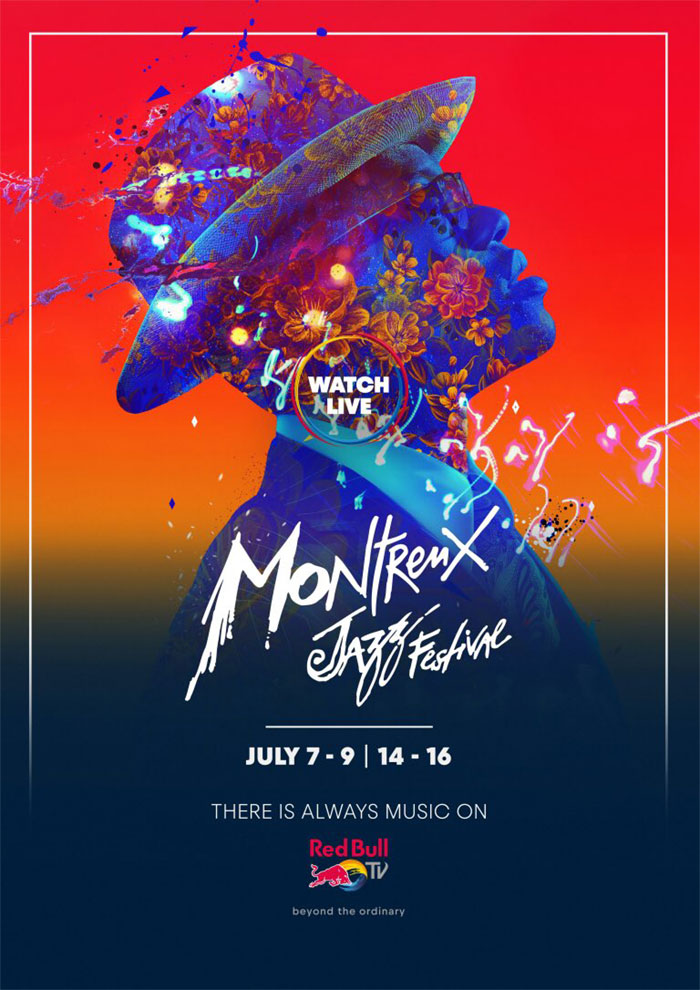


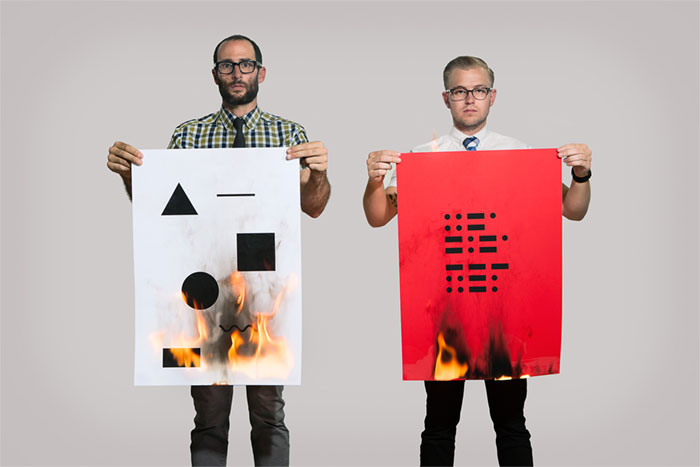

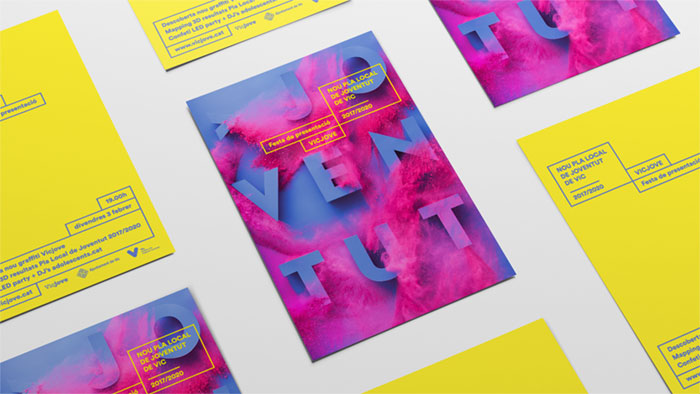
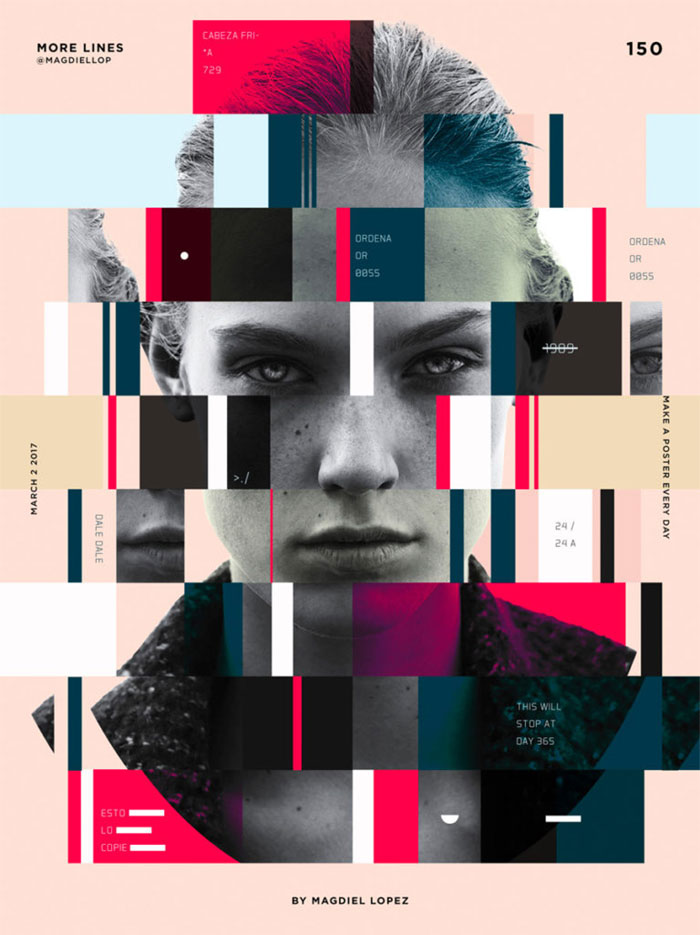
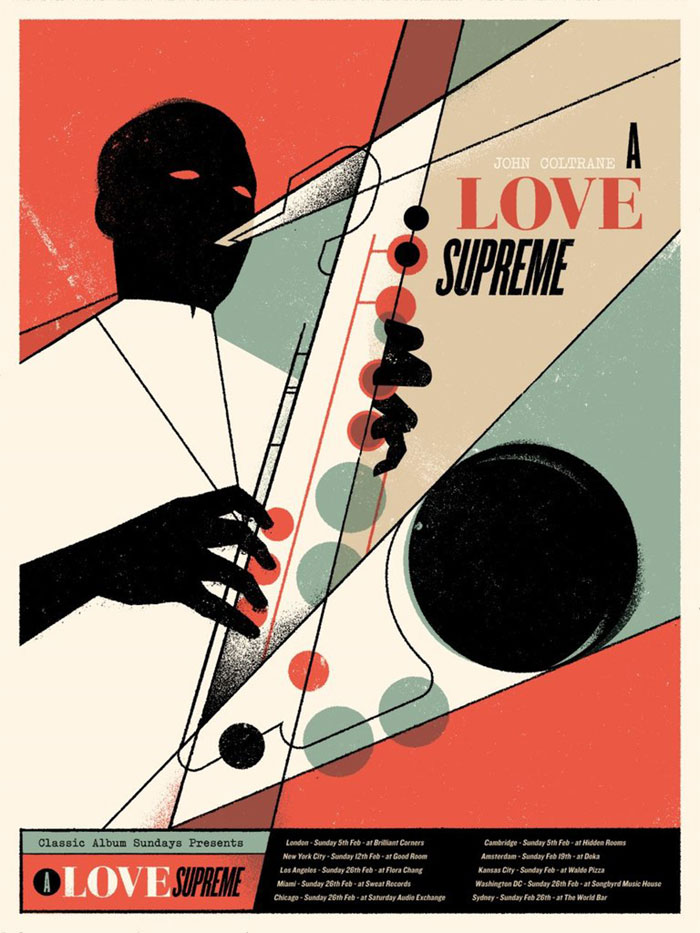
 RSS Feed
