|
People tend to use VPNs, or Virtual Private Networks, for plenty of reasons. And if these are free VPN software, then it’s even better. However, the vast majority of them either want to hide where they are or want to hide who they are. If this sounds strange to you, you might be curious as to why you would want either of these things. Many people would rather avoid having their online activities be traceable, and this is especially true in some parts of the world, where there’s a serious problem with internet surveillance. This mostly depends on what you’re doing online but to each their own. A good example of this would be the signing of the bill by the United States President Trump, which legally allows ISPs in the US to sell the user data. This severely degrades the privacy of users and is a very valid reason for wanting to hide online. As far as hiding where you are, this is useful for accessing websites that you usually wouldn’t be able to use in some parts of the world. For example, sites like YouTube Red are still unavailable in many countries, and so is software like Spotify. Using geo-locking to block visitors from specific countries is a very popular thing nowadays, and VPNs can help you bypass this. Below, you have a list of free VPNs that you can use for whatever you please. Free VPN services like this can keep you anonymous on the Internet, and give you access to sites and services previously inaccessible. Finding a good free VPN can be a bit tricky, but the list below tries to help as much as possible. Be cautious: Recently, there have been numerous reports of malware being disguised as an application that otherwise looks harmless. This has been especially true for VPNs, especially ones for mobile platforms. If there’s a freshly launched free VPN software, and it seems too good to be true, it usually is, and you should stay away from it. However, if you’re aware of what you’re getting into, or you simply can’t justify or afford a good paid VPN, here are a couple of the top free VPN services you can get at the moment. SurfEasy
A Canadian-made piece of software, SurfEasy is one of the best free VPN you could go for. It is owned by Opera, which is among the best browsers on the market and is fairly similar to TunnelBear. The apps are incredibly easy, and you can find your way around them without many issues. You won’t notice any serious speed issues either, and there’s decent protection to add up to everything. For starters, their free plan only gives you 2 gigabytes of data, but if you’d rather stay free, you can get more by recommending the service to others. There’s also a paid plan here, and at $6.49/month, it is a very compelling offer. Hide.me
Made in Malaysia, Hide.me is a fairly restricted VPN provider and one of the best free VPN software for Windows. It gives you a 2-gigabyte cap per month, which is enough to get some privacy when you really need it, but not much more to be honest. You could also use it to unblock certain websites that might be unavailable at the moment. There are 28 servers, and 22 countries to choose from, and the OpenVPN encryption keeps solid connection speeds and decent security. As with almost all free VPN services, this one is restricted as well, meaning it isn’t very useful if you’re online all the time. However, despite that, Hide.me is a very good free VPN service, and one of the all-round best ones nowadays. TunnelBear
This is the people’s favorite, and a great free VPN software that is designed to be fun and easy to use, yet offer decent functionality. Security is kept at high levels, and this is confirmed by the fact that TunnelBear doesn’t keep any logs. They also have a very tight privacy policy, so if this is one of your concerns, you’re good to go here. When you’re comparing the free and paid options, it’s worth noting that the free one gives you all of the server locations that the paid one has, but there’s a data cap of 500MB. This isn’t a lot, but you can earn more with social shares, which isn’t very hard if you need it. CyberGhost
CyberGhost easily makes the best free VPN for PC list. It is one of the best options, and the free version is on par with some of the premium, paid versions by other competitors. There is no data limit, and setting everything up will take less than 10 minutes. The encryption is as good as you’ll get with a premium service, and there’s a user-friendly desktop app that just makes things even easier. There are a few things that you should know, though. Even though it’s great for entry-level users, power users will want to know that the free version comes with ads, and during peak hours there are often queues, so you might need to wait a little before connecting. You’re also limited in terms of server locations as well, which may or may not be a problem depending on what you need. VPNGate
A university project by the University of Tsukuba in Japan, VPNGate takes a different approach. Instead of using a centralized server, it runs off of volunteer computers that are interconnected. You will also find that mirrors are provided on a daily basis, just to keep things going in case the main site goes down for some reason. There are regular updates to keep improving it, and it is open source. The goal of the entire project is to give users with strict government censorship access to blocked websites. Torrents, P2P and any other activities that may be illegal aren’t allowed, and the project keeps logs. They also state that if asked, they would comply with police investigations, which is why this software is only good for accessing websites that would otherwise be blocked. And, given that it runs on machines around the globe that are purely volunteers, the speeds can also be a little low for some. Spotflux
One more ad-supported solution, it is one of the best choices for people who download or stream a lot of videos. It does everything, from blocking dangerous sites to a “set it and forget it” mindset. It also works on multiple platforms, and there’s a Chrome extension for the users who’d rather not download a full desktop version. You will even find a privacy test that checks websites you visit for tracing cookies. You’ll need to shell out for the premium in order to block them, though. As far as the premium goes, the $38/year asking price is not much, by any criteria. Compared to the free one, you get access to Spotflux’ premium network, as well as removal of all ads. VPNBook
VPNBook is a little different than the others. There is no premium service, meaning that everything is included in the free one. This means no service limitation and no bandwidth caps, but there is a catch. Guidance in setting up is minimal, and you will need it as there is no software and no installer. You merely get a list of servers and a choice of either OpenVPN or PPTP VPN. PPTP VPN has better support throughout the popular platforms, but it is much easier for both content providers and governments to block. OpenVPN on the other hand is more secure, but it does require extra effort by downloading a client, as well as VPNBook’s bundles that include configurations and certificates. Servers are located throughout mainland Europe, UK and the United states, which should be enough. Windscribe
With Windscribe you have a choice of either a full-on desktop version for Windows or a lightweight, Chrome browser version. Even though the main focus falls on the VPN network, you will also find a lot of additional tools that can be excellent from a privacy standpoint. There’s an ad blocker, as well as a tracker blocker, and even a firewall that doesn’t expose your IP in case your connection is lost for any reason. And it is all included in the free version. Where the free version is limited is the servers’ locations. You only get servers in the Netherlands, Luxembourg, Germany, France, Hong Kong, Canada, the UK and the United States. If you want another 40 countries to choose from, you will need to spend $7.50 per month. Hotspot Shield
Hotspot Shield has one goal, and that is to protect your online privacy. HTTPS encryption is used to protect your personal information, and you can use it to bypass the Internet censorship and access any service or website. There are even compression technologies and malware protection that reduce the data used and protect you from websites that don’t really have friendly intentions. Psiphon
Another decent free tool, you get a combination of SSH, HTTP Proxy and VPN technologies, all combined to give you an open and unrestricted access to the worldwide web. Censored knowledge is fully accessible, and the borders imposed by your campus, company or country can be bypassed with ease. Betternet
Betternet was made to give you access to any website you might think of, from any country you might be located in. You can surf anonymously, without worrying about leaving a trace, and blocked websites won’t be an issue anymore. Your data will be protected from both surveillance, and hackers as well, which is always welcome nowadays. PrivateTunnel
A decent entry-level option that is available for plenty of platforms, such as Android, iOS, macOS, and Windows, PrivateTunnel works to keep you safe when you’re online. You get a choice between a free package, and a paid one, given that you need one. The paid options offer plenty of flexibility. You have 200MB of data to use as you please, whenever you need it. Once you’ve used it up, you can buy more data, in packages of either 20GB or 100GB, depending on how much you think you’ll need. This is great as you only buy more data once you need it and doesn’t limit you with a monthly subscription. However, if you want to use it more often, or simply don’t turn it off at all, there’s a $30/year subscription package that nets you unlimited data. Even though connections might sometimes be a little stubborn and slow, you will find that PrivateTunnel is a great choice with a welcomed twist on the subscription packages. It prides on being incredibly easy to use, and you have no excuse for not even trying it out. Freelan
This one isn’t for the masses, and novice users beware – you might get confused if you don’t know your way around a command line. You get a completely free, open source tool, which doesn’t limit you in any way. The trick is that you don’t really get the software, but instead you get a set of network drivers that control all of your web traffic. This is worth mentioning, as technical users who want to have complete control over things will find that it is great. Novice users, however, won’t get the step-by-step set up and usage instructions that other services offer. Opera
Before you jump on me saying that Opera is a browser and not a VPN, hear me out. For a while now, Opera offers a built-in VPN service, and it is great. It isn’t an extension, but it is instead a built-in part of the browser that you can simply enable from the settings menu. The best thing? It doesn’t offer any limitations as far as data caps or network speeds go. As with any VPN, yes, your speed will drop a little, but that is to be expected. It is only limited in the fact that there aren’t really a lot of server locations, but the service is only a few months old, and locations are expected to be added soon. FinchVPN
An extremely reliable and completely free option, FinchVPN is full of features. There are plenty of servers for you to choose from, and the control panel is very easy, which means that beginners can easily find their way around it. Everything, from your activities to your web connections, is encrypted, and there are no logs saved. You can get it on macOS, Windows, Linux and Android. Tor Project
Just like Opera, the Tor project is not exactly a VPN, yet it finds its way in this guide. Running on volunteer relays all around the entire globe, Tor is an open source software which relies on Onion Routing, a highly secure layered encryption. Your entire data is encrypted at least three times. This is done in a very simple way. Each time you send data, it goes through at least three volunteers’ machines or nodes in the network, and it is encrypted every time it passes through. Your IP address will be the one of a volunteer to anyone who tries to check it, and there is no way of being identified, mainly due to the sheer number of nodes. The only drawback that is worth mentioning is the connection speed. Bouncing everything greatly depends on the volunteers’ connection speed, and it can be considerably slow. P2P sharing is also not allowed, due to the speeds being severely slowed down with it. However, if you can bypass this, Tor is one of the best options you could go for. ConclusionEven though everyone would like to get something for free, any complete and fully functional VPN will charge a subscription fee, and they have every right to do so. You can look at it as an investment that gets you access to a safe, private, malware-free browsing and unlimited access to browsing anything without anyone knowing who, or where you are. However, if that is really not your cup of tea, you can go for any of the free options offered above. The post Top free VPN software and services you should start using appeared first on Design your way. from http://www.designyourway.net/blog/resources/top-free-vpn-software-services/
1 Comment
Okay, I’ll be honest with you right away. The title is a little misleading. I started learning Swift 4 months before and I knew some coding before that. But I have never created a native app for any platform. Thinking about it now, I had no idea what I was up against… For you to understand the how I did it, first I must tell you the why. Traveling back in timeI always loved computers. My father bought our first machine when I was around 8 years old, and I became hooked in a second. It had a blurry CRT screen and it was running DOS, but it did what you wanted it to do. That thing was pure magic for God’s sake! Of course I mostly played games on it but I fell in love with the whole environment. I learned about how a PC worked, turned all the knobs and switches in the programs and became the guy others came to for tech-advice. Fast forward to 1999. It was the time of 56k dial up modems and ADSL lines. I was still into computers as the Internet started gaining popularity in Hungary. I spent most of my afternoons in the school’s IT room visiting Geocities pages. It was the beautiful era of <frame> based websites with the dancing baby animgif and I wanted a part of it. I started learning HTML and created my first website. And since it was ’99 I appropriately named it Zolee Site Millenium. It ran on our school server and was only accessible via a Frankensteinian URL, something like www.kkt.piar.school.gov.hu/~hosszu2 (notice the nice tilde character in there). But I was online, I conquered a little bit of the new promise land called the World Wide Web. It felt amazing. My love for gaming stuck with me in the following years: I was playing a lot of Counter-Strike. As it became the most popular game, I always had a chance to create a website for my current team. I loved designing and building pages, but after a while started focusing my efforts on the visuals and usability. The latest trends of web development passed right by me as I learned more and more about pixels and user-experience. Today I work as a full-time UI designer at a Hungarian agency. I have no experience with the current top frameworks like Node, Angular or Bootstrap. And I’m okay with that. But I’ve been keeping an eye on HTML, CSS and JavaScript goodies, because I always work on personal projects on the side. The idea for GAgetIn 2011 my website got a huge facelift. The layout got featured on DeviantArt and I felt excited about new users checking it out every day. But I also was really frustrated. Not because of the number visitors, but because there was no quick way for me to check them. There were two options. I either had to keep fiddling with Google Analytics, or I needed to find a simple app to do the trick for me. That’s what OS X Dashboard widgets are for, I thought, so I started looking around. But the solutions out there were either too nerdy and ugly or just didn’t give me enough data. So being a designer, I drew up a mockup of what the best solution for me could be and posted the design on Dribbble.
A couple of dozen likes made me dig into the topic a bit more. I found out that widgets were essentially HTML + JavaScript apps, so I started taking it a little more seriously. I mean, these were the two languages I was most familiar with. The working prototype was running on my Dashboard in a couple of days. I named it GAget [pronounced the same way as gadget] as an acronym for Google Analytics widget. A silly name, but it stuck. The widget was released about 2 weeks later, in August of 2011. 
The amount of feedback was stunning: MacStories, SwissMiss and tons of smaller blogs featured GAget. I even had my name printed in the Hungarian version of PC World magazine. I knew I had to keep working on it. What to do next? Today the widget has over 84 thousand downloads and it is being used by thousands weekly. With a friend of mine we even created an iPhone version. So when Apple released Yosemite and discontinued the development of Dashcode, GAget’s future started looking pretty grim. But as one hand took something away, the other gave something back: Apple opened up the Notification Center for developers to display widgets there. Hope! Maybe the success story of my small widget could continue! 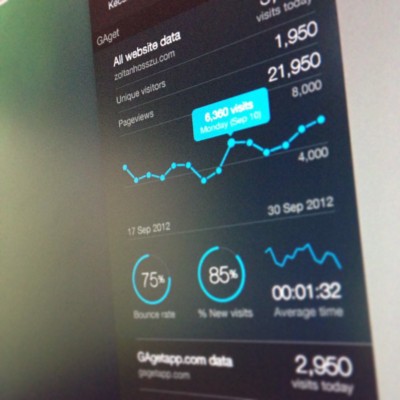
I started reading Apple’s documentation on Today extensions (this is what they call widgets). But it was all native Objective-C code. Ugh! Dealing with a compiler, memory leaks and multi-threaded processes was not what I wanted to do. It sounds scary if you’ve never done it before. But I made up my mind, GAget needed to become a native widget! My biggest problem was that I had no idea where to start. The Objective-Struggle I purchased a book about iPhone development in Objective-C, but gave up after a couple of sections. To be honest, for someone familiar with front-end languages and a bit of PHP, Objective-C looked way too complex. Look at this code: @interface ReminderViewController() @property (nonatomic, weak) IBOutlet UIDatePicker *datePicker; @end What could an interface, a property be, what does nonatomic or weak mean and what the hell are @ and * doing in there? I understood end though! The swifter way to code The tutorials in the book were leading nowhere. After a few weeks of struggle, I didn’t get any closer to a native widget. Then I remembered that Apple introduced a new programming language called Swift alongside Yosemite. It was new to everyone, so a lot of gurus started writing about it, discussing why it sucked and how you should learn Objective-C before even thinking about touching Swift. All this buzz made me take a look: I downloaded and started reading its documentation. It felt like a breeze. The code started looking familiar, something like a little complex JavaScript! I fired up Xcode and started copying what people were doing in tutorials. My main goal was an OS X widget, but most tutorials were focused on Swift itself or iPhone apps so I had to keep searching. I still had a lot of unanswered questions, like:
Apple’s one page long documentation on widgets forced me to dig up source codes on GitHub and Stack Overflow and it took me countless hours to figure out the answers. I collected and published the links I found useful along the way. They might be relevant for you too, in case you’re starting out with iOS or OS X programming. I managed to find everything I needed and started moving faster than I expected: GAget for Yosemite started to take shape.
MVC, multi-threaded processes, app targets, view controllers and core data meant nothing 4 months ago. But thanks to the tutorials, Stack Overflow and a lot of sleepless nights I managed to learn the bases of Swift and OS X development. Thanks to 800 people the beta testing was a blast. GAget is now available in the App Store as a designer’s first native application. What I learned — besides a new programming languageI knew that working on a personal project is awesome long before Swift came along. You get to do whatever you want and you don’t answer to a boss or a client. You can add and remove features any way you like and you work in your own pace. Deadlines However, I found that giving yourself a deadline can be extremely motivating. Every New Year’s Eve my wife and I sit down and make a list about the things what we want to achieve in the following year. This time I listed that I want to release the new version of GAget by the end of January: this was my deadline. Even though I ended up missing it by a month (thanks to Apple’s review process and a few other projects), I was working the hardest in January to check this thing off my list. Having it written down on a piece of paper is a powerful motivator. The circle of learning I also discovered that while learning something new there are three phases you cycle through: excitement, struggle and solution.
So next time you start out, remember: the struggle phase might be long and frustrating but the solution is out there. Finding it is part of the fun. And don’t forget to check out GAget ☺
The post How I, a designer, learned to code and released an app in 4 months appeared first on Design your way. from http://www.designyourway.net/blog/user-interface-design/designer-learned-code-released-app-4-months/ Do you want more traffic on your blog or are you struggling to produce more leads from your blog? In modern marketing, there is a huge demand for high-value content for lead collection. Attracting more people to your blog by showing them an easy way to access the information makes a big difference. Lead generation is an important aspect of online business and digital marketers are now focusing on the ways to produce more and more leads through. Content marketing, especially blogging has evolved as a top weapon for digital marketers to communicate their message through different social media and online channels. But, a good design for your blog can open all new ways for producing more leads by creating a good experience in accessing the information that really helps them in their endeavor. Following are some blog design considerations that will help in your endeavor of collecting more leads from your blog. Create a well-defined blog structure
Blogging is an important inbound marketing tool to produce more leads. Creating more quality content and generating good engagement are two top things that today’s marketers are struggling with. An easy and attractive blog structure can fulfill all the demands of users to visit your blog and interact their thoughts on a specific topic. Simple and clean graphic layout blended with attractive images and fonts will set the stage for your audience. However, effective use of different typography style can be useful in enhancing readability for users. Also, you need to present different blog elements i.e. brand logo, menu, search box, subscription box, social connect and social sharing icons, different forms for showing discount offers and gated content offerings are some important elements to implement strategically while designing a new structure for your blog. These small designing considerations can really make a big difference to create a better user experience. White space, which is the empty space between the different elements in the composition of your blog page is essential to lead your visitor’s attention and eye from one element to another in a logical order. Think about what your blog visitors expect from you and if you’ll be able to deliver the same then they will follow what you offer to them if it is helping them. So, in a way you need to understand your audience demand and then you need to offer the same. In the meantime, the power of the first impression remains the priority for everyone. Therefore, making a first good impression by designing a suitable most blog structure is the first step towards creating a good experience for users. Fine Tune the Color and Style
The colors of your website should match the mood and feel of your blog and the combination should be well thought out. When designing your blog, it is important that every element should follow the same style and color patterns. Each element of your blog should be well-adjusted within a defined structure or theme to keep everything in a synergy. Defining branding standards helps in better impression and better brand awareness and finally leads to better brand recalling in highly competitive market. Even choosing a wrong font type can kill your blog visits so, it becomes important to establish as a stand-out brand by choosing standard band elements and stick to them wherever it needed. It is advisable to keep up with 3 color palettes for your blog other than black, gray, and white. Make sure you have a purpose while choosing any color for your branding. This is important to create a strong brand recognition or else your audience won’t recognize you. That’s why today’s marketers need to focus more on unaided brand recall in this highly challenging business environment to remain competitive. Logos, navigation menus, search box, links to social utilities, primary and champion images, content, and bottom of the page are some essential elements that need to blend with the selected branding style and color as per the brand guidelines. Let’s create a complete brand guidelines document by choosing colors, font’s style and size, image resolutions and showcasing styles, logo usage formats, CTA guidelines and follow it strictly. Moreover, it is equally important to create a page on your blog for sharing and using your brand guidelines document for third party usage with a clear demonstration. Easy Navigation is a Must
Every marketer wants to turn their blog into a killer knowledge base but it is equally important to show your audience an easy route to access it. An easy navigation is the key to retaining a user for a longer time on your blog as people may forget what they’ve seen but they always remember what they’ve experienced. People like clear, direct and easy paths and they will get frustrated if they won’t find a painless route to what they’re looking for. Poor navigation will leave your users with frustration and it will lead to more bounce rate on your blog. Try to keep it simple and make it easy for users to go through different sections to get what they are searching for. Small things make a big difference and easy navigation is important to both- users and search. It works like a site map and spiders crawl it to determine the architecture of the site. An easy, effective and intuitive user interface creates a lasting impression on visitors and they like to visit your blog often for accessing information easily once they have a good experience. Remember you have a short amount of time to impress the users as it takes less than 2/10th of a second for an online visitor to form an opinion about your blog. And it takes another 2.6 seconds for that viewer’s eye to concentrate and reinforce the first impression. So, when you have this much little time to impress visitors on your blog you won’t miss any chance to create a good and lasting impression. Responsive and Device Compatibility
One more important thing to consider while designing your blog structure is to make it responsive and compatible with different device size. It is essential as more people access the internet on their smartphones and if your blog is not mobile friendly then you will lose a potential audience that may never return to your blog. 80% of internet users own a smartphone and they like to search for their queries on search engines using their phones. So, it becomes obvious to design and develop your blog for all types of mobile devices. Furthermore, the responsive blog will power your users with greater mobility and they can access information from anywhere. Empowering your audience with facility to access information from anywhere using any type of device will lead to greater interaction and hence more engagement. Crafting Lead Generation FormsThe next important aspect that can help you to score more brownies on your blog is lead generation forms creation. Call to actions (CTA), if crafted and presented well can become a quick refresher to your audience on your information architecture i.e. blog. Now, when your blog structure is all set it’s time to design and create different lead generation forms. Lead generation forms are the best way to collect more leads and you need to set it properly where users won’t feel annoyed and they will share the contact information easily. OptinMonster, Contact Form 7, Gravity Forms, Jetpack and Google Forms are the most popular form creation tools to create and set form on your blog in an effective style. Whereas, Hotjar and Kissmetrics are the heatmap tools will be useful in tracking different user behavior on your blog. These user tracking tools can be helpful in deciding on forms implementation on your blog. Based on user interaction you can place and remove forms on your blog. Lead generation forms can be presented differently on your blog such as placing call to action (CTA) forms on the sidebar, on the top and bottom of blog homepage and you can also create CTA forms for presenting it through pop-ups. Different types of pop-up forms can be customized for targeting different users as per their past behavior on your blog page. However, by observing different user behavior on your blog page you can showcase different types of CTA differently. Here are some of the ways you can use the right combination of offer and placement to form the right CTA:
Blog Loading Time
Speed counts! Your blog loading time can affect the bottom line and you won’t be able to collect leads from your blog. Loading time affects conversion and leaves the audience with frustration. One more thing, as webpage loading speed is crucial for creating a good user experience it is also an important aspect for a search engine to crawl search results. Nowadays, users need quick response and they get frustrated if a webpage takes too much time to load. Visitors are demanding 3 seconds response time and they will shift to other sites if your blog is taking more time to load. Thus, your blog loading speed should be optimized to load faster for creating a better impression and ultimately a good user experience. There are some important considerations that needs to take care for optimizing the speed of your blog for creating a faster web such as using CSS, avoiding nested tables, removing excess white space, keeping code clean, splitting long pages into multiple shorter pages, reducing number of plugins, reducing scripts, and removing unnecessary images. Also, you need to check blog loading speed against different devices and browsers as well. There are tools that will help you set your blog for multiple browsers and all devices- mobile and desktop. Your blog loading speed is a major contributing factor to page abandonment. The average user has no patience and if a webpage takes too long to load they will shift to some other quickly. There are some useful webpage speed checker tools such as Pingdom, GTmetrix, and PageScoring. However, you can use WebPageTest, which is a great tool to enable testing on various platforms using realistic data. Moreover, Think with Google is an amazing utility tool to test your blog speed and performance on mobile devices. Based on the results you can optimize loading speed of your blog towards different devices- desktop, tablet, and smartphone. There are lots of things that need to be optimized for getting your blog load faster such as blog page size, number of images, number of JavaScripts, and number of HTTP requests. However, your blog loading speed is crucial for achieving desirable revenue. Remember, Amazon has discovered that for every one second delay, conversions dropped by 7%, which is critical. ConclusionIf you take above-mentioned considerations into implementation while designing a new blog structure you’ll surely be able to give a good user experience to blog visitors. And this way you will be able to retain them for a longer period and you’ll be able to sell your product and services through blog. Ultimately, we can say that a well thought superbly designed blog is all that you need to collect more leads and that’s how designing play its role in converting your visitors into your customers. Also, you can read different techniques to convert your blog into a lead magnet for better business ROI. The post How to Design your Blog for Lead Collection appeared first on Design your way. from http://www.designyourway.net/blog/misc/how-to-design-blog-lead-collection/ Designers love to sweat the details. Much time is spent pixel-fucking buttons, form styles, setting type, & getting those icons as sharp as a tack. A+, great job, don’t stop you guys. …but there’s little consideration about how it all fits together outside of a static comp. You tap a button and the form just …appears? You swipe to delete an item and it just vanishes? That’s super weird and un-natural. Nearly nothing in the real world does anything as jarringly as just swapping states. It would feel like a glitch. Oh, ok sweet. You made some notes — it just “slides in.” How? Quickly? Does it bounce back? Cushion in? Static design doesn’t provide context between states. Folks keep throwing around the word “delight” when referring to animation and cute interactions. Cool and great for those guys. Guess what though? Animation can be used functionally too. It’s not just an embellished detail. Animation leverages an overlooked dimension — time! An invisible fabric which stitches space together. You don’t have to be a math dork to understand this. Let’s take a look at some simple ideas: Easing/cushioningIn traditional animation, a breakdown determines how a mass moves from Point A to Point B. It adds bias to motion, and determines how the rest of the frames fall into place. Take these 25 frame interpolations, where frame 13 (the middle-ish point) varies in position:
Look at that! You just learned about cushioning/easing. Computers are jerks and love to fill in the gaps linearly because they are lazy sacks of wires. A great animator/motion designer spends most of their days fighting computers to make sure they don’t mess this up. Animation is all about timing. You can play with all sorts of different spacing to get different results. But enough about that. This isn’t an animation tutorial, the point was to get you thinking about the language of timing and spacing. Some ideas about Animation in the context of InterfacesLike I said earlier, animation can help to provide context. It helps brains understand how the information flows. Inserting an item into a list Let’s say you’re looking at a live list of things and you’d love it to be populating with live data. If you leave it to a computer, it’d look something like this:
Yikes, that’s rough… Smoothing it out only requires a few frames of animation. How about giving your brain a clue about what’s happening to the list?:
For a new item to be added, the list needs to make room for the item, and then the new item (which came from somewhere) fills in the space. Muchless jarring. There’s easing in & out of states to soften the change. It feels more natural, because we have the contextual hook of space — mirroring the way you’d add something to a stack of things in real life! A few more: Drilling down into list itemsThere’s the typical, default pattern of sliding over into an item. A regularly used pattern, but doesn’t make a whole lot of sense spatially:
The direction of sliding doesn’t really give you any useful clues outside of a linear chain of views. How about considering the item to be a container you prod for more detail, inline?
If the goal is to drill in and have the list item hold full focus, we could even make everything else hide within the same view:
Breadcrumbing>all>the>way>into>a>view is an easy way to get lost. An advantage of remaining inline is that you can remove the need to explain how deep a user is embedded into sub-views. You can scrap the display of a hierarchical navigation, because the user saw how they got there. Of course, the above ideas don’t work with every case — but this perspective can lead to much more elegant solutions to connect a flow. An implemented example – Thinglist
Thinglist, an Elepath product I’m working on with Mister Kyle Bragger has some pretty fun transitional interface work woven into it. The above example demonstrates how we reveal the new filtering feature. Examples of Transitional interfaces you should check out: You know, I can’t really name many… On one end of the scale, there are a lot of beautiful, but dreadfully static interfaces. On the other end — ones that are over embellished with gimmicky animation. Three stand out to me right now. Clear: Very tight gesture driven animation. Willcall: Has a consistent, kinetic rhythm. There’s no hard pops between states. A lovely playfulness. Facebook.app: Not very consistent, but there’s some nice solutions to drawing focus. Specifically… drilling down into lightbox-like views for fullscreen photos, and popping comment inputs into list views. It seems crazy to me that more people don’t think about interfaces with respect to the dimension of time. Motion can provide so much information! Maybe the tools to create prototypes are too complicated for most designers? I originally wrote this as an internal document for Elepath employees, to begin to explain my obsession with motion. I am an Animator after all. We figured it would be cool to share this for discussion. I’d love to hear thoughts from other people building interfaces, with a real consideration for how & why they move. Chat to me on twitter @pasql or check out my portfolio.
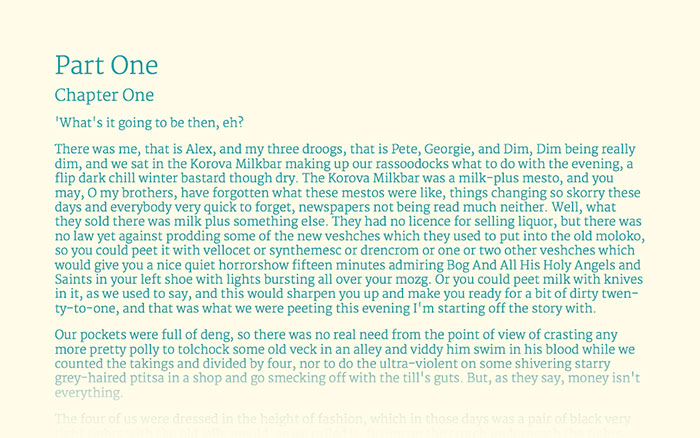
The post Transitional interfaces appeared first on Design your way. from http://www.designyourway.net/blog/user-interface-design/transitional-interfaces/ Living in a highly competitive world is not that easy. Especially, when it comes to the competition online. Hence, a high-quality website has become an indispensable tool in today’s world. In fact, a good website is essential for the search for new clients and for the retention of the existing ones. If you are promoting a product or an idea, a well-optimized website is crucial for your success. The same applies for the launch of a startup or a proper operation of a business. Acquiring such a website isn’t as difficult as it may seem either. A ready-made theme may be all it takes to get you started or to give you the inspiration you need. Today’s list is presented with small businesses and startups in mind. It is, in many respects all-encompassing. These themes lend themselves to becoming custom fit to a business person’s needs. Check them out, and let us know what you think. Be ThemeHow is Be Theme good for startups and small businesses? There are over 260 ways Be Themecan help you get a website up and running. This, the largest WP theme ever, has in fact, too many outstanding features to list here. Be Theme is responsive, WooCommerce ready, and it has an excellent selection of special effects. It also has a 260+ (and growing) selection of professionally-designed pre-built websites, most of which are multi-page. The functionality you or your client will want and need is already embedded, so you can get off to a fast start and turn out a finished problem in as little as 4 hours. Best of all, Be Theme is delightfully easy to use. It takes but a single click to install the pre-built website of your choice, after which, it’s simply a matter of letting the Muffin Builder and Options Panel take over. Be’s Layout Configurator gives you the option of starting a page from scratch, plus you’ll never need to do any coding on your own. AdvisorsHow can The Core provide a great solution for startups and small businesses? The Core is a fully-responsive, retina-ready, multipurpose WordPress theme that features and promotes 20 different website examples for startups and small businesses, one of which is Advisors. When you purchase it, or any other website example, you get the other 19 for free. Features include an easy-to-use, drag and drop visual page builder; and there are tons of options to work with. The package includes 6 header types, several footer options, and color palletes along with Google fonts integration. Plugins allow you to translate a website into nearly any language, make your website e-commerce ready, e-learning ready, and accept donations. You can build a nice portfolio with this WordPress theme, plus its pre-made website examples are completely customizable and SEO-friendly. Updates and lifetime support come with your purchase. OshineHow is this theme good for startups and small businesses? The answer is simple. No matter which of the 27 stunning demos you choose to work with, Oshine gives you a clean and modern design that’s suitable for building any type of website for virtually any type of startup or small business niche. This WP theme’s one-click installer lets you get started instantly. Tatsu, its front-end, fully visual page builder, makes editing pages a dream. The powerful options panel gives you total control over your page layouts, as well as your site’s color scheme and typography. You’ll also have more than a dozen header and menu styles to work with. Oshine enables you to build a stunning portfolio with minimal effort, plus it’s WooCommerce and WPML compatible. HouzezHow is Houzez good for startups and small businesses? If your startup or small business is in the real estate sector, Houzez offers a perfect solution. Although it is a specialized theme, it’s amazingly flexible. Features include property search, rating, and review systems, an online payment system, and the ability to coordinate with other agents or agencies. Whether you own or manage an agency, you can customize Houzez to match your workflow. UltraWhy should startups invest in Ultra, byThemify? The short answer to this is the speed in which you can build layouts. Themify’s new pre-designed rows feature enables you to drag and drop a pre-designed row onto any page you’re working with. Each of the 34 initial pre-designed row is responsive, and suitable for any type of site. Think of these rows as modules, and how easy it is to build a page using a modular approach. UncodeWhy is this theme a good solution for startups and small businesses? Uncode is an ultra-professional, smooth-as-silk to operate multipurpose WordPress theme. Its design is creative and pixel perfect, and since it uses Visual Composer as its page builder, it’s easy to create a bold and beautiful website for almost any need. With Uncode, you will have an advantage of creating high-standard quality websites in a breeze. This great WordPress theme is very detail oriented, while it is also very flexible in terms of performance. InfiniteHow is Infinite good for startups and small businesses? As you would expect from a premium WordPress theme, Infinite has, as its core feature, a great selection of website demos. These easily customizable demos have been assigned to four categories: Corporate, Creative, Niche Retail and Services, and WooCommerce. You can mix and match different options, and use the Infinite builder, with its pre-built content to create your pages and your website. Infinite has all the features and functionality you’ll ever need. KallyasWhy should you choose Kallyas to create your startup or small business website? Kallyas is a mature product that has been among the top 15 best-selling WordPress themes for nearly 5 years. You have more than 50 pre-built websites to choose from, which you can install with the click of a button. You can also use the amazing Zion Builder if you prefer to start building from scratch. Kallyas is fully loaded with features, its SEO-optimized, responsive, and WooCommerce ready. Updates are free, and our dedicated support team will be there to help you every step of the way. KLEO – Ready To Go Theme For Your BusinessHow is this theme good for startups and small businesses? Eager to get a website up and running? With KLEO, you can have one up and running in hours, or even minutes, instead of in days or weeks. Features include 1-click ready-to-use demo import, a drag and drop page builder, and compatibility with a majority of plugins. You can test KLEO and play with its many options for free before you buy. TheGemHow is TheGem good for startups and small businesses? TheGem is a real Swiss army knife among the WordPress themes. It’s most suitable for building small business or startup websites. It offers a huge set of flexible features and useful tools to establish a solid business online presence. And, its design is amazing! If you strive to make your online image unique and creative in any visual aspect, choose TheGem. This theme is packed with 50+ pre-built awesome homepage concepts, installable in few clicks and easily customizable with powerful drag’n’drop frontend editor Visual Composer. Delivered with website elements like fancy product descriptions, teams & clients, creative CTAs, pricing tables in huge variety of styles, and much more, TheGem can guarantee that your online business or startup idea will stand out on the Web. ConclusionThere you have it. Now, it’s simply a matter of deciding which theme will work best for you. They are all high-quality products, and each one is easier to use than the next, so you can’t make a poor choice. If you like what you see, let us know. If you feel we’ve left something out, let us know that as well. In the meantime, enjoy creating your website! The post Best WordPress Themes for Startups and Small Businesses appeared first on Design your way. from http://www.designyourway.net/blog/wp/best-wordpress-themes-startups-small-businesses/ There are 3 small changes you can make to your content to provide a more pleasurable read. The tips don’t just apply to design — use them to make your text documents look great too! The names of each principle may be complicated, but understanding and using them is simple. 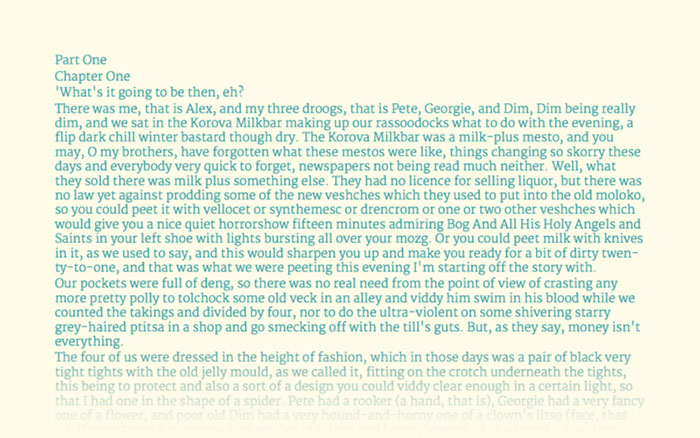
Important note: Every font is different, so if the content doesn’t feel right, go ahead and adjust your measurements. What is important here is that the reader is getting a comfortable reading experience and that it looks correct to your eye. Tip 1 — Use Typographic Hierarchy To Give A Clear Sense Of The Structure Of A PageTypographic hierarchy is the visual hierarchy of the text on a page.
Imagine a textbook. In it, the primary heading (the chapter title) is more prominent than the secondary heading (the sub-heading) which is, in turn, more prominent than the body text (the main content of the page). The same principles should be taken into account in a design or word document. All font sizes should be derived from the body text, as this is what will be most-read on each page. Here are a few simple steps to define your hierarchy.
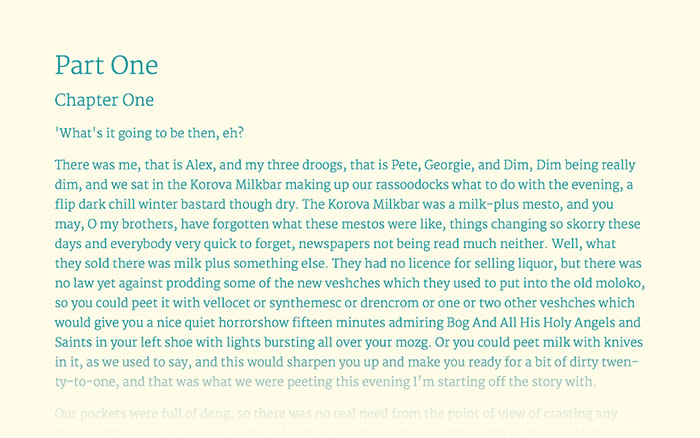
Here’s what the page looks like after following this advice: 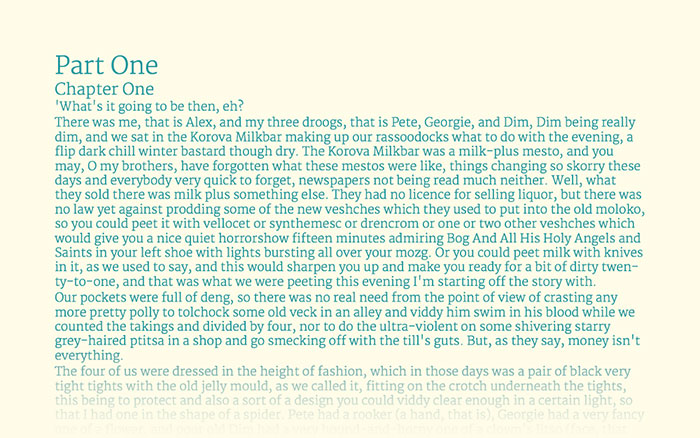
Further Considerations These levels weren’t necessary for this article, but you should also consider a tertiary heading and caption text.
Tip 2 — Use Vertical Spacing To Make Your Words Easier To ScanThis is the spacing and arrangement of text as the reader descends the page. We need to make sure the the line spacing and space between paragraphs is generous enough to allow the eye and brain to more easily decipher characters, words, and word shapes — which is how we all read.
Paragraph Spacing Setting the paragraph spacing is simple, but is very different to just pressing ‘return’ twice for a new paragraph. Pressing return twice means the gap is too big to immediately decipher whether it’s part of the same or a new section of content. In most cases, it should be equal to the body text, so if the body text is 16pt then the paragraph spacing is 16pt.
Line Spacing The line spacing should be set somewhere between 120–160% of the text size. As a rule, the smaller the text, the more generous the line spacing needs to be to give each word room to breathe. Tip: You should be able to fit a sideways ‘h’ between the lines without it hitting the tops of d/b/t’s (ascenders) or the bottoms of p/q/y’s (descenders). If the body text is 22pt, then the line-height of that text should be between 26–35pt.
Tip 3 — Adjust The Measure To Make Each Line Of Text More Comfortable To ReadThe measure is the length of a line of text. Long lines of text are difficult to read, with shorter lines being easier. The ideal number of characters per line is 65–75. The measure should be defined by the width of the body text rather than headings or sub-headings.
Tip: A line of upper- and lower-case letters and numbers is 62 characters, a simple way of finding a comfortable measure. When you’ve worked out where 65–75 characters is on a line, reduce the width of the column of text until that is about to wrap, you should find the measure is comfortable. 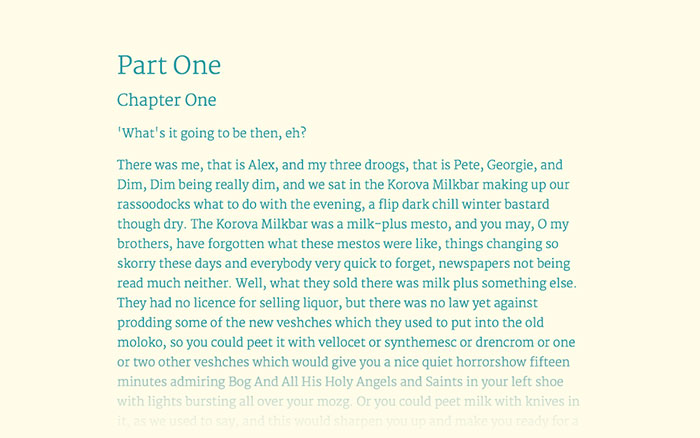
The Final ResultOnce you have followed these steps, the readability of your content should have vastly improved, as seen below.
Setting type is not an inaccessible skill, it is possible to follow a few simple principles to make every bit of content an easy read. Make this part of your content creation workflow and your readers will be in for a treat. This list is succinct and by no means comprehensive. The intention is to provide non-designers with a simple list of steps to follow to make their content look better. If you have any questions, comments, or suggestions, please speak to me on twitter. Thank you for reading my post! If you enjoyed it and want to stay in touch, let’s speak to each other in one of these places: Twitter, Instagram, my portfolio. The post 3 Typography Tips For A More Comfortable Read appeared first on Design your way. from http://www.designyourway.net/blog/typography/3-typography-tips-comfortable-read/ It applied to Ludwig Mies van der Rohe when he was designing buildings in the mid 1900’s, and it remains true in product design today. Though I don’t profess to know much about architecture, another likely commonality with product design is that it’s those same details that are the easiest to forget. But it’s those little things, the tiny minutia of detail, that ultimately make beautiful products, and beautiful houses. Unfortunately, when I refer to the “details” in product design, I’m not talking about obvious design things; like colours, drop-shadows or placement. Instead I’m referring to something harder to define; experience and subconscious patterns that help the user feel more at-ease with an interaction. That detail might come in the form of a change in cursor, a “down” style for a button, or a helpful animation. Whatever form that detail takes, I’ll bet that it wasn’t designed in Photoshop, or included in even the most detailed spec document. It’s the details that fall outside of titles like UX, or UI. It’s interaction detail that can only be found after using a product for real, then dedicating solid design and engineering time to building. The details are difficult to include when you’re building a product; they’re expensive both in terms of time and technical overhead — which is why they’re rare. I spend my time in pursuit of these details, and as the designer and developer of Prevue, I have two luxuries which thankfully afford me the ability to obsess over them: The first is that I have the capacity to use, improve and repeat. I’m not just talking about about the technical ability to implement the details — I’m also talking about having the time to do so. Sometimes an interaction will take me 50% longer to build, simply because I’ve spent hours obsessing about the animated states that occur over a 0.65 second duration. That’s not a luxury that many products can afford, or are willing to build into scope. Understandably so. The second is that I use my product, for real, every single day. If there’s an annoying interaction, unnecessarily lengthy animation or a dumb user-flow — the chances are pretty high that I’m going to spot it. That’s the difference between functional testing: “Does X do Y when you press Z?” Versus true-to-life user-testing: “Does the product intuitively help me achieve a task, quickly, when I’m up against a deadline?” But let’s be honest; using a product over-and-over, re-building functionality, and obsessing about the little things takes a lot of time — perhaps a luxury afforded to side-projects like Prevue, or products with too much money. They’re usually too hard to justify, and they’re definitely the first thing to be sacrificed when push comes to shove. That’s probably why Ludwig Mies van der Rohe only designed a handful of buildings that weren’t ugly skyscrapers — or why Prevue doesn’t ship features very often. Having spent the last 7 years polishing my own side-project, I’ve learned where to look for “quick wins” when it comes to building detail-oriented design into larger, fast-moving commercial products. So instead of professing to knowing the perfect solution for forcing “detail-mining” into your release schedule, I thought I’d share a few places where you can start looking for improvement in your own projects, and why those details can make all the difference. Visually confirm interactionsI’m going to start with something that applies to most products, yet is so commonly overlooked — button states. Even on a fast internet connection, there’s likely going to be a delay after pressing a button before the next action takes place; like a new page load, image upload, or some kind of event. Yet so few products give any visual confirmation that something is happening in the background. Leaving the user hanging there, with no confirmation that their click actually did anything, is likely causing an unnecessary break in their journey. Whilst your servers are processing the action, your user is wondering whether their click actually registered. They’re thinking about your UI. That’s the very opposite of what you want. The solution is to consider adding a button style for when the user has clicked, then another style or animation for when the submission has been made. At the very least, this shows that the user did, indeed, click. 
Better still, if the action is likely going to take a little while — consider actually telling the user what’s happening. If you can’t explain something adequately through design, then there’s no shame in literally spelling it out.
Of course, attention to detail can run deeper than basic styling. A good example is when it comes to uploading images (an action that takes considerable time). In the event where user interaction is predicted to last into the 2+ second range, you might be better off faking success than making your user wait. Use subtle animationI could talk for days about the importance of animation, and the role it plays in helping users understand an interface — fortunately there are already plenty of better resources out there. Instead, I’ll just touch on the importance of subtle, almost invisible animation. Take the following as an example; dragging an image to a folder doesn’t require feedback — it just works… but the user doesn’t know that. So a small animation that infers success is all it takes to alleviate uncertainty. 
Animation can also help to indicate context, and transition between views. Instead of abruptly moving between states, risking losing the focus of your user, animation can help indicate where things came from.
Remember… things… load…I recall reviewing the notes from a user testing session whilst working at Skype — where we had given people a drag-and-drop UI that saved ‘on drop’. It was so well-built, that the action of saving was almost instantaneous, and didn’t even require a loading state. It was so fast, in fact, that users had a total disbelief that their action was successful — ultimately causing more confusion and anxiety than necessary. The solution? Pretending that the product was “thinking”, by adding a loading spinner on event of a drop. Even though it wasn’t. That was a good use-case for a loading spinner. But most of the time, I see designers adding spinners, simply because they can. Most of the time, the user doesn’t need to be told that something is loading at all, and adding a spinning graphic is likely to command more attention than necessary. Take the following example — the image, which is dynamically generated (slow) then loaded via AJAX, isn’t the point of the page… the text is. In this case, animation replaces the need for spinners or delays. 
Optimize for contextWith any product that contains data, images or reporting — it’s likely that no screen is ever going to look the same. Yet when designing, we optimise for the best-case scenario, and often forget about when there’s no data, lots of data, or somewhere in-between. A good start is to ditch lorem ipsum, stock-quality images or perfectly rounded numbers in designs — and optimise for context instead. What does real data look like? By considering the various states of a UI, you can begin to get creative about how to design accordingly. For example, a group of images in Prevue will change configuration depending on how many there are — to make sure that no matter what, the users images always looks nice.
Being context-aware isn’t just about looking good, either. Situational context is about identifying when and where extra attention should be paid to seemingly straight-forward, commonplace UI. A modified version of Stripe’s Payment plugin using learnings from Brad Frost’s article
Take credit card forms for example — an area where extra care and attention can help users subconsciously understand what’s required of them, and prevent potential errors. They’re also a perfect example of the value of real-life testing — there’s so much anxiety involved in entering secure, financial details that you simply can’t appreciate it until you try for yourself. When building the credit card form for Prevue (above), I tested several live versions in an attempt to perfect the experience. Every time, my card was actually charged $10 — which was a great incentive to get it right. Context is key in a situation like this, and even the tiniest details can help users understand what they’re doing. For example:
By considering what content might be displayed, the circumstances in which a task might be undertaken, or the feeling of the user at the time — you’ll be able to balance what looks best with what works best. Respect native functionalityYour product should respect the functionality of the platform in which it lives — which means it definitely shouldn’t alter native functionality, like ‘hijacking’ your scrollbar, and should ideally complement existing user experience patterns. For example, some people are used to using keyboard commands to perform common actions. So if your product allows the user to perform a potentially disruptive action (like moving content around, or deleting lots of text) — then you should strongly consider allowing Ctrl+Z functionality to ‘Undo’. The same applies for saving (Ctrl+S), pressing ESC to dismiss a modal window, or “clicking away” to close a dropdown or open menu. By preventing your user from performing an interaction they’re familiar with — you’re creating an unnecessary pause; a moment of uncertainty for them. There should also be no wrong way for a user to perform an action. For example, in both Prevue and Email Builder, users can upload an image by pressing the “upload” button — but if dragging a handful of images directly into the browser is what someone is used to; both products are built to allow for that too. Building two or three different ways to perform the exact same action seems like unnecessary complexity, especially if you don’t even tell users that functionality exists. But when users are able to use your product how theywant; you end up creating a seamless and fluid experience that people feel comfortable using. It’s why iPad’s were designed to emulate the familiar actions of leafing through a magazine’s pages. Set the toneThe final, and arguably easiest detail to implement, is tone of voice. In the midsts of designing tough UI and writing functional documentation — it’s easy to forget that you’re building a product for real people. Forgetting to add a human touch to your copywriting can result in error messages reading as though they’re composed by robots — reminding users that they’re dealing with a faceless machine, right at the moment they need the most guidance. Dave Greiner gave me some good advice about copywriting: Read your copy aloud, and imagine you’re talking to your user face-to-face It’s great advice for two reasons; firstly because you quickly spot when your message becomes unnecessarily lengthy, impersonal, or even rude. And secondly, because reading your message aloud will inform you when being overtly personal isn’t appropriate for the context either. Take the following as an example of the latter — where I got the tone and context completely wrong for an error message: 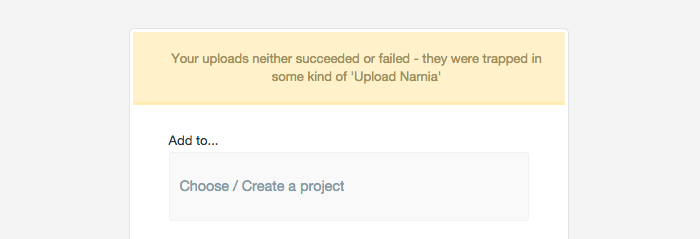
In an attempt to be disarming and human, I wrote the above message to be displayed on the rare occasion when uploads failed due to server error. What I didn’t consider was context. At a point when the user had waited patiently for their upload to process, the app responded with an unhelpful and unapologetic response. If I was a user on my way to a client presentation, or up against a deadline, this would be less than ideal. This has fortunately been fixed, but not before I received a justifiably angry email from a customer. Of course there are also occasions when you can have fun, and where a bit of personality can add value to an otherwise boring user experience. Like on the Prevue signup, where submitting the form without entering any details will return this message: 
The details are the last 1% of a product. They’re hard to define, they’re impossible to scope, and they’re absolutely no substitute to thorough research, great design and clever engineering. They can, however, be the difference between an average experience and a great one. The details will help your product feel natural, fun, intuitive, and even make your users feel smart. It’s in the small things, that easy-to-forget 1%, where you’ll find the key to making people fall in love your product. In the details -- that’s where you’ll find God. from http://www.designyourway.net/blog/user-experience/god-is-in-the-details/ Many websites rely almost completely on visual communication. Such enables users to navigate the website easily without unnecessary complications and delays. Attracting and maintaining attention may be challenging, but it is not impossible. In fact, employing icons can be an excellent mean to achieve that-they look interesting and have a purpose at the same time. Why using icons in web design? It is because communication is the essential feature of design. Failing to communicate a message and to attract attention could mean that all of the quality information you offer would be in vain. As we know, users don’t read content in details-they scan the site and look for something that is worth of their attention. It is very likely they’ll skip writings and headings, and that they’ll jump straight to the best icons they’ll see. Not sure which icons to apply? Look around you! Icons are all around us as essential part of every interface we have-we find them as road signs, keyboards, tags, etc. Their main purpose is to help us interpret information and to understand easily why we should use them. The importance of web icons
Well-executed and beautiful icons look like tiny and cute images, but they are much more than that. They are extremely advantageous to every website because they attach visual cues to the essential elements of a website (headings, sections, buttons, etc) and they make the site/app look professional and sophisticated. Generally speaking, icons play the same role as paragraph breaks-what they do is to divide text in smaller, less intimidating parts. Well-organized text can be easily accessed and marked with icons, visually attractive and sustainable. Therefore, forget about plies of textual information and begin using icons!
As we already mentioned, users don’t read content, but glance on the site in order to find something visually interesting. Designers use icons to promote content, and they place them wherever considered necessary. On the long run, icons help the recognition of a website and they direct users towards the important parts of the content. The final result is excellent organization of content. Beautiful icons are crucial for web design, as they perform the role of content ‘breather’ and they ensure an intuitive workflow for your users. Icons help you avoid those situations where users click on a link and leave your site without paying attention to your attention. It is not enough to have good content-you have to make it accessible! Icons in the service of your web content
Icons shortly summarize the content of each website section. Both smaller and larger ones are equally powerful to attract attention. At the end of the day, icons can ensure bigger readability and better appeal for your website. Aim and placing
Icons play a welcoming role on the website-they attract users with a friendly and inviting tone, and they show that you took care even of the tiniest details. Therefore, be brave and use your creativity-icons can be placed on the headings, sidebars, lists, or whatever other part of your website. Use icons to explain your products
Well-executed icons are the perfect mean for displaying product lists. A small, interesting icon standing next to the product link can give users a pretty good idea of what you’re offering them. This is the shortcut to creating urgency, anxiety and great expectations. Soon after, a good icon can become the recognition symbol of a particular product (just as a logo would be). Use icons to attract attention
One of the main tasks of icons (the same as other pictures) is to kick boredom out of your websites. You can always add them to your attractive headlines and catchy content, and make the website more visually appealing. However, experienced designers know that icons are more than a decoration-they are a designer’s main tool for separating content and differing between functions. Determine your style
Style is not just about appearances, but also effectiveness and functionality. Even if you’re attempting to be original, choose effective icons, rather than unique ones. Have in mind that their purpose is to help the readability of your content, so make sure they match the style of the other parts of your website. It means that downloading a premade, fancy set of stock icons may not be enough. Icons can also be applied for services
As we already pointed out, icons make your website welcoming and your workflow intuitive. Even more-they show users that you care about them and that you’ve been thinking about every single detail. Therefore, you should relate each service you offer with a particular icon that will ‘ring a bell’ whenever your users see it. Furthermore, icons are worth thousands of words when it comes to finesse and professionalism. With or without text?
This is a very important question for every designer. The experienced among them know that the essential task is to ensure that users need to understand the meaning of every icon and to be able to differ them from each other. It is true-text can be a solution to this problem. A small heading next to the icon can help users interpret its meaning and to use it without second thoughts. However, you need to be careful and to balance between imagery and text, so consider using the proximity principle. Use icons for innovations in your features
You want users to familiarize with new, positive features on your website? There is no easier way to do it than to associate them with creative icons. In such way, users will feel attracted to check them out even without a clue of what they might find inside. The better the icon is, the less likely visitors are to overlook it. What does a well-executed icon mean?
There’s no narrow set of rules or guidelines for creating icons. The only common rule that ought to be respected is that icons are images which visualize the meaning of your items or direct users toward a particular action. Therefore, their success depends on whether users are able to understand them and whether your information is clearly highlighted. In order to achieve this, you need to keep your icons set consistent. As stylish as you want your icons to be, don’t overdo them. Apply details carefully and stick with the basic parts which clearly match your brand. Final thoughts
It is important not to underestimate the meaning of icons in web design. As small or modest icons may be, they play a crucial role and contribute essentially to the accessibility of your content. Icons are the items that are most capable of grabbing attention and helping users estimate what is really worth of reading. Icons inspire positive and welcoming feelings on your website and they make the workflow intuitive. In order not to overdo them, stick with the basic metaphors and don’t frustrate users with complicated images. Final remark: have in mind that the icons have to match the style of your website and the main features of your brand. If your icon set is specially created for the purpose, or you are uncertain whether people would understand it, attach a bit of descriptive text to the icon. Sometimes, a single word could be enough for a visitor to associate the icon with a particular action. However, don’t forget the proximity principle and take care of margins and sizes. The simpler your design is, the easier it will be to understand. from http://www.designyourway.net/blog/design/icons-in-web-design/ Illustrations and posters are generally liked by people but prints that also have clever illustrations are at least loved. They make you think about the subject and the satisfaction that the “Aha!” moment provides is really nice. The illustrations that you will see in this article are made by a single person called Tang Yau Hoong who is a really talented and creative illustrator. I’m happy to share with you the work that he has created cause designs like these shouldn’t be kept hidden. There are 41 posters in this article which, if you want, can actually be bought from his website. I’ve stated this in previous articles too, but I feel the need to say it again, having posters like these in your office is really cool and it will add color to your rooms, especially if you have a minimalist office. The Writer
Eco-Friendly
Picycle
Found Anything Yet?
Feather of Life
Pool of Light
Day vs Night
Neighborhood Irrigation
Sharpen Your Imagination
Patience Is The Companion Of Wisdom
Songbird
Panda Park
It Always Seems Impossible Until It’s Done
Journey to the City of No Horizon
Keep The Fun Going
Little Red Riding Hood
The Sound of Nature
The Sound of Nature: Piano
Reach For The Love
Sky Guitar
Always Remember That You Are Absolutely Unique, Just Like Everyone Else
Dawn
Light Painter
Hidden City
You Light Up My World
Gone With The Music
Love Is All Around
Home
Music Is My Life
Discover Yourself
It’s Not What You Look At That Matters, It’s What You See
Creativity Is Intelligence Having Fun
Brain vs Brawn
Moustacheville
Imagination Is The Beginning of Creation
Beware of Those Hands
Stay Hungry Stay Foolish
Eye On The City
Staring Through The Star
In Nostalgic Mood
Everything Will Be Okay
from http://www.designyourway.net/blog/inspiration/smart-and-creative-illustrations-collection-41-prints/ For everyone who has ever used some sort of note-taking tool, you have undoubtedly heard of Evernote. It has become the staple of anyone who has a lot of tasks to take care of as a busy professional, or a myriad of assignments as a student. Note taking can be very productive in our everyday life, especially for people who might forget things easily. There are multiple good reasons why Evernote is the first thing that springs to mind for many, such as the simplicity of creating the notes and tasks to do, as well as the ability to synchronize with different devices, thus giving you your notes wherever you are. You can even add multimedia notes such as photos or online articles to your notes, which is great. However, you will find that there are plenty of Evernote alternatives. It is certainly not the only tool you can use for this purpose, and some of the Evernote competitors offer more, some offer less, so you should do your research before committing to any one of them. However, there are plenty of times where an Evernote replacement is necessary, such as:
Dropbox Paper
This is another option that you can use both as a team notes taking app, or as a personal tool to boost your productivity. It is a collaboration app that rose from the ashes of Hackpad, a tool that Dropbox bought. It uses the shared space of Dropbox to keep everything together, from documents to ideas. The entire app looks like a minimalist, stylized version of Google’s Docs, and a great tool for teams to share ideas using comments or stickers. It’s excellent as a collaboration tool, since you can create task lists, where the tasks you put are assigned to either yourself, or other team members. It has a distraction-free user interface, which gives it a very simple look. You will find that the formatting toolbar is out of the way for an even simpler interface. Don’t let that confuse you, though, it is extremely useful and powerful once you get the hang of it. This is reinforced by the fact that you can add Google, YouTube, Dropbox and SoundCloud content to it – which is excellent support for multimedia content. There is revision control, for those times you need to take a look at your past edits, or the edits of someone else, which is excellent for a collaboration software. You can organize everything into folders which are either available to you only, or the people you’d invite for collaboration as well. You can also export any documents you or your team create in multiple formats. Microsoft OneNote
There are multiple reasons why you’d take OneNote as your Evernote alternative, but the main one is regarding how you use Evernote. If your main purpose is organizing your projects or using it as a multimedia pinboard, you will find that OneNote can be a very suitable replacement. It also comes bundled with Windows 10, as a part of Office, and you can download it for older editions if Windows 10 isn’t your cup of tea. You will also find mobile apps for iOS, Android, and even Windows Phone, which is a rarity these days, as well as a web app. The way OneNote works is by using your Microsoft account to sync your devices, and everything you save is stored on OneDrive. However, ever since Microsoft capped the standard OneDrive limit to 5 gigabytes, down from 15, this is something you should be careful about if you have plenty of multimedia files on your notes. OneNote can give you everything that any decent Evernote alternative should provide – notebooks to organize everything such as text, images, links etc., but it also has a few things that, for some, might make it better than Evernote. There’s the ability to record audio, import data from other apps within the Microsoft Office suite, and even e-mail content to a notebook, which is very useful if you’re working on a small smartphone screen. You could install extensions such as Office Lens, which is a mobile app that lets you capture documents or whiteboards and turn it into a very clear, visible image of whatever you captured, or even an editable document, and save them in a notebook of your choosing. There’s also OneNote Web Clipper, which lets you capture and save parts of web pages you visit, and it’s available as an extension. Simplenote
This is another one in the list of apps like Evernote, and it prides on having a user interface that everyone can get used to in a matter of seconds. However, one major downside is that it only supports text-based notes, and no multimedia attachments. You can, however, share notes, synchronize them with devices on a variety of platforms (albeit only through third-party software), back up your notes etc. It is also worth noting that the app that makes Simplenote is Automattic, which might sound familiar to some – it is the company that made WordPress. The main reason why this is a viable alternative to Evernote is the fact that this is a very simple app, and, honestly, not everyone needs something as big and complex as Evernote. Google Keep
Google Keep is Google’s in-house way of note taking, and it keeps the minimalism as its theme throughout the entire app. It comes with a grid-based arrangement you can get used to in a matter of seconds, and it has a lot of useful features. Some of them include color-coding your notes, adding reminders within notes that can be read by Google Now, transcribed voice notes, list-based notes, OCR for images, and integration with Android Wear. You will find plenty of reasons to choose Google Keep instead of Evernote, but the main ones are usually the sheer simplicity of using the app and the ability to integrate with other services from Google’s ecosystem, which makes sense, especially for those who are invested in this ecosystem. LeaNote
This is a lightweight app that you can either get as free code on GitHub, or pay and get as an app from their website. It offers a lot of services and tools for note taking and blogging, and the concept is very simple. Whatever you need, you use note to save it as a personal thing, and if you want to share it, simply publish it to the blog. DEVONthink
This is another one in the long list of alternatives to Evernote, but it is more of a personal assistant than a simple note-taking tool. It takes care of your bookmarks, notes, documents and other things, and it comes with different plans to suit your needs, such as DEVONthink To Go, or DEVONthink Pro Office etc. There are some excellent features such as AI-based processes and advanced search, as well as synchronization abilities that let you get all notes and documents on all your Macs, either via a local network or the internet, it is your choice. The key reason to opt for DEVONthink over Evernote is the amount of professional features that make it a better option for hardcore users. However, it is very limited with the fact that it doesn’t support many platforms. Together
Another minimal tool in the list, Together is a note-taking app for Mac devices. “A place to store your documents, sounds, web pages, images and bookmarks and be able to access them in a convenient way” is the description you will find for Together, and it uses iCloud to sync everything to your other devices. No matter what kind of content you need to save, you simply use drag and drop to place it in the window and you’re done. It has an incredible user interface and advanced features that make it a good alternative over Evernote, and even though it’s a paid solution, it is excellent if you’ve invested yourself in the Apple ecosystem. Cintanotes
This one is for Windows only – sorry Mac users. It comes as a portable app, meaning you don’t have to install it, but there is no online version, which is a major downside. A positive fact that is supposed to make up for this is the fact that you aren’t limited with the number of devices, just as long as you’re invested in the Microsoft ecosystem. You get three options, free, Pro and Lifetime Pro, which should cover the needs of users of various levels. The free version should be enough for anyone that’s only looking for a way to boost their productivity, as it comes with a straightforward way of clipping text, backing up notes, a search function, hotkeys you can customize, as well as three sections you can use to store your notes. The design is simple and well-made, which makes it feel like it was built into Windows, and not an app you need to install additionally. The notes you create are actually being synchronized via Simplenote, which is mentioned above, so you might want to take a look at both and see which one suits your needs and requirements best. Box Notes
This is an option that is often ignored, but it is taking away big chunks of the market from its competitors. It gives you more storage than Dropbox, offering 10GB for free, it adds document collaboration in real time, and it comes with a minimal text editor with options for formatting. You can share notes with full editing privileges, or read-only access, and you can add comments and annotations. There’s also the real-time changes option, where multiple people work on Box Notes at the same time. You will find support for revision control, as well as a number of tables and file types being supported by the app. Yojimbo
Yojimbo is another one in the list of Macintosh alternatives for Evernote. It accepts all types of input, such as text, PDF files, web clippings, multimedia files such as images etc., and it keeps all your data in one centralized place. What sets it apart from the others is the tab-based structure, which lets you select categories when you input your data, and the fact that you’re able to sync your Macs, as well as other iOS devices, via Wi-Fi. When closely compared to Evernote, Yojimbo is obviously lacking in features, but the ones that it has are focused on the professional market, and it gives a simple user interface that you can easily get used to. Google Docs
While Google Keep is simple and best used for note taking, Google Docs has a much wider use purpose. It is a general place where you can both create notes, and create advanced items such as presentations and spreadsheets, which you can later access from anywhere. It is available on Windows, macOS, Android, iOS as an app, and you can also access it as a web application. It offers collaboration features, which is great if you’re working with a team, and it comes from Google, which guarantees reliability. All in all, it is a perfectly viable Evernote alternative. Notezilla
Notezilla is a pretty feature-rich option, and it lets you take quick notes, similar to Sticky Notes, and then organize them in folders to avoid clutter. You can even stick the notes to documents, folders and website, and set reminders to each one. The Notezilla.Net cloud service is used to sync everything with other devices, and you can choose from a plethora of platforms, such as iOS, Android, and even Windows Phone and Blackberry. You will also find advanced features such as encryption, spell-check, linking folders and files, locking notes, etc., which are all things that might come in handy. Nimbus Note
This tool is great for having your most valuable information wherever you are – it lets you create notes, save screenshots and web pages, and a plethora of other things, and share everything with people of your choosing. It makes sure you never lose or forget anything valuable again. Memit
Memit is a one-click application that works as a social network, and its main purpose is to make people smarter. It uses the content they collect and publish to achieve this, and it’s a very easy way to collect and share things for yourself personally, or your team and/or business. Conclusion Even though there are plenty of options, you will find that the software or hardware is only a part of the equation – there’s a lot within the habits as well. This is why there are a lot of options, an all can accommodate different needs and different requirements. Therefore, you will be hard-pressed to find one single app that is better than all others, since someone might not like it that much. And, you can always choose more than one tool for your different needs, why not?
from http://www.designyourway.net/blog/resources/evernote-alternatives-14-competitors-to-use-instead/ |

AuthorPleasure to introduce myself I am Jamie 27 years old living in Searcy, AR. I am web developer and have developed over 50 sites for clients. Now a days I am focused on designing as I feel I am lacking it. Archives
April 2019
Categories |
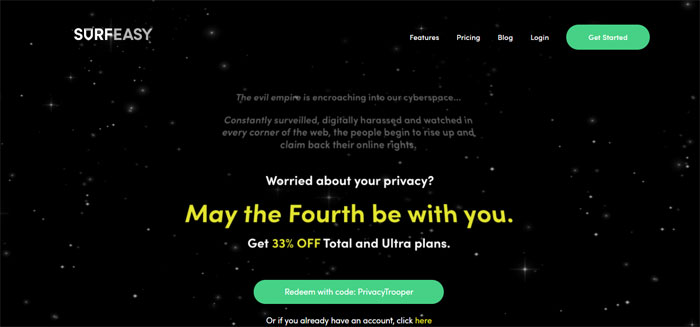

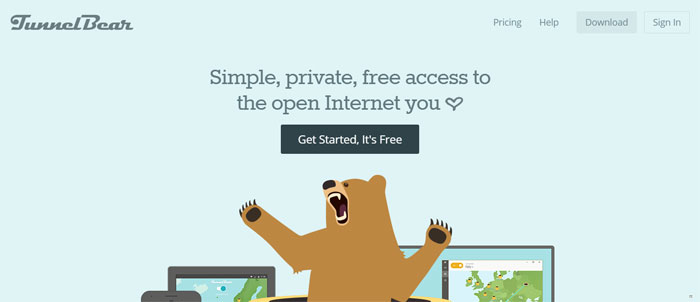

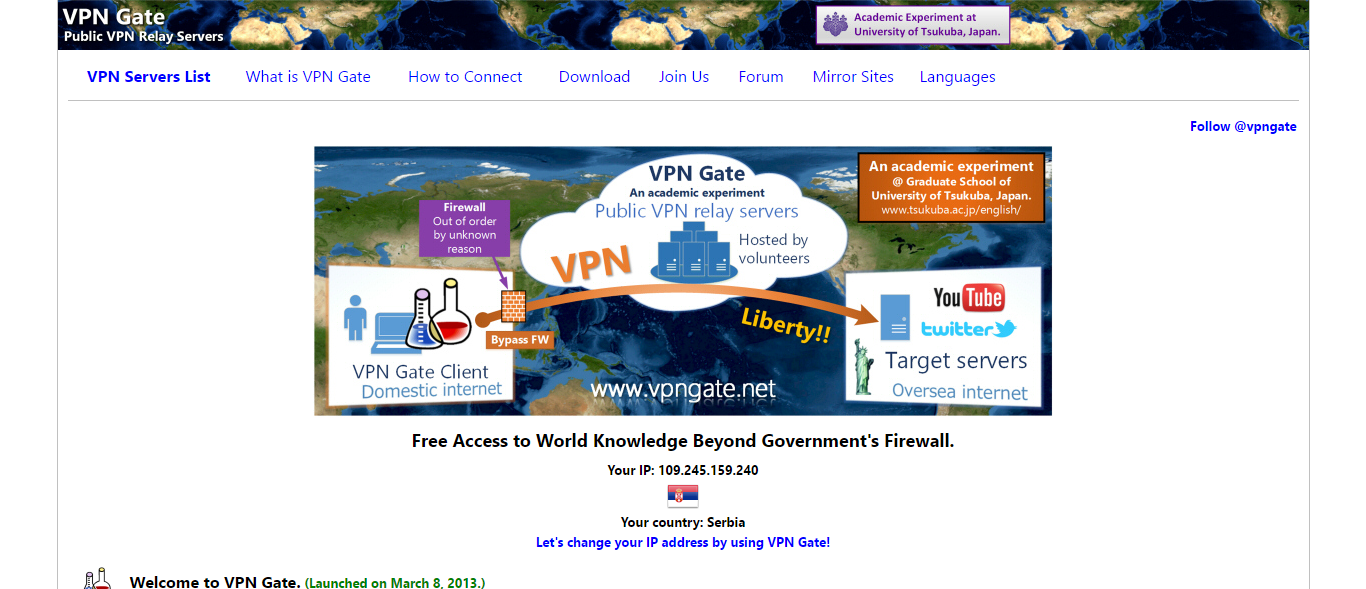
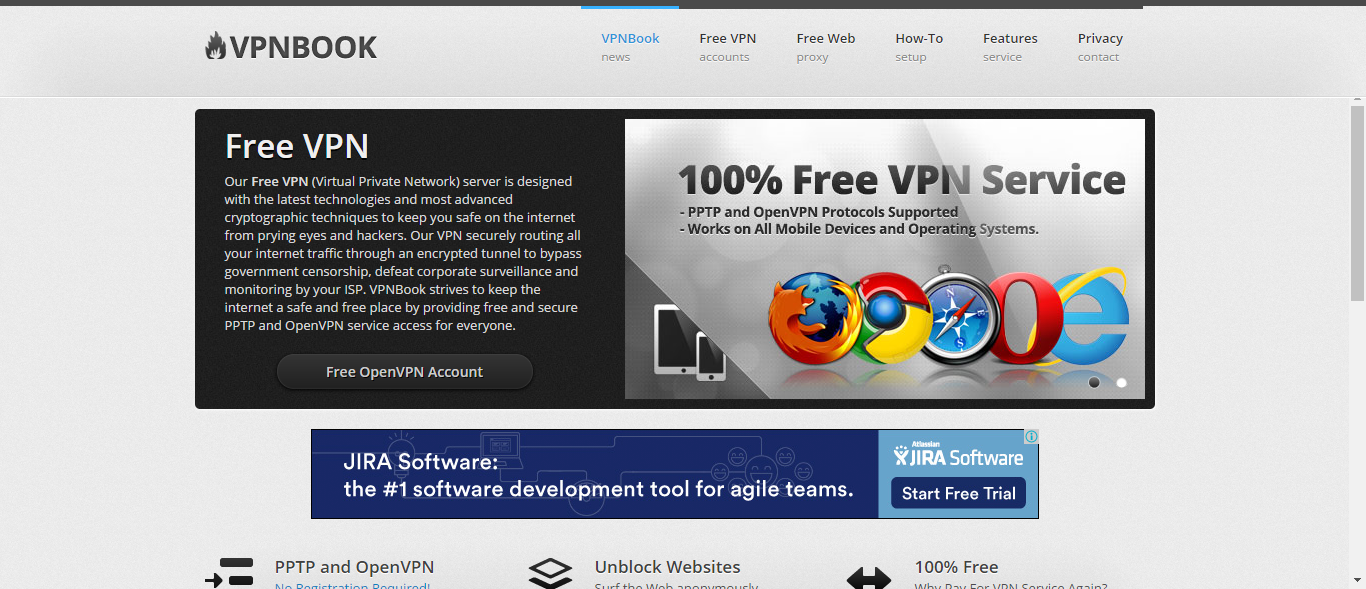
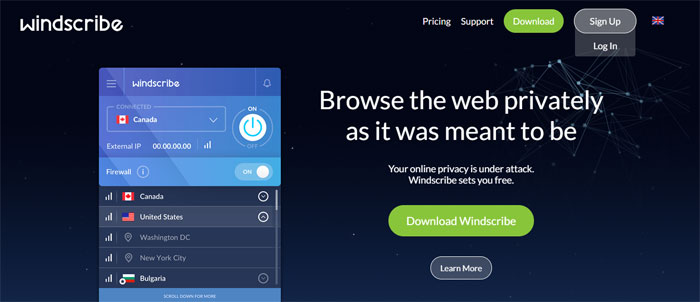

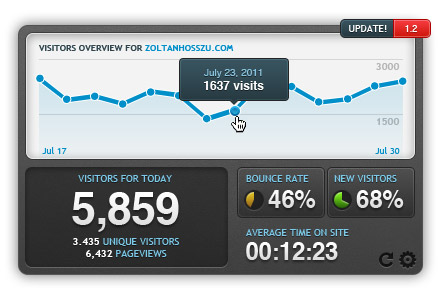
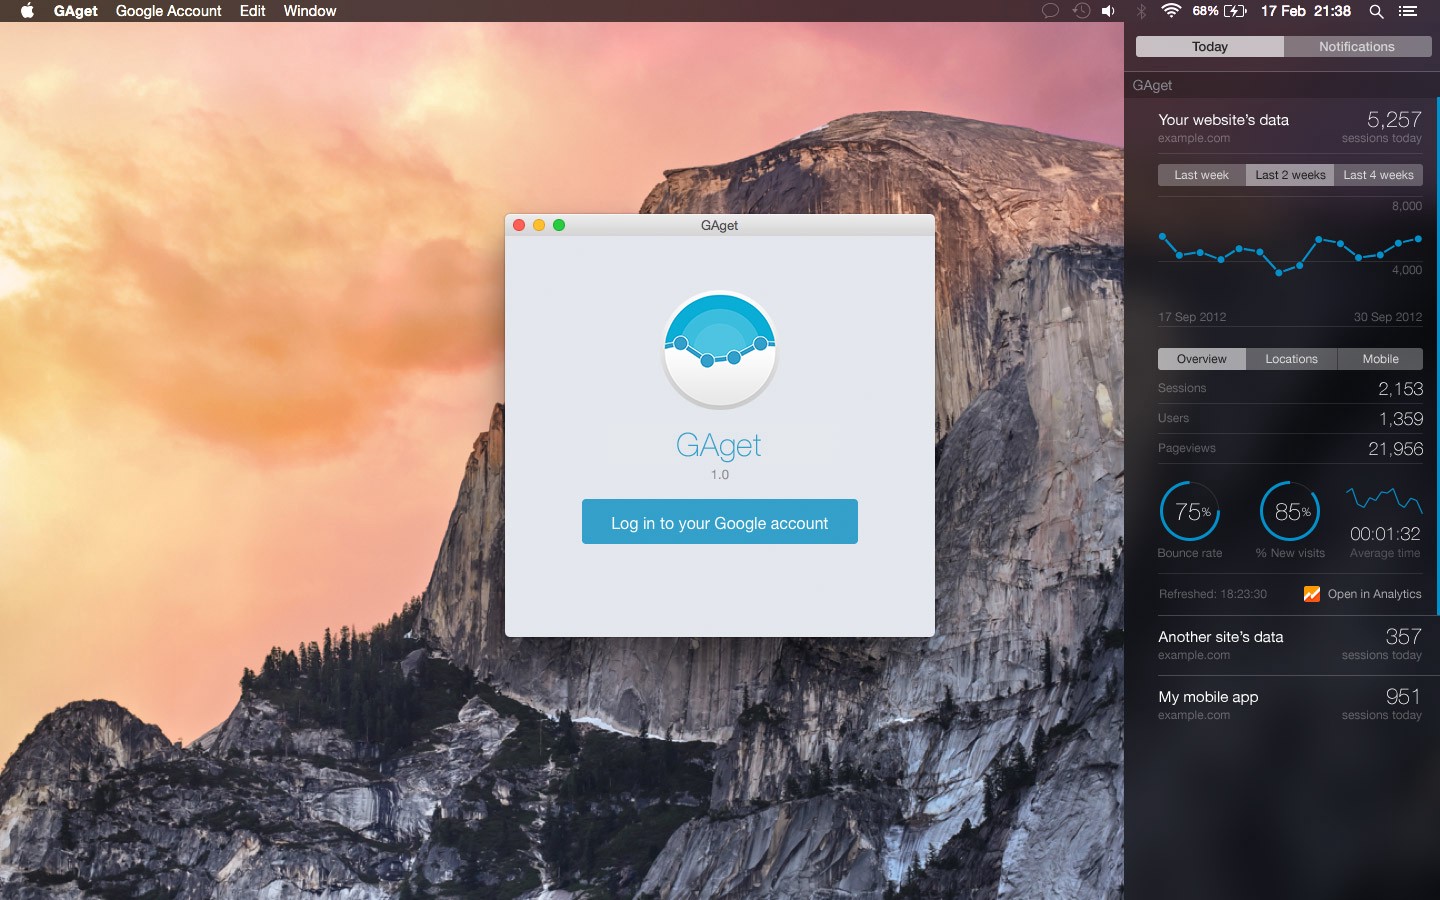
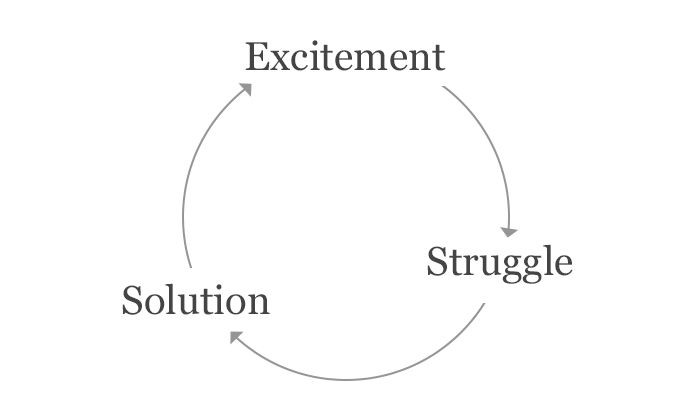

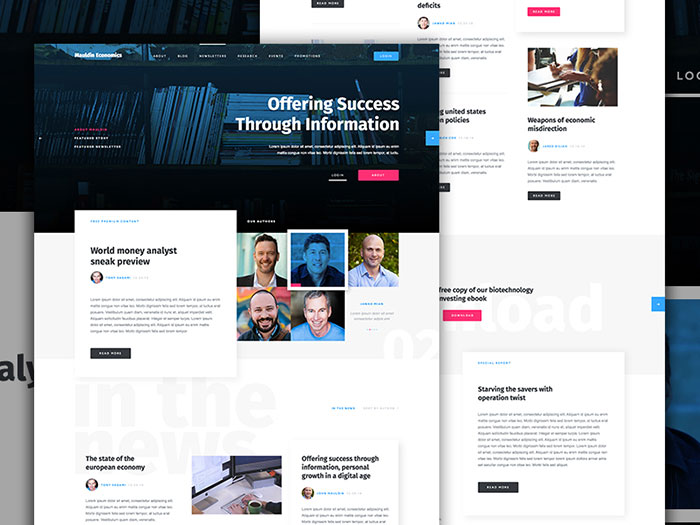
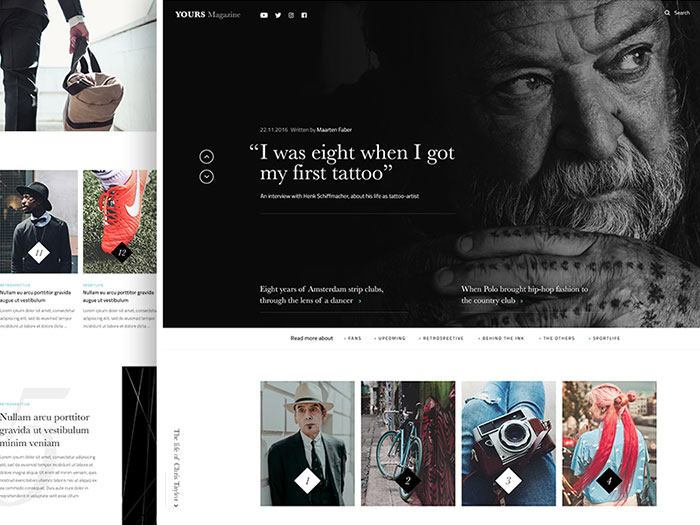


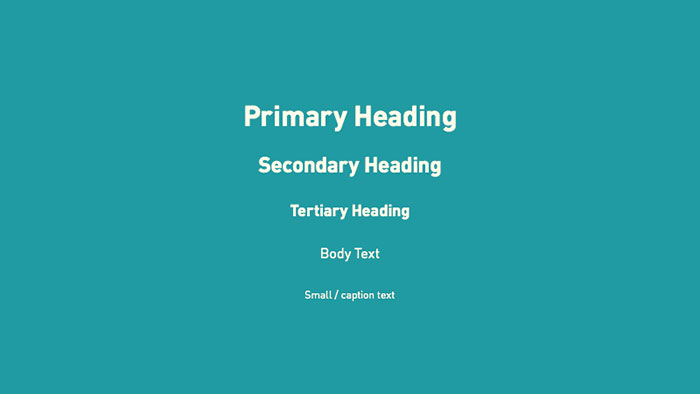
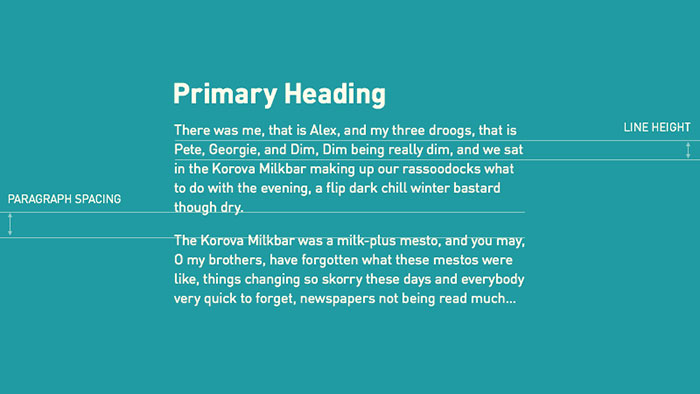
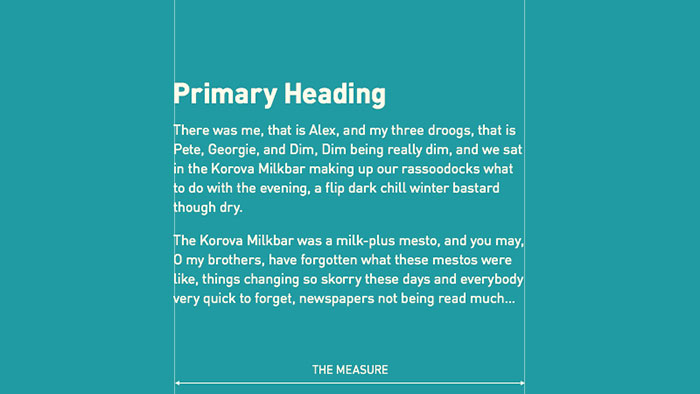


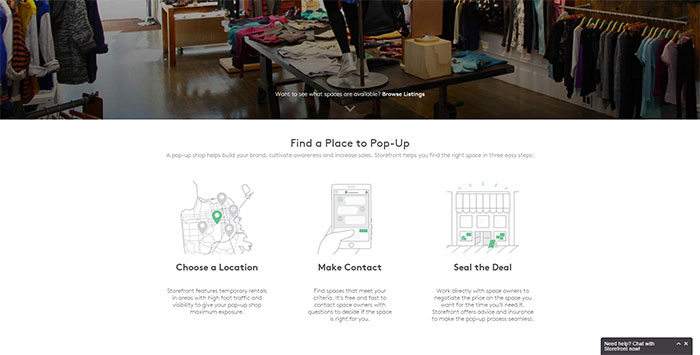
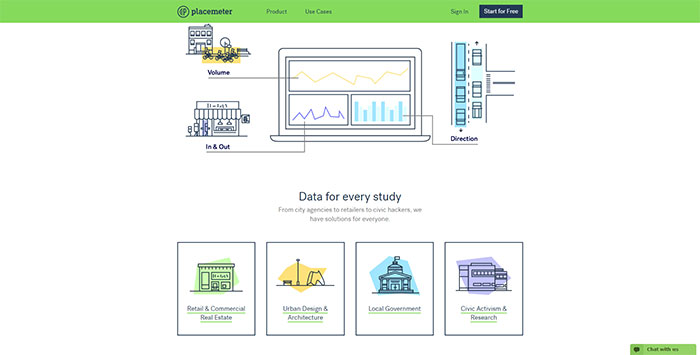

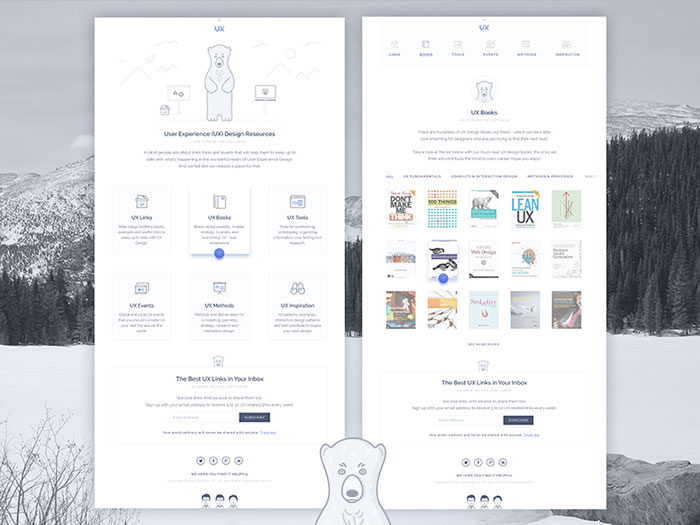


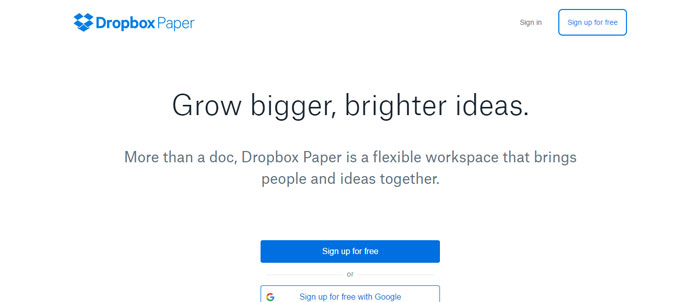
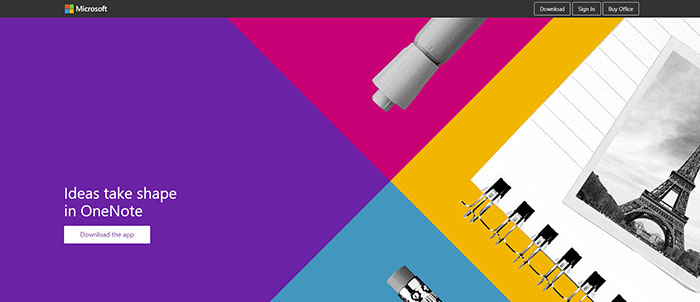
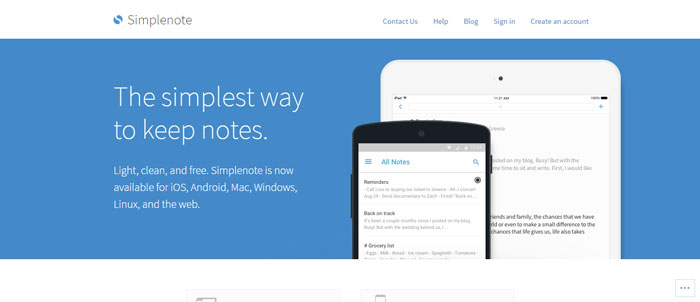
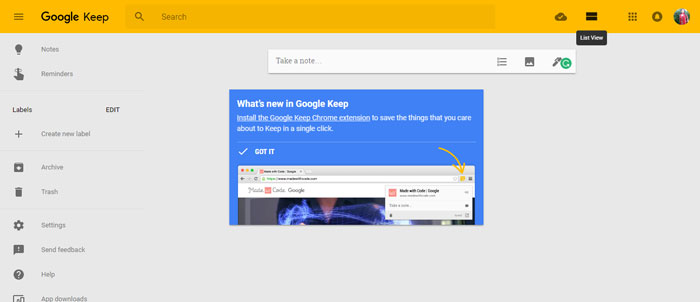
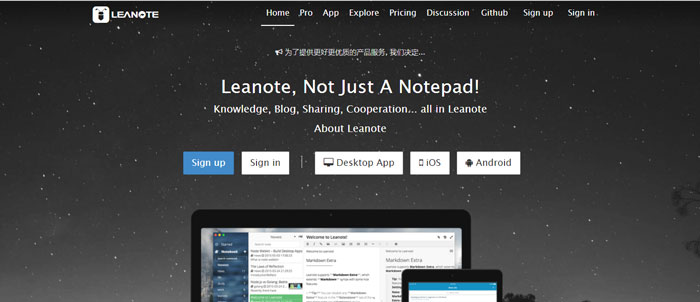
 RSS Feed
