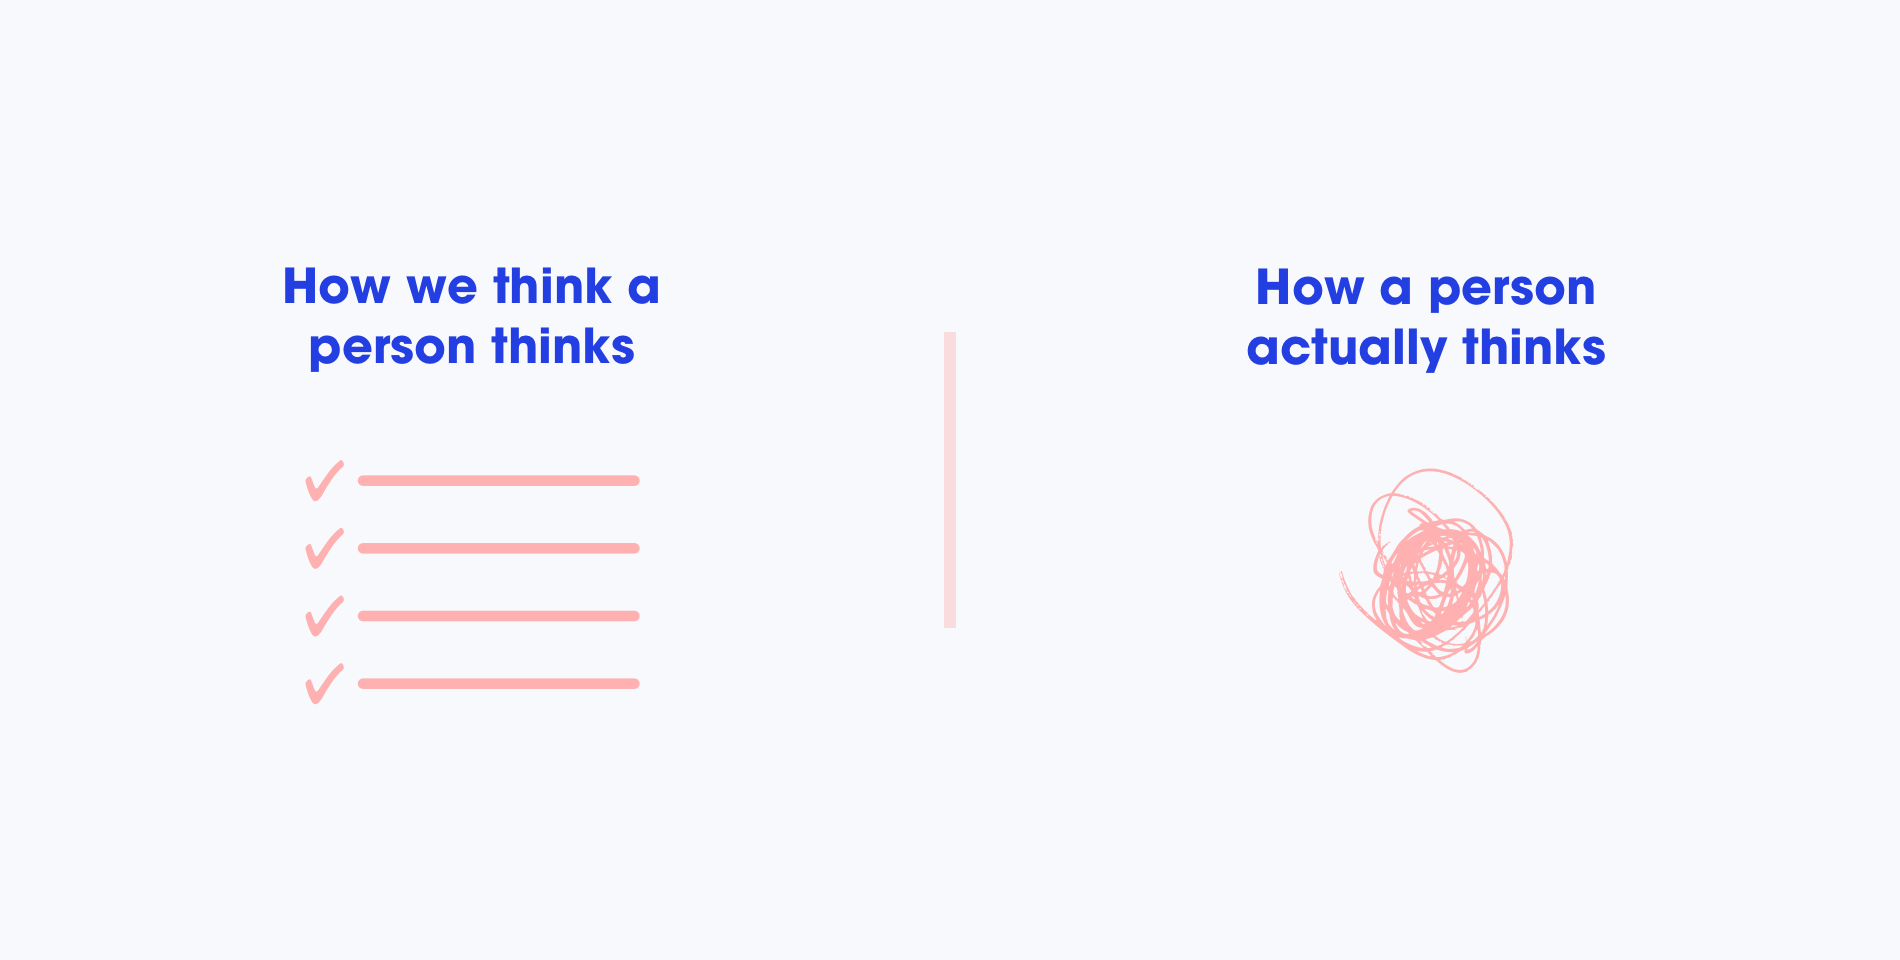
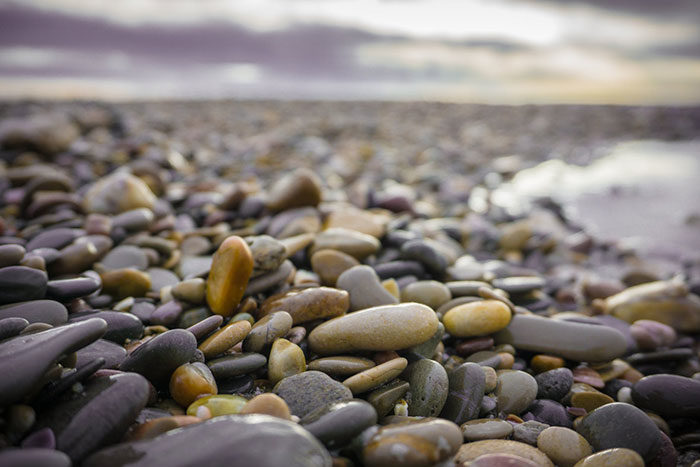
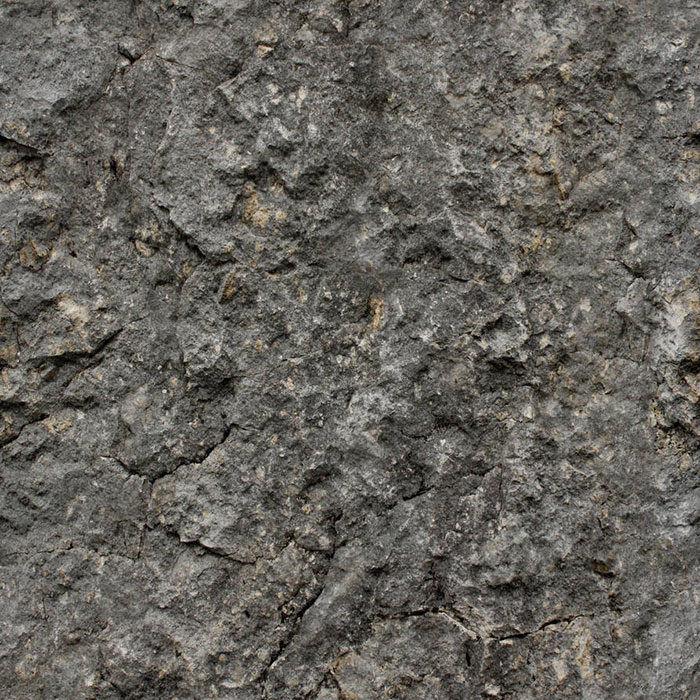
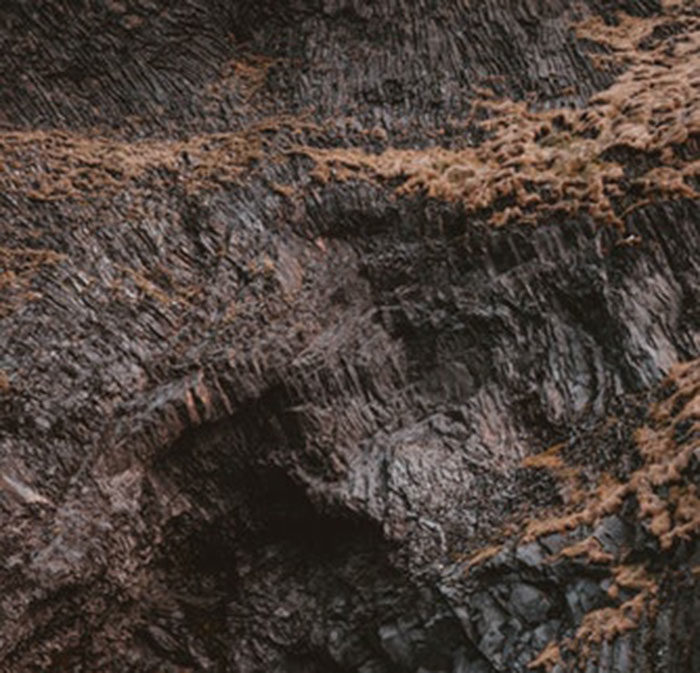
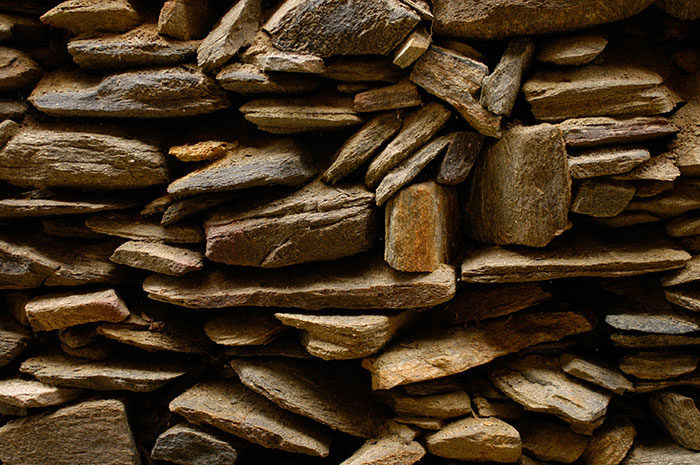
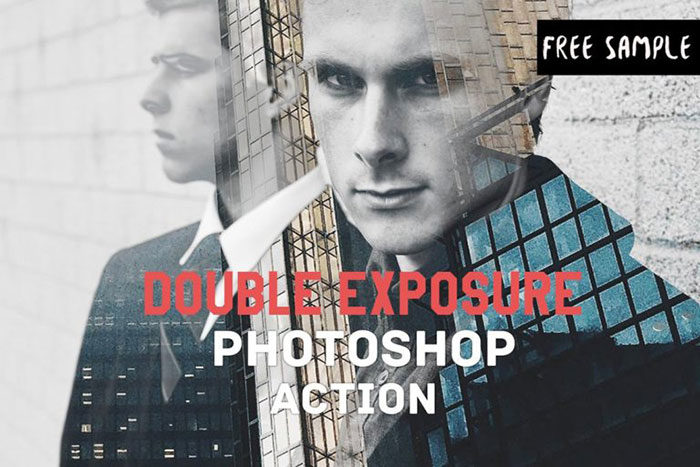
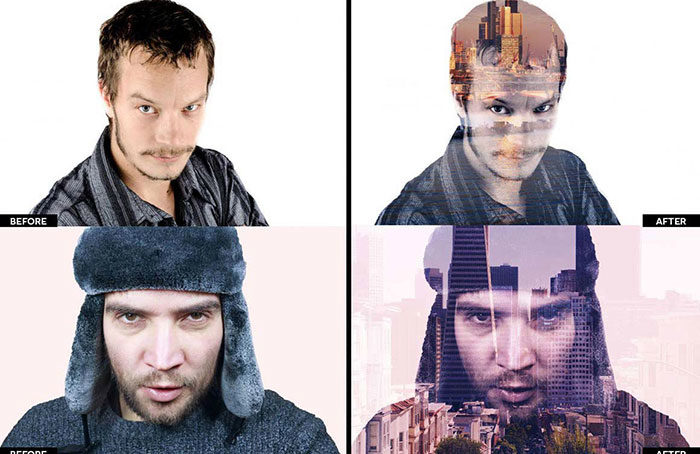
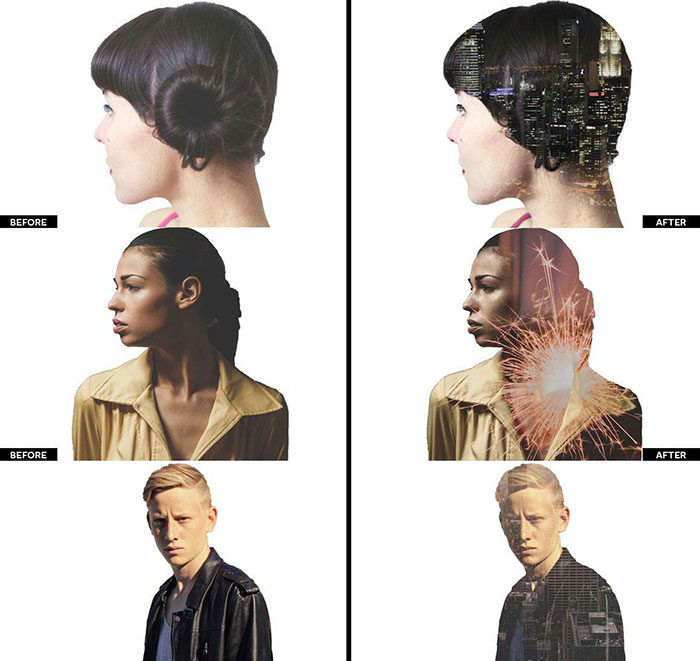
Double exposure Photoshop techniques are being used more and more frequently and lots of photographers use double exposure Photoshop actions to make them happen. From digital design to the print media, Photoshop double exposure techniques are becoming more and more frequent. In times gone by, photographers would use their cameras to create double exposure photo. This often meant combining an image in silhouette with another, fill photo. However, double exposure pictures are far easier to achieve and improve upon with the use of Photoshop. This is because with double exposure Photoshop images, designers have freedom to create a perfect edit. What are double exposure photos?Now that double exposure Photoshop images exist, does the overall meaning of a double exposure change? Well, the techniques have changed but the definition hasn’t. With a film camera, a photographer would take double exposure images by taking one image and then layering another over this. By not advancing the film, two images would overlap on the same piece of film. The result was often incredibly creative. Photoshop enables a designer to produce a double exposure effect with far more creative freedom. Although creating double exposure Photoshop images produces a highly effective result, you don’t need to be highly experienced in order to create a double exposure effect. Browse through our choice of great double exposure Photoshop actions. They will help you to create double exposure effects with your photos instantly. Free double exposure actionsFree Double Exposure Photoshop Actions V1
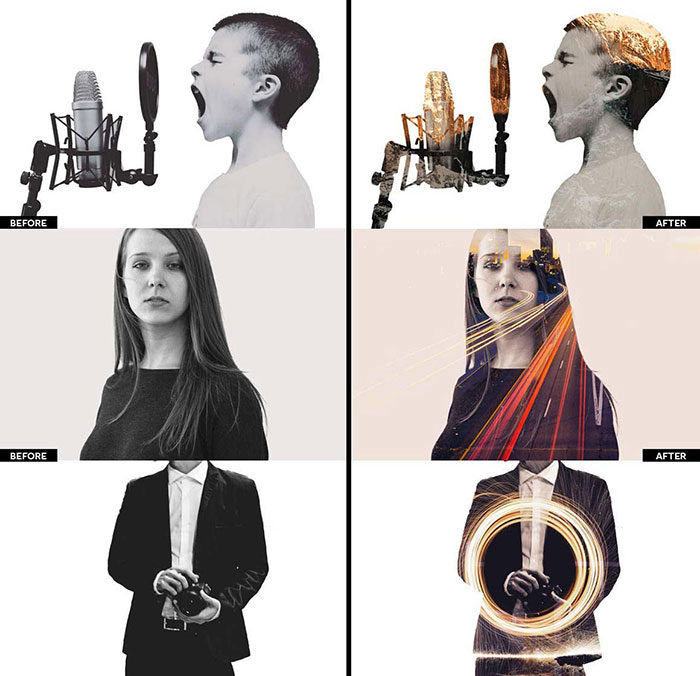
You will be able to create great double exposure Photoshop actions if you download this excellent bundle. You can explore different techniques for creating double exposures. You will also be able to adjust the intensity of your images with just a single click. This will provide you with great double exposure images in a short space of time. 3 Double Exposure Photoshop Actions
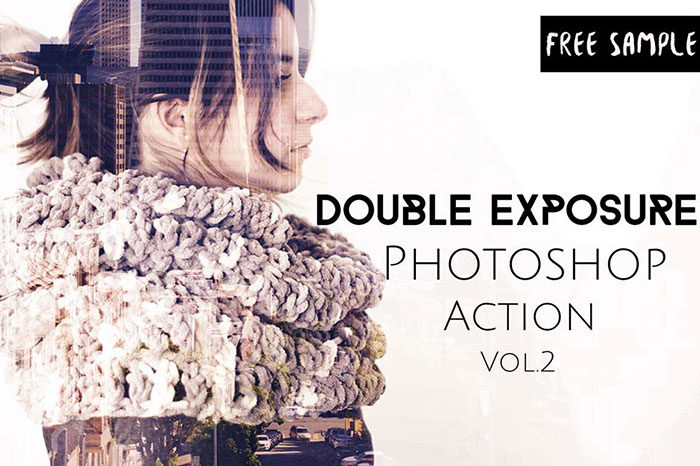
Do you want to create great double exposure pictures? This pack comes with not one double exposure action but 3. This will give you a choice in how to create double exposure effects. You will be able to adjust the intensity of your images while you use these excellent actions. Free Double Exposure Photoshop Actions Vol.2Would you like to use different techniques to create your Photoshop double exposure images? Would you like to do so quickly and efficiently? Create excellent digital double exposure images with this great package. All you will need to do is prepare your photos and the action will do the work for you. 2 Free Double Exposure EffectsHow about the opportunity to use different styles while creating double exposure effects? This double exposure Photoshop action download has 2 different effects. You will be able to choose between styles while customising your results to create your own unique designs. 3 Double Exposure Photoshop Actions
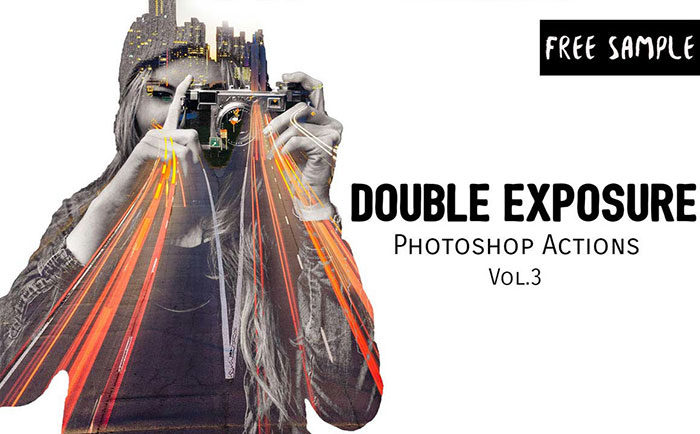
Would you like a double exposure Photoshop action package which gives you the choice of 3 different actions? You’ll be able to create gorgeous images as well as customise the colours included in your designs. Free Double Exposure Photoshop Actions Vol.3
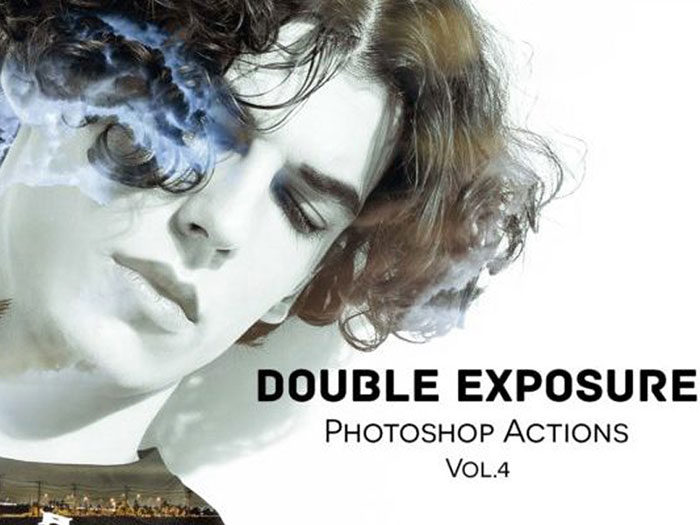
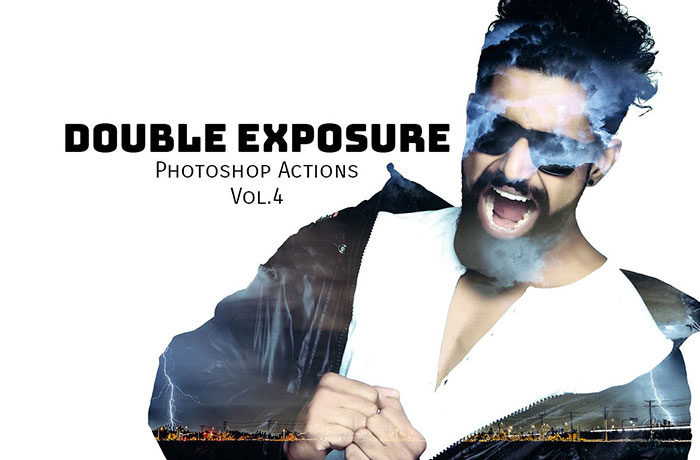
Looking for a free double exposure Photoshop action which will offer you the quality of a premium product? This is the choice for you. Create Photoshop portraits with a double exposure effect and enjoy excellent results. Free Double Exposure Effect Photoshop Actions Vol. 4
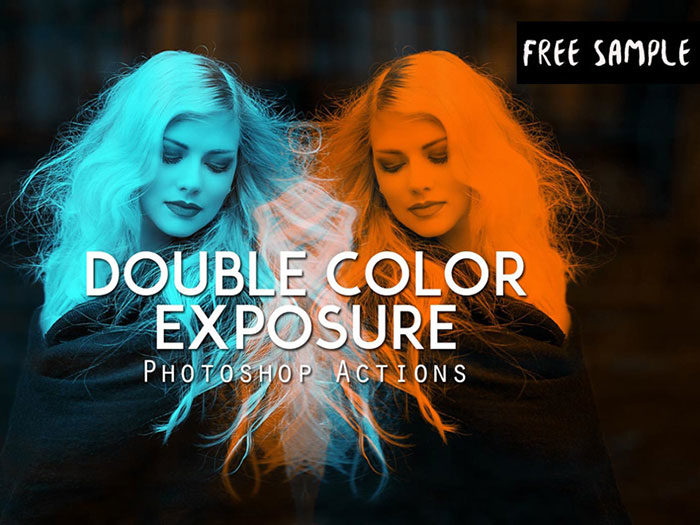
With two Photoshop actions to choose from while creating a double exposure effect, you will have twice the creativity. You can vary the intensity of your images with only a single click. You will also be able to create high quality canvas photos using this action. The result will be unique and innovative. What better way to achieve excellent results within a few seconds. Free Double Color Exposure Actions
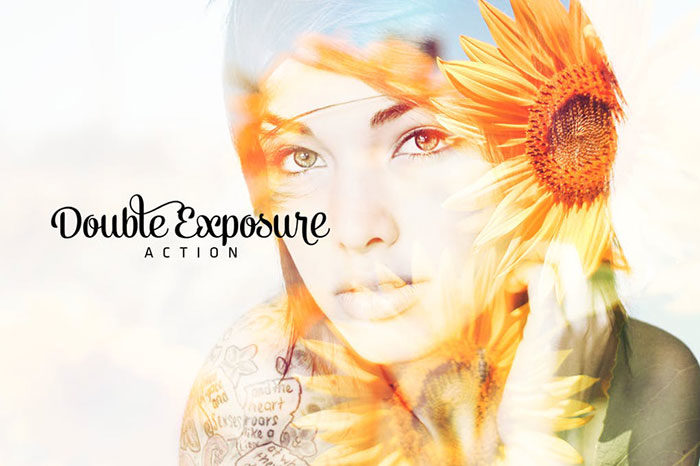
Create double exposure effects while adding mixed colours with this unique double exposure Photoshop action. This action is available for both personal and commercial use. Basic Double Exposure Photoshop Action
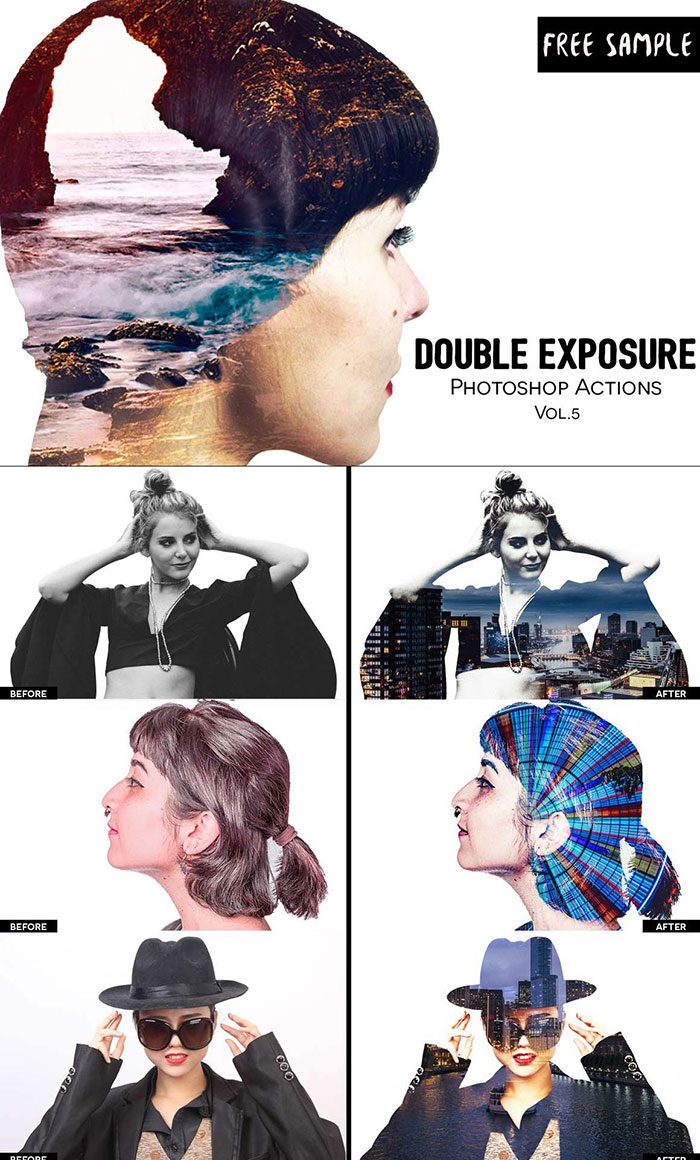
If you would like to create customised double exposure images which allow you to add in your own choice of effects, this double exposure Photoshop action is for you. Create unique results with only a few clicks. Free Double Exposure Photoshop Actions Vol.5If you would like to create double exposure images with just one click, this package is for you. You’ll get the choice of two different actions so that you can not only create an inspiring double exposure effect. You will also be able to customise your images to suit the design you are working on. Free Double Exposure Photoshop ActionWould you like to great double exposure images for book covers, magazines, posters or advertisements? You can add layers or make changes using this double exposure Photoshop action by adjusting the values until you get the image you want. This package is a favourite with photographers and graphic designers. Premium double exposure actionsSimple Double Exposure ActionWould you like an effective double exposure Photoshop action which is simple and easy to use? You will get four different variations of this action in order to create an original design with each and every double exposure. You will also be able to use this action with other Photoshop tools to increase the creativity and flexibility of your software. Newspaper Art Photoshop ActionThis Photoshop action was not created to produce double exposure pictures. However, it uses the same techniques. You can add shapes, letters or newspaper images to your photos. Your portraits or landscape images will have a unique and creative appeal when you use this product. Double Exposure Photoshop Action
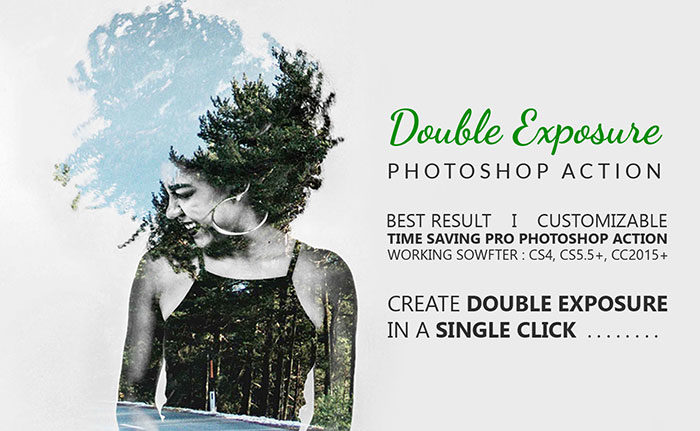
If you would like to create easy double exposure images with just a single click, this amazing package is for you. You’ll save time with this easy to use double exposure Photoshop action. You will be able to work with any different images, as well as erase any changes with a single click. You will be able to work in layers. You will also get a double exposure Photoshop tutorial to guide you. Double Exposure Actions With 230+ Effects
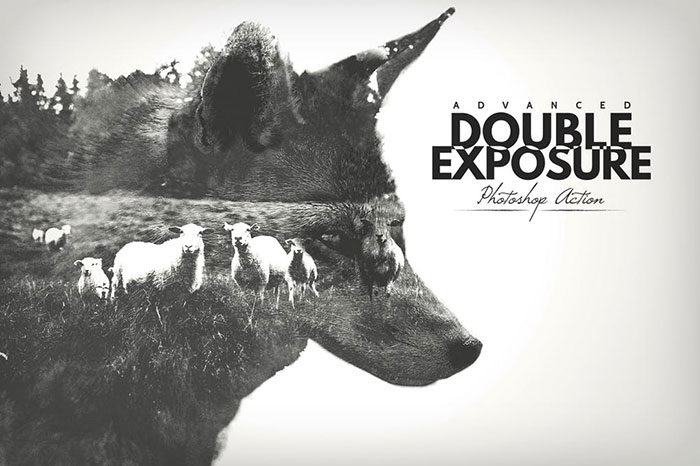
If you want to create double exposure images, this pack has two different Photoshop actions to choose from. One action will enable you to work with double exposure images, while the other will enable you to work on any single exposure photos. You will have 235 light effects to work with as well as 33 different textures. With these great effects your double exposure pictures will be highly original. Advanced Double Exposure – Photoshop ActionAs a premium double exposure Photoshop action, this product is easy to use. It will also give you a highly professional result. You will be able to choose from eighteen different colour presets. You will also be able to adjust the effects to create a customised and very unique double exposure image. Double Exposure Photoshop Action
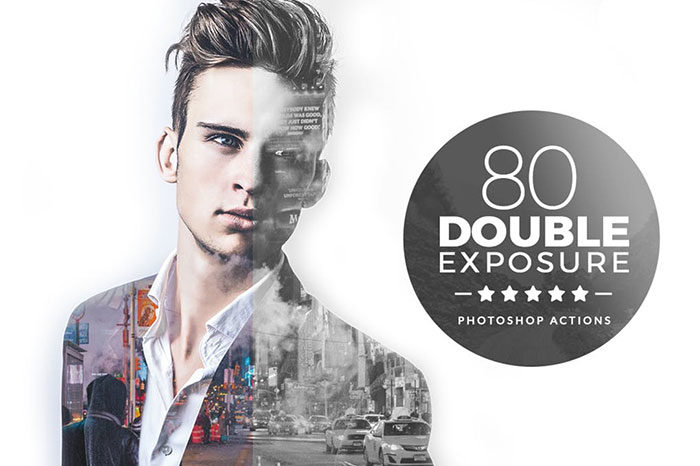
Customised double exposure Photoshop actions enable you to add a unique element to your design. Your designs will be highly personal and creative. With this package you will be able to create original double exposure images and the product will work with almost any Photoshop package. 80 Double Exposure Photoshop ActionsThis bundle of Photoshop actions will help you with great double exposure design. You’ll get 80 different presets to use to create a highly unique and visually attractive double exposure effect. You will also receive a double exposure photography tutorial to guide you on how to use the actions. Double Exposure Photoshop Kit
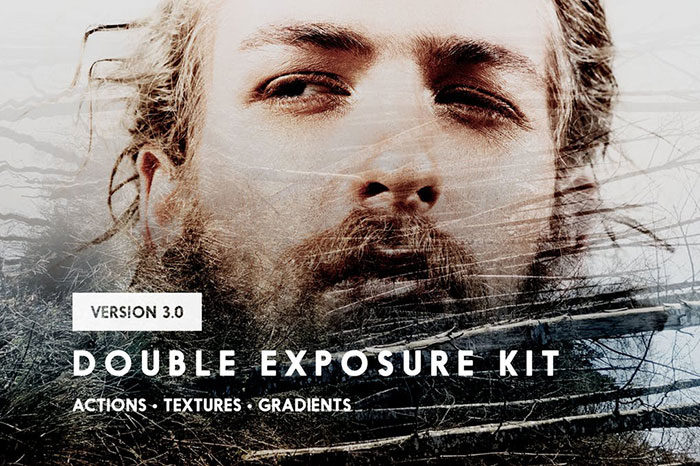
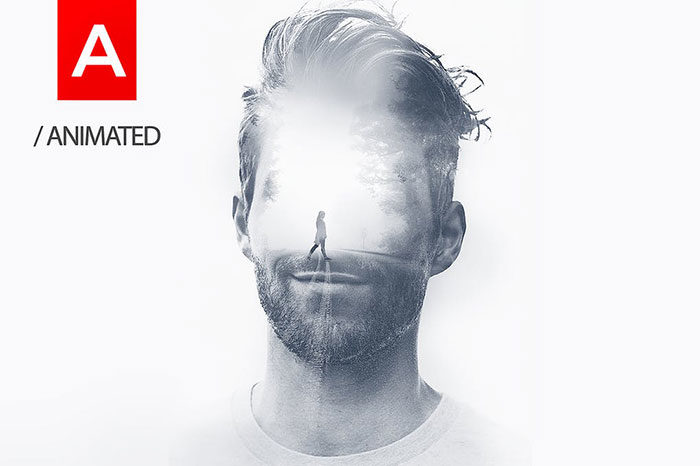
Would you like a unique package which will give you everything you need to create exciting double exposure images? You’ll get Photoshop actions, 30 textures and 10 gradients which will enable you to come up with original images. This is a complete package which will give you everything you need to create excellent double exposure images. Animated Double Exposure ActionDo you love GIFS or videos? Would you like to create one using double exposure images? If so, then this double exposure Photoshop action is for you. You will be able to use double exposure design on GIFS or videos. Use them on your social media sites or even as an introduction to your YouTube channel or videos. Instant Double Exposure Photoshop ActionIf you would like to save time by creating cool double exposure images with only a few clicks, this easy to use professional package is for you. You’ll find the program very easy to use and you can work with it in Photoshop CS3 and above to create great images. 4 Double Exposure Photoshop Actions
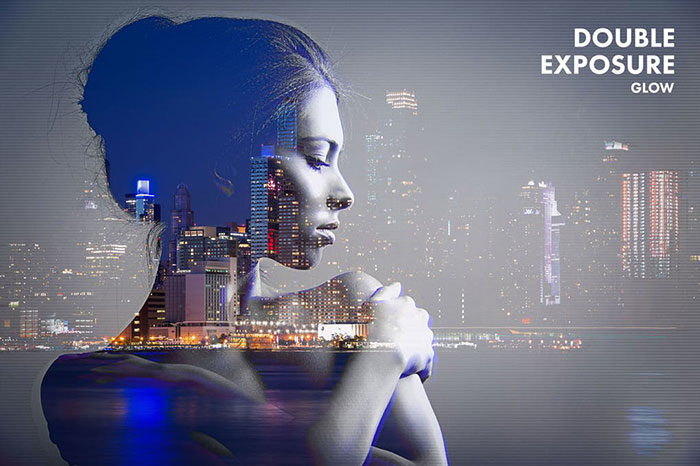
Would you like to create flexible double exposure images? This is a Photoshop actions package with four filters for a variety of double exposure picture effects. You can edit or customise your designs by working with different layers within the package. Double Exposure Glow Photoshop Action
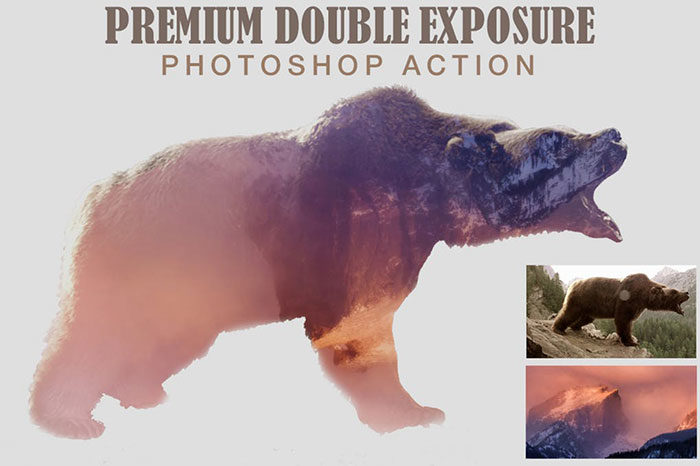
If you would like to create a blended double photo image which adds a glow to your final result, this is a great action to choose. You will be able to work quickly and efficiently, creating great double image pictures in a single click. You will also be able to customise your images using layers. Premium Double Exposure Photoshop Action
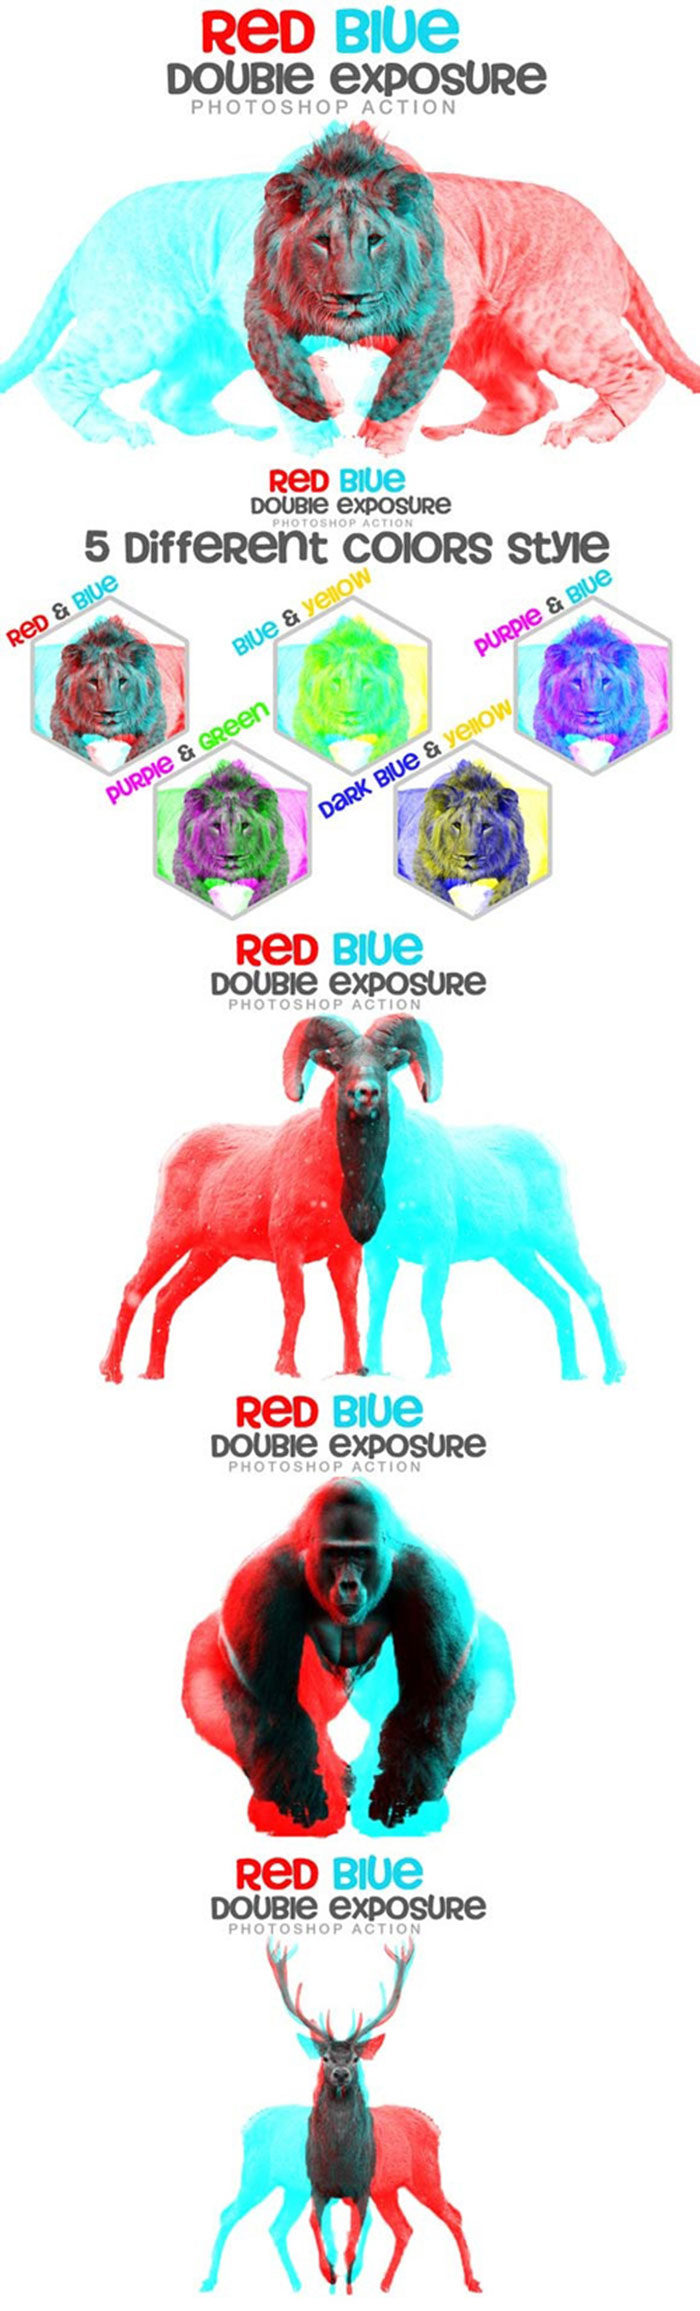
If you would like a simple and easy to use Photoshop action to create your double exposure pictures, you will find this one easy to use. The results are highly professional and this action works with Photoshop CS3 and up. Red Blue Double Exposure Photoshop Action
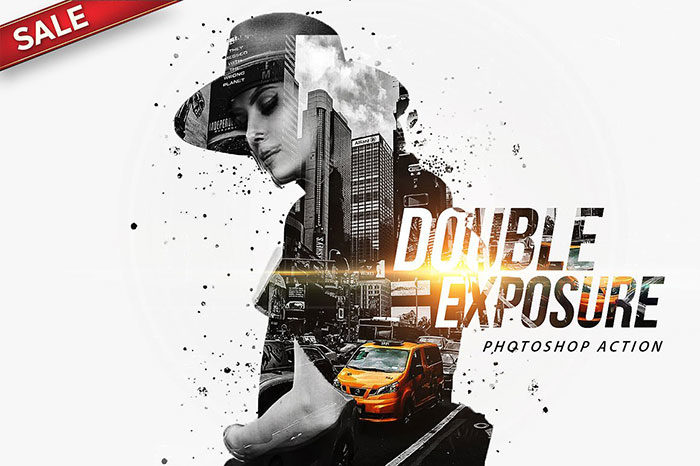
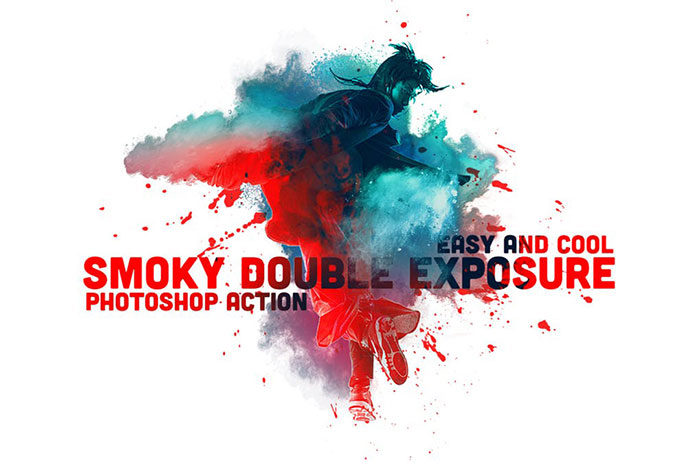
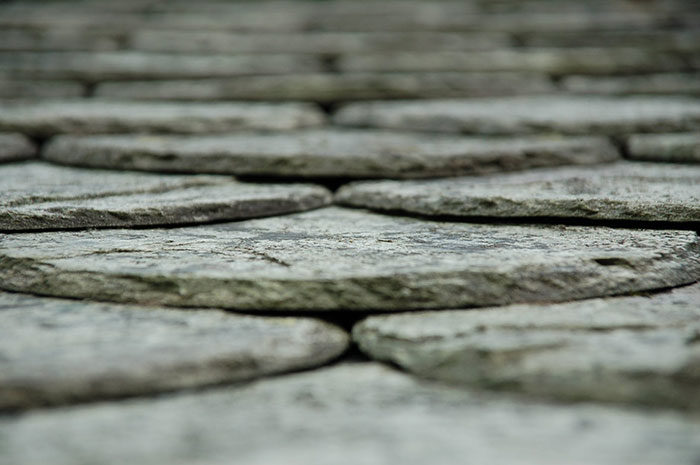
Create great double colour exposure images by combining red and blue to create a dramatic appeal. This action is great to use while designing book or album covers and posters. You can also use it for working on your digital design images. Smoky Double ExposureWould you like to turn two photos into a single image? Are you interested in adding textures or graphic images to your pictures? You will be able to use smoky graphics or textures to create exciting double exposure images with this great Photoshop action. Duotone Double Exposures
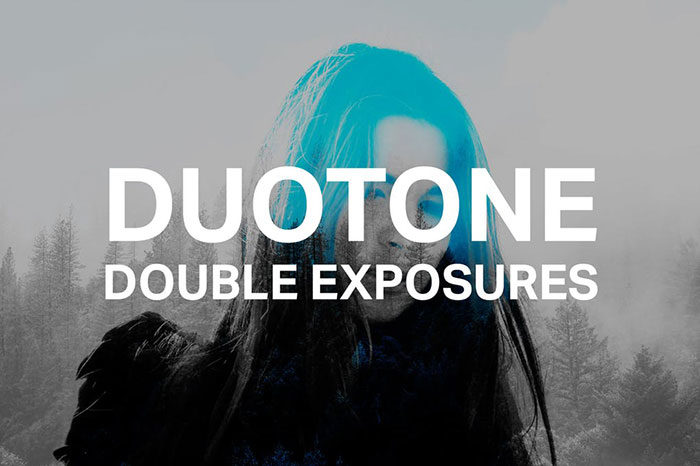
Duotones remind us of cartoon imagery from days gone by. Currently trending again, they make great additions to websites or print designs. This great Photoshop action helps you to create a great double exposure image using 12 different duotone options. What could be more perfect to add a retro element to your designs? Double Color Exposure
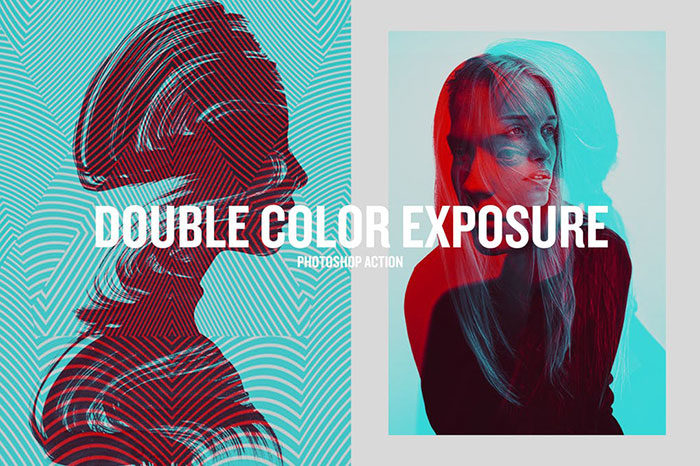
If you are into retro style designs, you’ll love this action. You’ll get a package which includes a duotone effect as well as 7 different colour styles. You will be able to use photographic images as well as shapes to add a trendy touch to your website or print designs. Simple Double Exposure Action
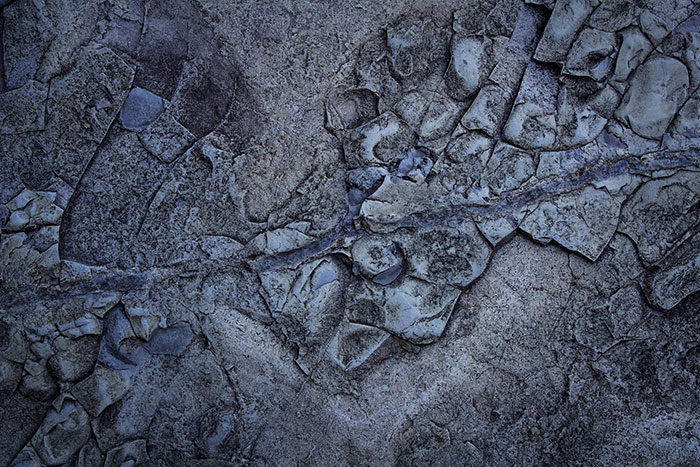
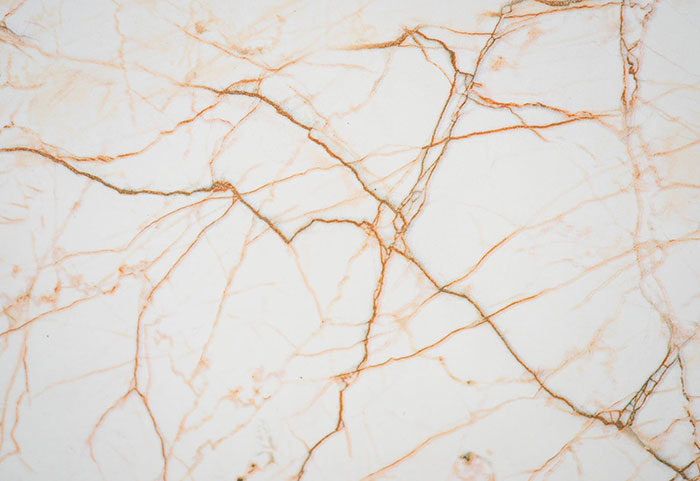
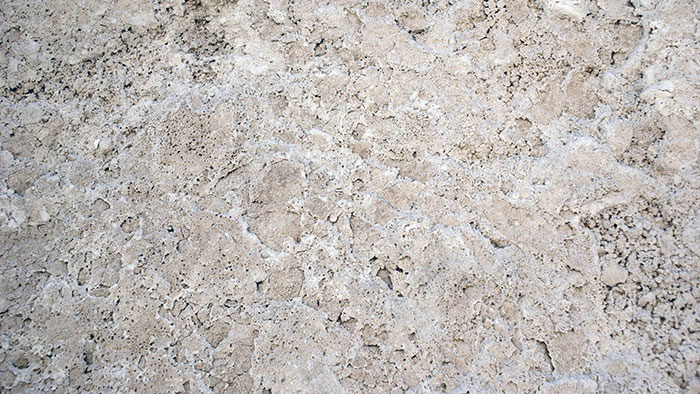
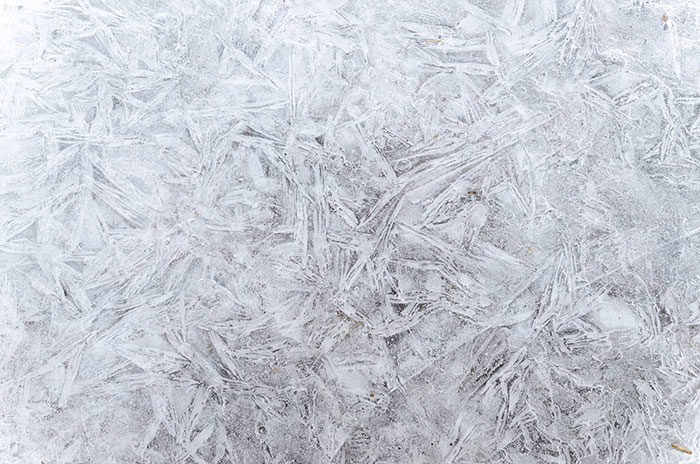
When you are busy working on your designs, you’ll long for a simple package which can create effective results. This double exposure Photoshop action will give you professional results while offering a range of different choices to select. You will also be able to combine this package with other Photoshop actions, increasing your flexibility as a designer. What can you do with your double exposure Photoshop actions?You can create a Tilt-Shift EffectYou don’t need expensive equipment to create a tilted appearance to your images. Photoshop offers you a great tool which will adjust your images, tilting them to create a unique perspective. You could also blur one background aspects of your photos while only focusing on important features. By keeping one important detail you will show your viewer where to focus. You can use this feature by going to Filter – Blur Gallery – Tilt-Shift. Add a Fake ReflectionHave you ever shot a photo through a window? Have you enjoyed the reflection? Incorporating reflections is a popular photographic choice. However, you don’t need to include a reflection in your original photographs. Instead, you can use double exposure to add a separate window, creating a reflected effect. By combining windows with different images of people, objects or animals you can create a dramatic impact. Create a collage using double exposure picturesA collage made up of two separate images is known as a diptych and they are deeply loved by those interested in creative photography. Double exposures help you to create interesting diptychs using creative editing techniques. First, begin with creating double exposure images. Once you are happy and have two choices which complement each other, you can use them to form a collage. This collage may tell stories about the photographs or might add visual appeal to your images. Place your images side by side to create an interesting story using a collection of double exposure images. Experiment with simple portraits and detailed texturesIf you have a clean portrait image and you would like to add to it, combine your images with textures. Cracked cement, sand, water, rocks or wood all make a great addition to a portrait photo. By combining simplicity and detail you will create a balanced effect. Convert your results to black and whiteBlack and white double exposure images create a massive emotional impact. Create emotionally expressive designs by experimenting with a lack of color. Start a themed project using double exposure picturesCreating a themed project takes a lot of time and effort, but the results can be very effective. Begin by choosing a theme. You could base your theme on events, memories, people, plants, a city or landscape or even a time of year. You can even use the colors within your photos to pick a theme. Then decide whether you would like to use light or dark images in your double exposure pictures. Keep your themes simple. Complex themes or images may take a lot of time and you may end up putting your project on hold. Find images which speak to you and a theme which will interest you and keep you feeling motivated. This way you will be willing to put in the time and effort you need to work out how to express yourself and use a wide range of images to create a great result. Ending thoughts on these double exposure Photoshop actionsThere are so many double exposure Photoshop actions you can use to create interesting and memorable design projects. Take the plunge and pick an action which suits you. By using Photoshop actions you will be able to add a new element to your design projects. This will take your work into a new level, where you can use double exposure images to entrance your viewers. If you enjoyed reading this article about these double exposure Photoshop actions, you should read these as well:
The post Double Exposure Photoshop Actions to Check Out appeared first on Design your way. from https://www.designyourway.net/blog/graphic-design/double-exposure-photoshop-actions/
0 Comments
MailChimp templates help you to create stellar emails for your email campaigns. Email marketing is a new way of carrying on a conversation with your customers. By using emails, you will help your customers learn about new products as well as continue to communicate the meaning behind your brand. Although your email campaign will benefit from shaping conversations with your clients, you will also need to send out attractive emails which have visual impact. A MailChimp template can help you to achieve these goals. You can use MailChimp newsletter templates as blueprints for your emails. MailChimp templates use HTML to create excellent email layouts which will help you to communicate your brand. Even better, with MailChimp templates, you have a choice of designs.
Here are the free MailChimp templatesMarseille
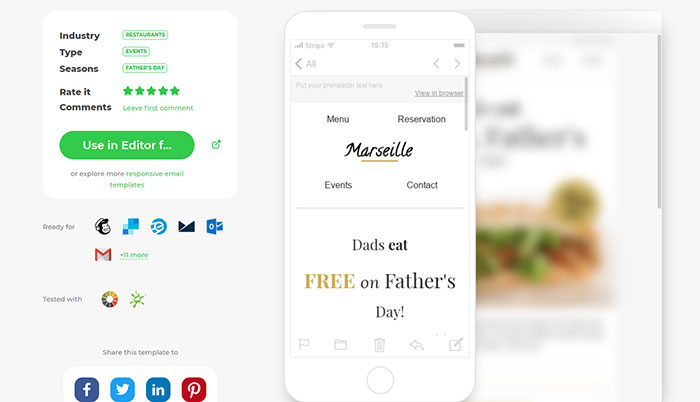
Marseille is a MailChimp template designed exclusively for restaurants. As people are searching or booking restaurants online now, it is a great idea to come up with an online marketing strategy for your restaurant. Websites, as well as email communication, help you to stay in touch with your customers. You can use this Mail Chimp template to share your special offers as well as promotions you may be running. This great MailChimp template has large text which will help you to highlight your important information. You will also be able to insert images of delicious food. Customers can click to find out more information. An interactive map will show new clients your location. This is one of the best MailChimp templates for tempting your clients and then showing them where to find you. Green VillageGreen Village is a MailChimp example with a hipster style feel. This template will enable you to send out highly professional emails. A large header space enables you to add quotes. You will be able to add images in order to show your latest updates. Importantly, a footer note at the bottom will enable you to show your address as well as add social media links so that your followers can find you online. This is a great MailChimp template for sharing your latest news with clients. Responsive Email
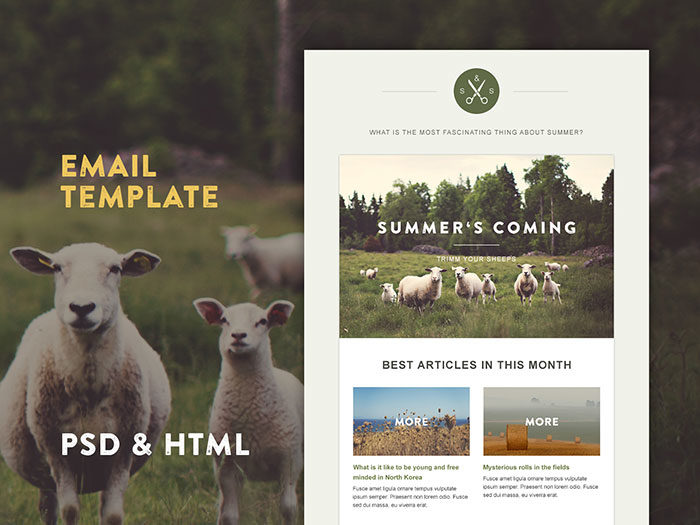
With so many people using mobile devices at the moment, a responsive email is always a great choice. Choose a responsive MailChimp template in order to share your latest news. You’ll be able to add links directing your readers to a certain page, should they wish to find out more information. All you need to do is download this template and load it onto MailChimp. If you are an experienced web designer or developer, you will also be able to customize this design. SummerIf you’re looking for a lighthearted and bright MailChimp template, you’ll love Summer. Summer comes from Mail on Acid in collaboration with MailNinja. This is a MailChimp template which offers up content sections, backgrounds and buttons. You’ll also get a hidden pre-header. This template is easy to download and display. It’s also one of the MailChimp templates with is responsive, making it a great choice as mobile devices and tablets become increasingly popular. Foundation for Emails 2
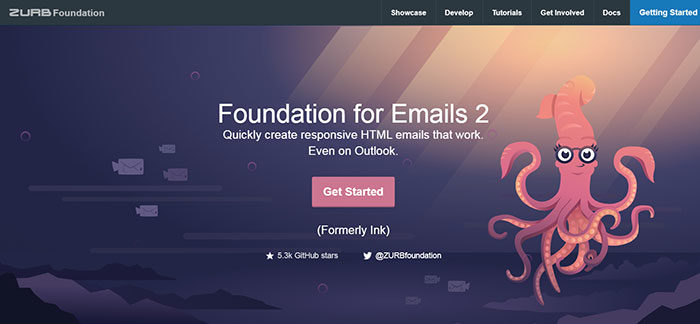
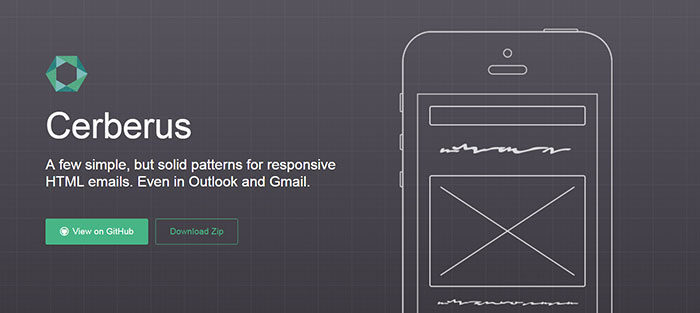
Foundation Emails offer great MailChimp templates which can be designed to your unique needs. Whether you’re looking to promote your latest products or create great a communicative message, you’ll be able to customize these tools, designing precise emails that offer exactly what you need. You’ll be able to select from a choice of layouts which will give you a professional looking MailChimp template which communicates your brand. Cerberus
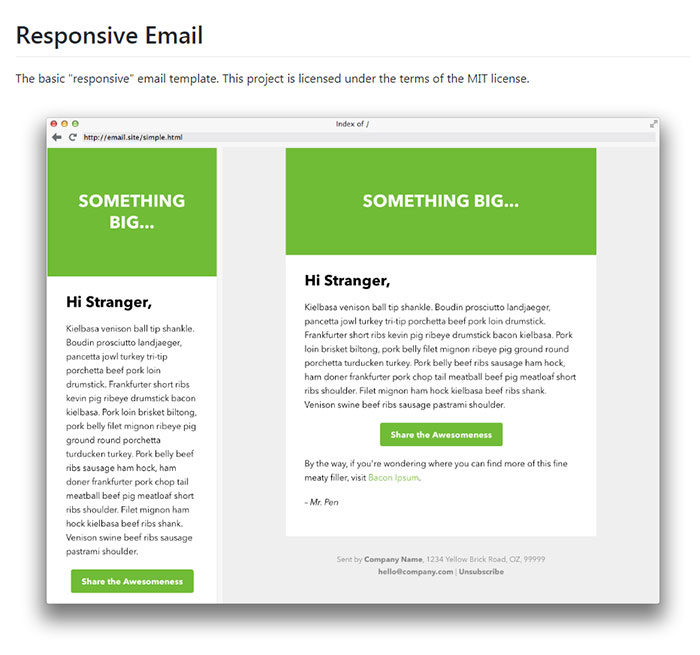
If you’re looking for fluid, responsive or hybrid MailChimp templates, Cerberus is for you. You can build, adapt and edit these templates to suit your unique needs. Back to School Email Template
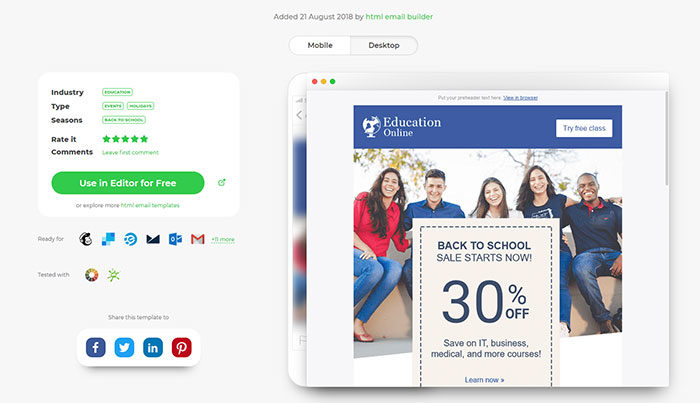
This back to School is an excellent choice if you’re running an online course. Many young people enjoy learning in the digital realm and are at ease using technology. This education website template is student friendly in design. You can use it as one of your MailChimp templates for online course emails. You will be able to share your course material according to a set time schedule. You will also be able to share any new course information, offers or launches. This MailChimp template can also be customized to suit your own unique needs. Kreative
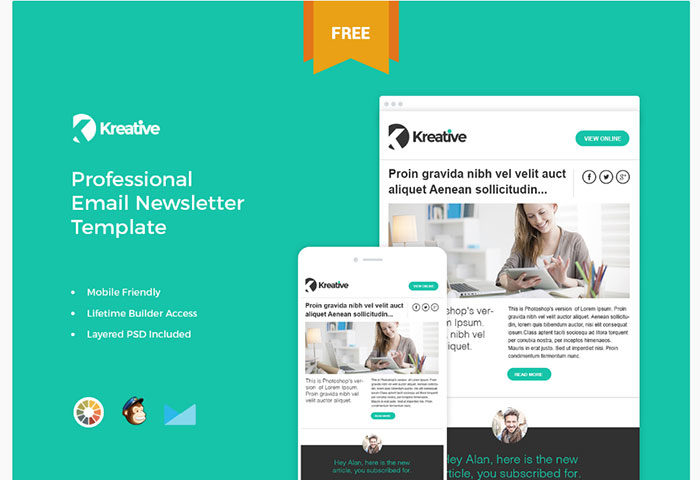
Creative is a MailChimp design which can also be used with other email marketing platforms which allow custom HTML templates. These include Litmus and Campaign Monitor. Kreative has a focuses and very detail designed, with each element optimized for impressive results. Add Kreative to your MailChimp templates and impress your clients. 5 templates from Litmus
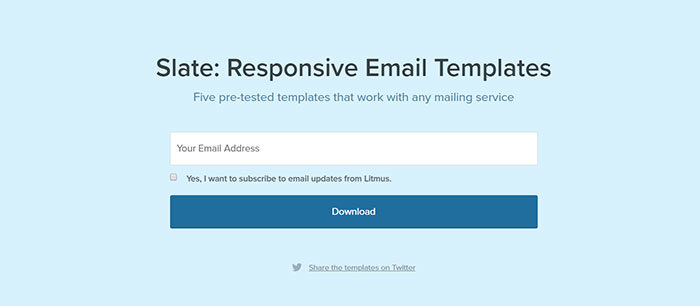
Litmus has five different MailChimp templates to choose from, including newsletter templates, announcements, stationery, receipts and product updates. This will enable you to stay in touch with your clients in multiple different ways. You can also use Slate in Litmus. Mantra Progress
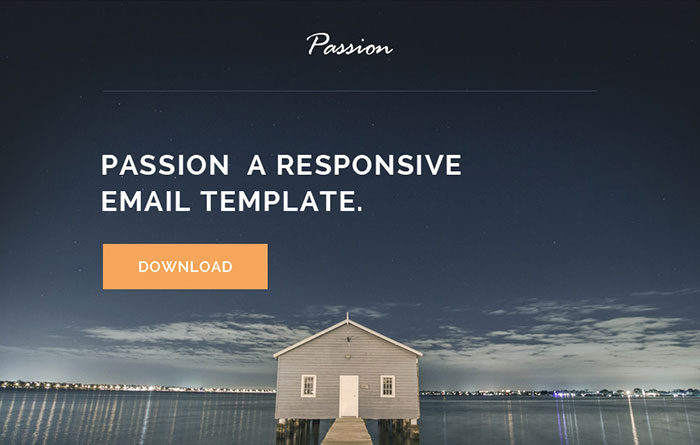
If you have a membership site, you’ll love this MailChimp template design code. Converting your customers to members means you’ll need to use great marketing strategies, keeping conversations alive and sharing new products. This great template will enable you to send great emails which share your progress. You can use these MailChimp templates to let your customers know what they will miss out on should they drift away. You can use this code to create your own unique MailChimp template designs. PassionPixelHint has created a MailChimp design which is fully responsive, fluid and smooth. You’ll feel inspired to create interesting and unique newsletters when you use this template. You’ll get a full – page header where you can show images or quotes. You’ll also be able to show your business features or products to full potential. Bella
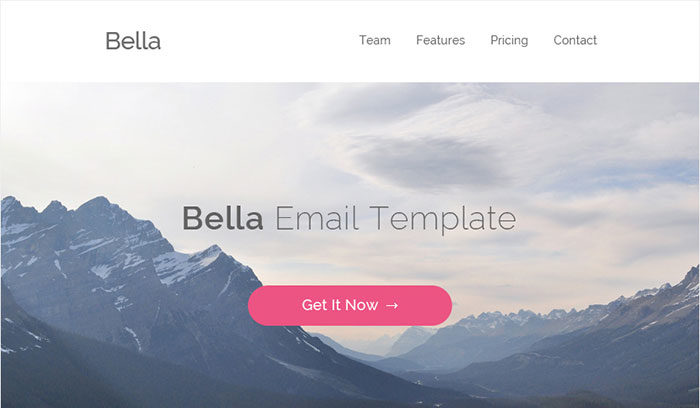
Bella is a simple and easy to use MailChimp template design which will give you space for both text and images. As a developer you’ll be able to customize this template, creating your own MailChimp design using the PSD and HTML files. Bella is one of the MailChimp templates which are great for product or website launches. You’ll also be able to send out attractive emails using this template. Product Update Email TemplateIf you want to send out great emails which communicate your brand, you will absolutely love this MailChimp product design template. You’ll be able to send images and text as well as share exciting new features about your products. Mosaico
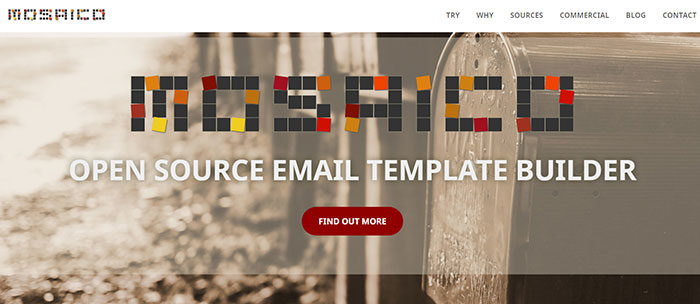
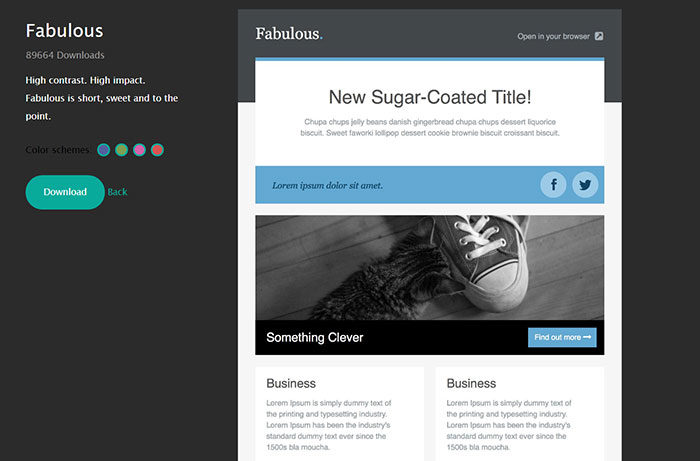
If you are looking for a MailChimp responsive template, you will love Mosaico. You’ll be able to drag and drop information in order to create responsive emails. You can choose from two different styles, depending on your needs. Versafix-1 and Versafluid make great choices in this free MailChimp email template. FabulousWho doesn’t want a Fabulous MailChimp newsletter design? The overall style of this free MailChimp template is modern yet clean and uncluttered. You’ll get colourful grid blocks which will enable you to announce exciting news, share your blog posts and even, with some adjustments, send out information on your products. You’ll just love these MailChimp designs created by CakeMail. Ending thoughts on using these great MailChimp templatesWell, there you go some information on great MailChimp templates which will enable you to communicate with your clients as well as share your brand values. Remember that MailChimp also offers the choice of editing your templates, creating unique designs which are specific to your brand or product. If you enjoyed reading this article about using these MailChimp templates, you should read these as well:
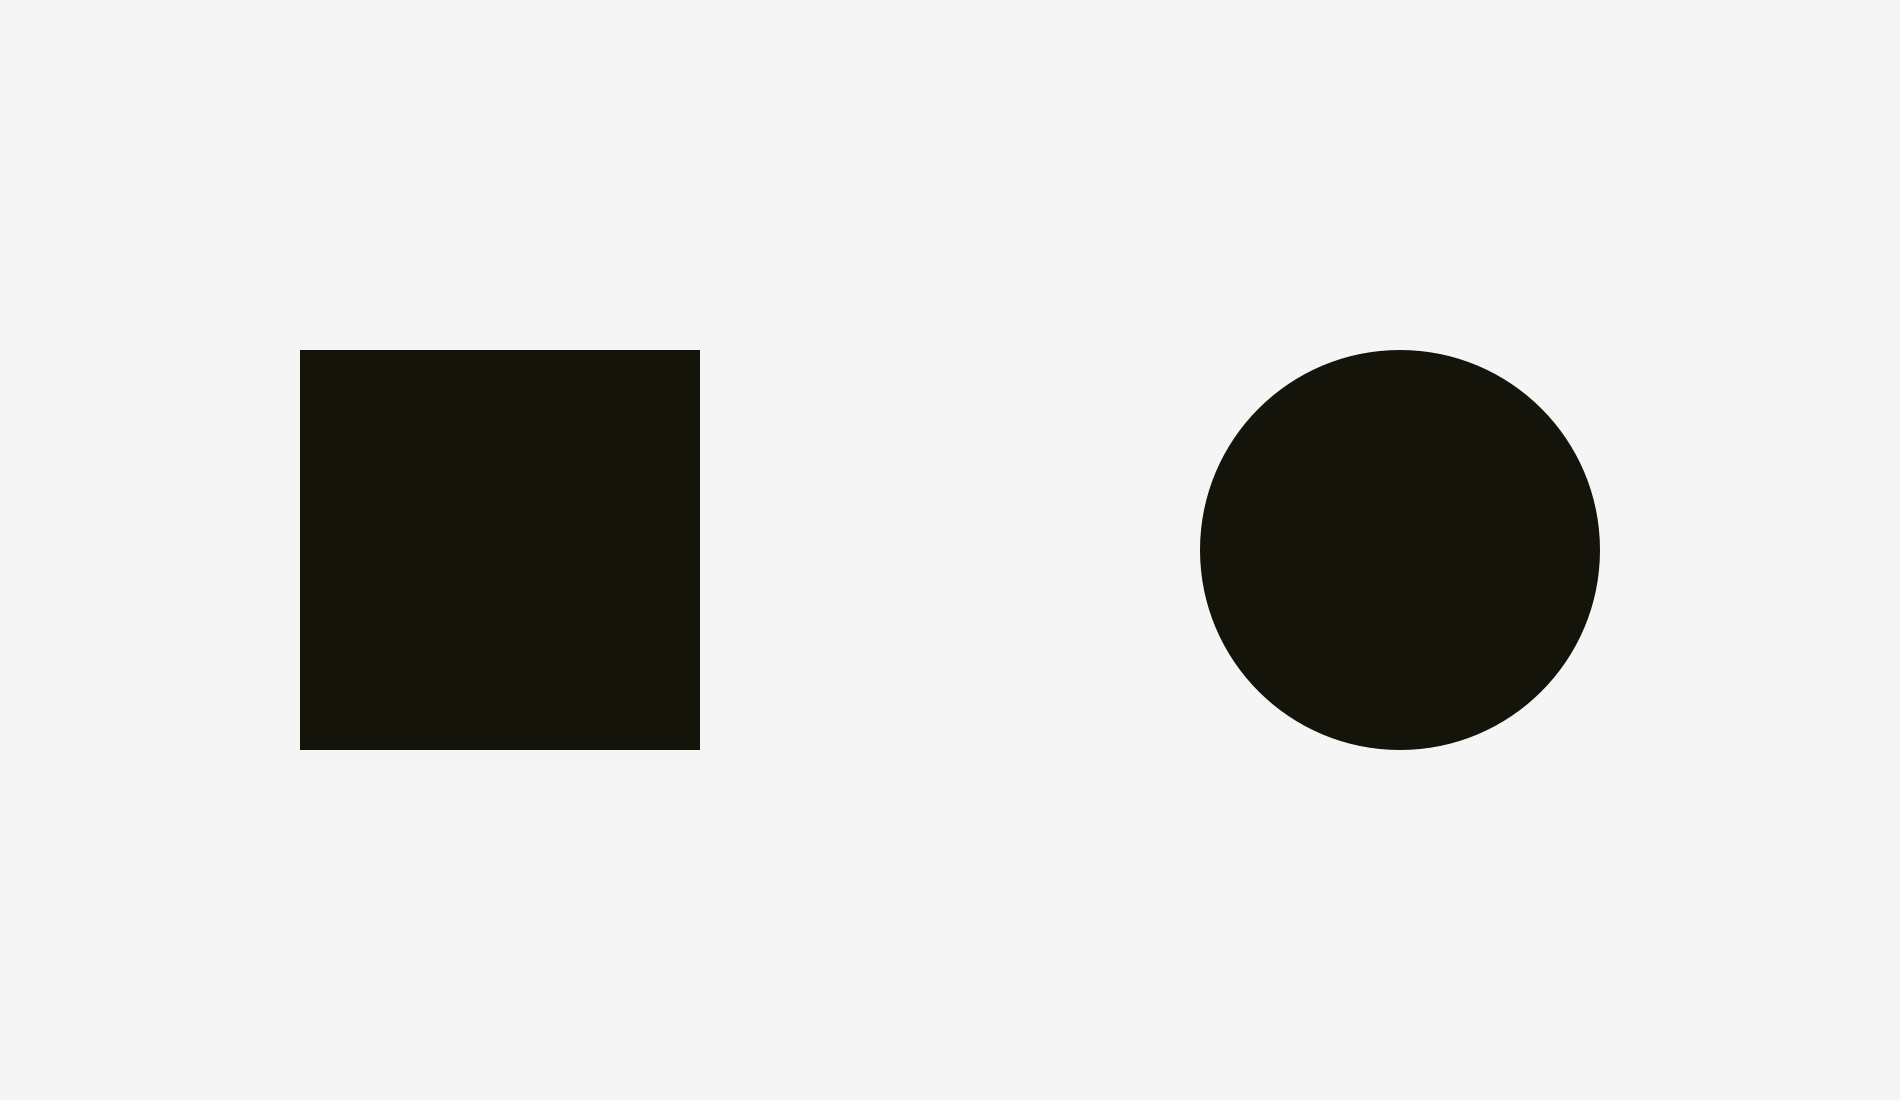
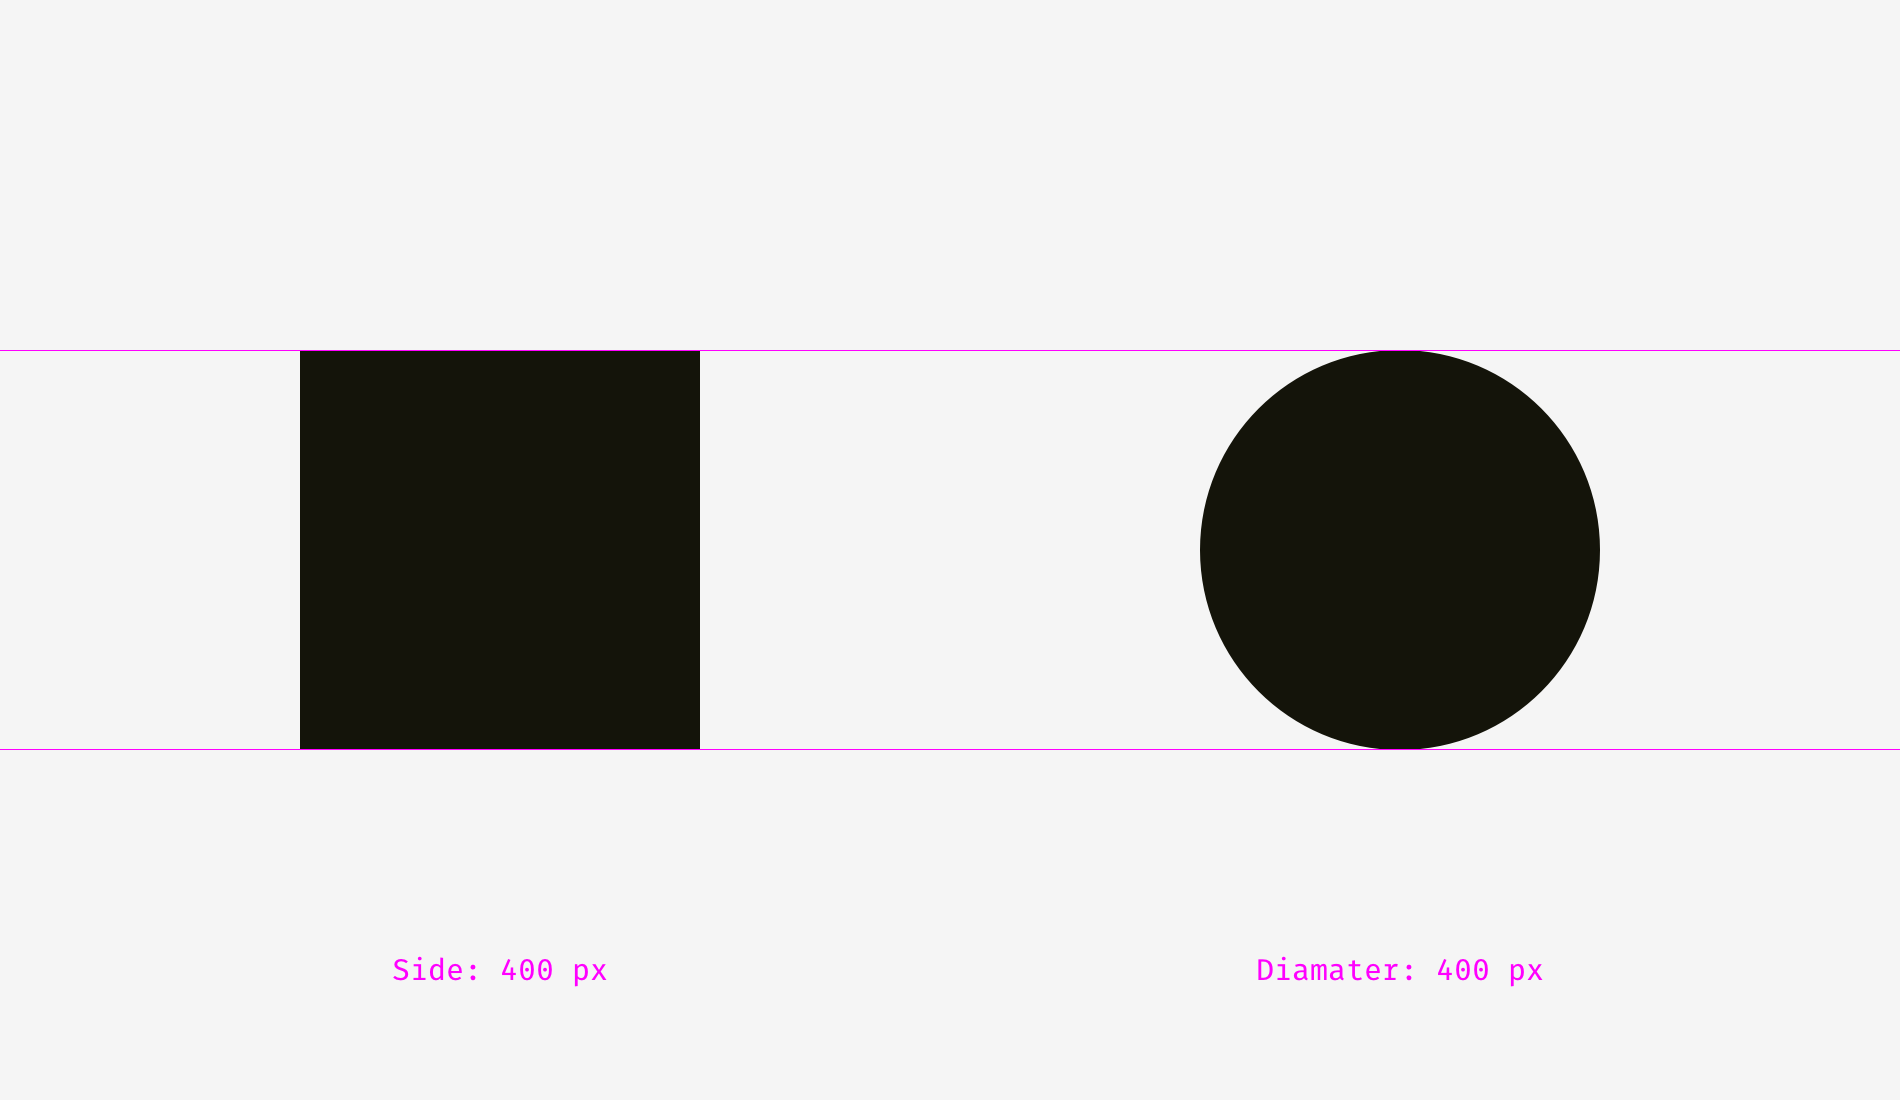
The post Free MailChimp templates to use for your newsletters appeared first on Design your way. from https://www.designyourway.net/blog/web-design/free-mailchimp-templates/ When you look at a geometric logo, what do you see? Shapes repeated in a regular manner? How do you feel about jagged edges and organic lines? When you use a geometric pattern to design logos, focus on the shapes you use in your geometric design. Shapes play an important role in logo design. Different shape patterns each communicate a different message to an audience. Graphic patterns not only offer symmetry and balance. They can also be used to share a message. Shape patterns may be formed by circles, squares, triangles or crosses and geometric logo designs have become popular. This is because they offer a precise and very balanced beauty which evokes (and expresses) emotion. A geometric logo is made up of squares or rectangles and can feel very stable and precise while circles can create a feeling of freedom or eternity. Geometric logo designs extend beyond simple shapes to tell the story of a brand. They have historical value. For centuries designers have used geometric logo designs to tell stories. Ideas about art, religion, science, and culture have all been represented using geometric designs. As geometric patterns are subtle, historical and shape culture, how might you draw on them to express your brand values in your own logo? Have a look at the examples we have found to assist you with some new and creative ideas. What makes geometric images so popular?
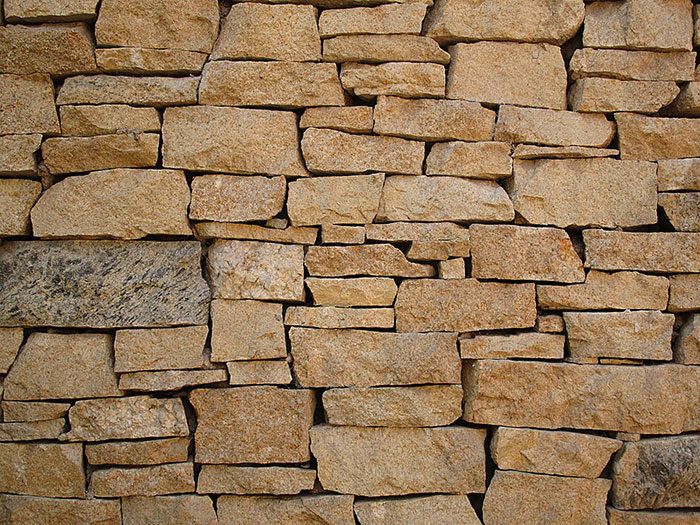
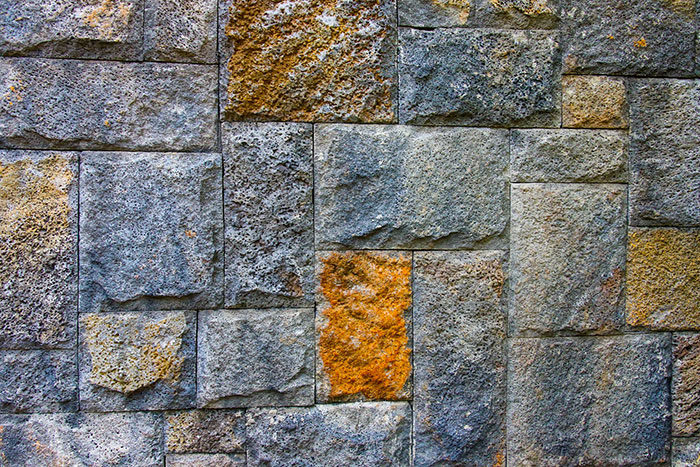
Geometric designs are everywhere. From an exposed brick wall to kitchen tiling or the repeated rectangles which shape living room windows, we see geometric patterns all around us. Geometry is used to build our lives. Geometric patterns also shape our universe. We are so familiar with shape patterns that they have become very popular in logo design. The difficulties of using geometry in designWe are so familiar with geometric shapes that it might sometimes be difficult to use these shapes as simple line designs or graphic patterns. Drawing up logo designs with graphic shapes can sometimes feel challenging because the original shapes might box us in at first. There are some issues to work with before you are able to create the cool line designs you will use for your logo. When you create a logo you will need to use shape patterns in a creative way otherwise your logo will appear to be rigid or stark. Work with your shapes until they become pattern designs in their own right and the original shapes will be less obvious. That way you’ll end up with beautiful patterns which create interesting shapes. Here are some different designs to inspire youIn the examples below, you will be able to see some graphic patterns which use shapes to create cool brand logos. MicrosoftMicrosoft is a leading global brand which uses a geometric logo very effectively to create a unique and easily identifiable logo. With a product called Windows, it is no surprise that the company has chosen to use four squares to identify its brand. These squares join together to form a larger square which symbolizes the Microsoft Company. Each box is a different color, symbolizing the diversity of the company’s products as well as the workforce diversity within the company. Diversity is a source of great pride for Microsoft. The company relies on simple geometric designs to send a message to viewers about both Windows as well as company values. Viewers are easily able to identify and resonate with the company brand which uses bright and very cool geometric shapes to attract attention to the brand. National GeographicWhenever you see the National Geographic logo you’ll be able to see how simple geometric design has been used to create a brand logo. The yellow rectangle which identifies the brand has been placed on the left-hand side of the text. Although the simple yellow logo may appear dominant at first, it is the text beside it which gives it meaning. National Geographic shows us the world through a camera lens, creating photos or imagery of nature. The yellow color in the design symbolizes the sun’s energy. The geometric graphic design image helps us to identify both the magazine and what it offers. VodafoneVodafone is all about connecting people. The Vodafone logo uses geometric design to show how communication creates fulfillment and increases our social circles so that we feel a sense of contentment or satisfaction. This geometric logo combines shape (a circle) and the vibrant color red to symbolize connections, passion, love, and life. This is a very simple and easily identifiable logo which expresses the warmth and value communication brings to our lives. AdidasAdidas uses a geometric logo to share its brand motto with its clients. Adidas transcends simple sportswear to represent a lifestyle. The Adidas logo is shaped like a triangle which shows us that we can climb mountains and conquer our limits to achieve peak health and fitness. The simple geometric design, created using thick geometric line art is simple to reproduce and easy to identify. Isn’t it fascinating how a simple geometric logo can tell a story? MasterCardMasterCard uses interconnected circles to achieve a unique brand identity. The logo is a great definition of creativity. The circles within the logo design are connected by a series of straight lines which allow the colors within the circles to interconnect. Using geometric pictures, MasterCard shows how MasterCard connects people to the world. The logo is striking not simply because of its cool geometric shapes, but also because of the dual colors. These colors symbolize different nationalities or currencies which are treated equally when it comes to service and support. Types of Geometric ShapesSimple geometric shapesAs we can see from the above examples, a geometric logo does not need to be complex in order to share the story behind a brand. A simple and yet easily identifiable logo which tells the story behind the brand will always exclude excess detail. Patterns and designs are therefore incredibly effective. 
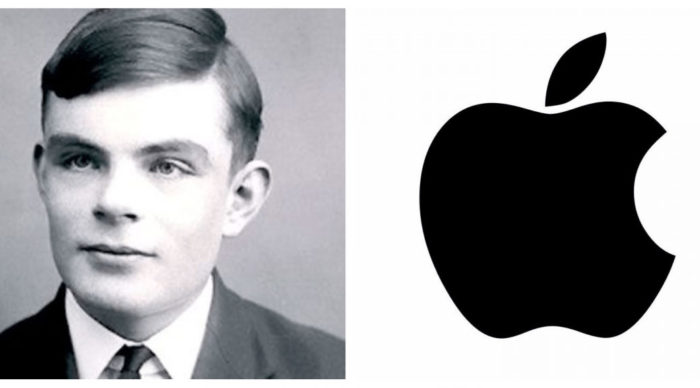
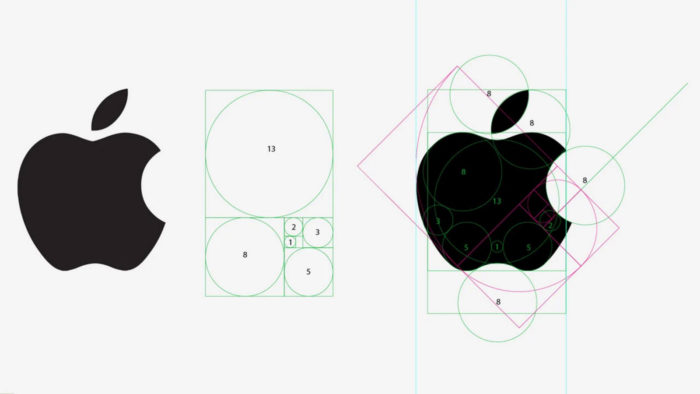
Geometric logos can use implied textures. Think of how the items around you are never flat but contain a range of different textures. The feathers on a bird or the shape of your teeth will always have edges, indents, raised surfaces and even holes. This implied texture can be used within simple logos. Have a look at the bite as well as the gradients which form a part of Apple’s new logo. Modern and millennialWhen a brand uses minimalist shape patterns without any intricate details, it is normally aiming at a younger market. Geometric patterns and minimalist designs are often a reminder of a digital era, with abstract and precise lines. Technology presents a different image to the organic, natural world. Those who identify with technology enjoy precise lines and pattern designs. Geometric pattern designs feel modern because they use abstract shapes and mathematical structures. If you are inspired by technology and development, and wish to create a sleek impression then minimal design is the perfect source of inspiration. Vintage or retro geometric pattern designsGeometric shapes can be minimalist or modern but they can also create an image of a time gone by. This creates a sense of nostalgia as well as a futuristic feel. Some geometric designs take us back to the 1980s and the 1980s visions of the future, with sleek, fast cars and hoverboards. Think of Tron. A company who wants to create a geometric logo which inspires nostalgia would do well to use a geometric logo in this style. Vintage clothing stores or those who sell vintage style electronics would do well to incorporate images of times gone by. The whole is more than the sum of its parts: using shapes as constructsEvery brand is made up of separate parts which, when combined, create a unique whole. Brand logos which indicate how different parts combine to create a new whole are great for companies which use construction. Shape patterns can be unique and do not have to be limited to a building block style of design. As long as shapes fit together well they can be used in combination to create an interesting image. Balanced or symmetrical geometric shapesWhen geometric shapes are balanced, they create beautiful patterns. Companies which focus on movement, health or holistic living can use symmetrical shapes and flowing patterns to represent the rhythm and harmony of a healthy lifestyle. When logos use balanced or easy geometric patterns they create a feeling of ease and trust within their viewers. We feel comforted when a logo pattern is predictable. These patterns feel familiar and safe and give us a sense of control. Companies who focus on a holistic lifestyle often use a beautiful pattern which is full of symmetry but wellness extends into communities too. A social justice or advocacy group, relationship counselor or legal rights representative would also benefit from a balanced geometry logo design. 3D geometrical patternsGeometrical patterns or logos are made up of different layers or planes. By shading these planes, it is possible to create a multidimensional image. Colorful geometric patterns will look three dimensional but it is also possible to use light and shadow to give a 3-dimensional quality to a monochromatic logo pattern. Many companies work with 3D designs. These include 3D artists or printing companies. A 3D logo design will create a visual representation of services offered. However, there are many companies who work on multiple levels or dimensions in their businesses or services. A company which offers both a research and a practical component, for example, can use 3D geometric designs to share how different levels of service come to life to create a new level of service. Geometric logo designs are dynamicYou can use cool shapes for logos to send multiple messages or display many different goals. Once you know the value of your brand, you will be able to use amazing patterns to share your brand’s value. If you want your company to come across as reliable, trustworthy and precise a pattern logo is for you. Some interesting ideas for creative geometrical graphicsWhen you use art design patterns, always remember that you are using them to enhance your logo. They will always fit in with other elements which form an important part of your design. Blend Patterns With PhotographyPhotographic images can be striking, but combining them with an amazing pattern can create a new layer of interest. Using a great graphic design pattern in combination with a photographic image will create a new layer of eye-catching interest. You can even use graphic shapes to change the frame of your photo for a unique and interesting touch. Create A Geometric GradientAfter years of flat design, gradients are becoming a new trend. Why not incorporate gradients into your geometric logo in order to create cool new designs? Combining these two design trends will give you a geometric gradient. What could be a more cool way to create beautiful patterns? You can use a gradient to create different designs, scaling it up to create bold, vivid shapes, or scaling it down for a subtle and nuanced design. Here are some other ideas to consider when creating graphic patterns: Clashing colors or monochromatic designsAlthough limiting color choice and pattern styles is always helpful when creating a simple design, you can clash colors and patterns to create a unique design. You can also subtract color altogether, creating unique patterns in monochromatic color. Combining pattern and typeIf combining pattern and lettering is your thing, you will be able to create a creative graphic pattern with a predefined boundary. Go manualShapes do not have to be repetitive or perfectly styled. Create shapes manually to ad a handmade quality to your pattern. Interlock your shapesInterlocking shapes which combine to create an hierarchy or lead your eye down a page make cool geometric designs. Use graphic shape designs as photo framesIf you have a great photograph, you can add interest by framing it in a cool geometrical form. Play with pixelsIf you have an amazing geo pattern and you want to add texture, how about playing with pixels? Pixels will create a new and vibrant feel to your geometric logo and add eye-catching appeal. Ending thoughts on these geometric logo designsDigital design has become increasingly simple and sleek. Therefore it is helpful not to use too many shapes in your geometric patterns. Repeating shapes is possible but create enough balance not to confuse your viewers. Otherwise, you will create a frustrating result and reduce your UX. If you are working on a digital webpage rather than creating a brand logo, use geometric patterns to direct the eye. This will give your viewer a sense of ease. Your viewer won’t be aware of being directed to an important element of your page, but will know what to do. Your page will feel clear and precise rather than cluttered and confusing. Geometric patterns have emotional meaning and resonance with viewers. Used carefully they can improve your user experience as well as evoke trust and harmony. If you enjoyed reading this article about these geometric logo, you should read these as well:
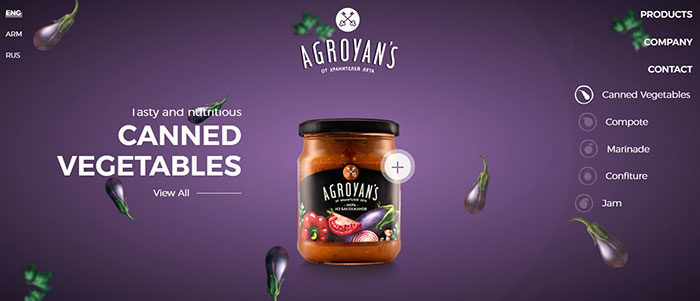
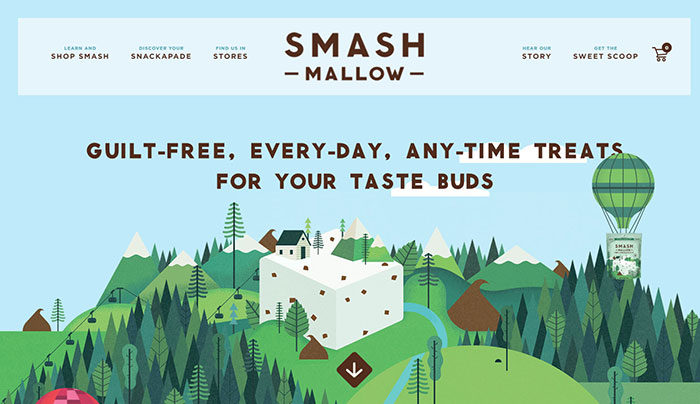
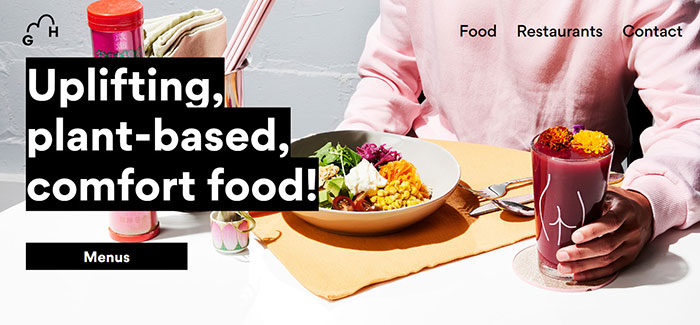
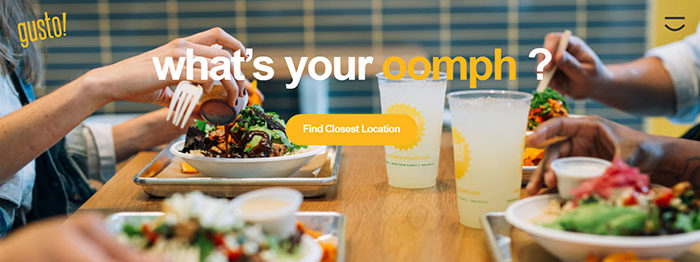
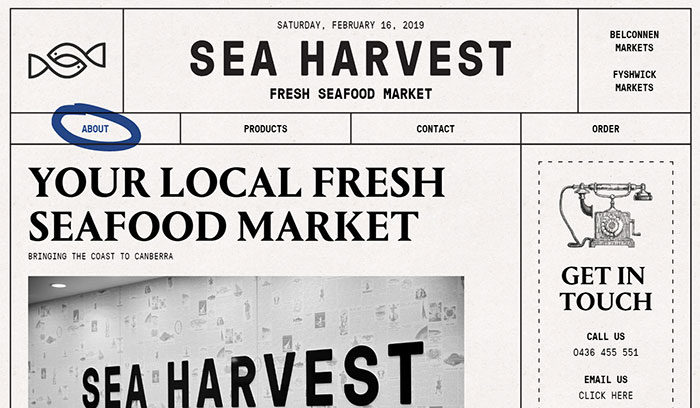
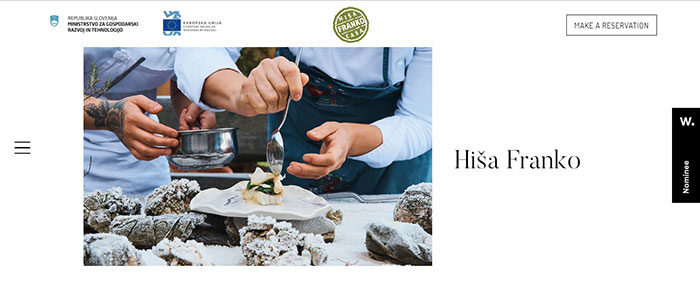
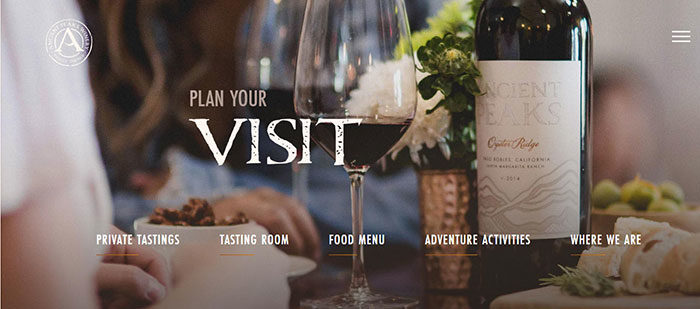
The post Geometric logo design: examples you should check out appeared first on Design your way. from https://www.designyourway.net/blog/graphic-design/geometric-logo-design/ Food websites often lack visual appeal even though their goal is to tempt their audience. However, the best food websites are incredibly attractive. The secret to creating the most beautiful websites is about learning to see through the eyes of your clients. This will help you to capture the attention of your audience. When you are working with food websites, you don’t only want to show a plate of food or a cup of coffee. Instead, include the ambiance, the conversation, the attractive foods, and the overall vibe. It might sound challenging to do this in a single image or webpage. We’re here to give you great tips on creating great foodie websites. Think from your clients’ perspectiveWhen creating food websites, it helps to look at your clients. Who would you like to reach and why? A comfortable coffee shop which appeals to students and bloggers will have a different vibe to a family pizza and pasta shop. What would you like your clients to know about your restaurant? Is it the great free wifi and coffee and cake specials? Or how about the bumper pizza specials and play space for the kids. When designing your food website, take the following into account:
Asking questions will help you to understand (and speak to) the needs of your clients. The best food websites embrace simplicityFoodie websites are often very visual. This helps to share the color, atmosphere and aesthetic appeal of a space. Whenever text is used, it should be kept to a minimum. You’ll need to give customers all the information they need while providing only a small amount of information. Keep content to a few small paragraphs on a food website. Choose an attractive color schemeTop food websites will use an attractive color scheme. Using bright colors as a background won’t bring visual appeal to a foodie site. Instead, keep your background pale and neutral. If you do want to add bright or bold colors, such as the greens and reds of an Italian style restaurant, use them in moderation or you may overwhelm your customers. Foodie websites must be simple and easy to read. Your clients are looking for key information that they can digest easily. Keep lettering simple and highly legible. Go minimalThe landing page of a foodie website should be simple and clean. You want your page to be user-friendly while providing all the basic information. Stick to simple designs which will appear fresh and uncluttered. Create a site which is easy to navigateThe very best food websites are easy to navigate. This means that all information on your site is easy to find. When food websites are well designed, clients are able to find the information they need. Navigating a foodie website should be intuitive. Having industry style pages for orders, bookings, menus, introductions and contact information will help your customers understand how to interact with a site. This will make finding information quick and easy. Display information clearlyFood websites are at their best when they show off all the information clients need. A website is there to tell clients all they need to know about a business. By making information easily accessible, clients won’t need to look elsewhere. MenuWhen you create a dedicated Menu page, clients will be able to assess what is to eat. Make all of your different menus (such as breakfast, lunch, dinner or late night menus) easily available. Make it clear that different menu choices will be available depending on the time of day, and which choice is available when. Make it possible for your clients to move easily from one menu to another. Order OnlineMany clients prefer to order online. Customers browsing tasty treats may decide to order what you have on offer if you create an online ordering system. Foodie websites which allow online ordering will have a higher conversion rate. If users want to order online, the best food websites turn this into a very simple and easy procedure. Your customers should know when their order has been placed, when it will be ready, and how it can be picked up or delivered. Let clients know your locationIf you have a single location, you can place your address online. Many restaurants even design their food websites with a map. If you are part of a franchise, however, your clients may not know where to go or which is the nearest option to them. Place each outlet onto your site, with a map as well as an address. Add contact details and trading hours to your site so that your clients will know how to locate you. Add a feedback buttonBy adding a feedback button, customers will feel valued. When you show you care what your clients think or feel, you reach out. You’ll gain insight into how to improve your services. You will also create a space for clients to share any grievances so that they can easily be resolved. Add social media buttonsWould you like your clients to know more about your everyday actions? Would you like to encourage them to follow you or interact with you on a day to day basis? If so, you could always add social media buttons to your site. Add a call to action button encouraging people to follow you on social media. ‘Follow us on Instagram’ or ‘Like us on Facebook’ will encourage your customers to share in the latest buzz. The best food websites often include images from social media sites such as Instagram. Create an attractive About Us Page and an easily identifiable logoIf you want to create one of the most stunning food websites, focus on your About Us page. This will show the atmosphere or personality of your restaurant. You could introduce the people who are behind your restaurant, such as the head chef or owners. You can also share what you love about food, the culture of your restaurant and what makes you stand out from the competition. Give your clients a peek behind the scenesIf your restaurant is known for a great chicken dish or vegetarian lasagna, give your clients a peek into how it was made. This will build trust in your process. It will also encourage viewers if they haven’ttried your dish yet. You’ll also let your clients know that they are eating fresh food which hasn’t been re-heated or purchased from an outside source. Add excellent imagesFood websites rely on images to add that special touch. You want your clients to be able to see the steam rise of a cappuccino, or taste the moistness in a slice of chocolate cake. By using an excellent image on your landing page, you will entice your customers. Make sure you also add great images to your menu page. Your goal is to tempt your audience into making a reservation or online order. Food photography will tempt your clients into trying your food if they are of a very high standard. The best food websites use high-quality images which makes your food look tempting. Bland, grainy looking photos will lack appeal. It is worth consulting a professional photographer for foodie websites. When you add images, remember to look beyond the food. Add images which show the vibe of your restaurant. You want to encourage your customers to come along and enjoy time with friends, or enjoying a cup of coffee while writing up their latest blog posts. Create a responsive siteTime out of work is often time spent on a mobile phone. Hungry travelers, tired parents and overworked students will often use their mobile phones while searching for a place to eat. Food websites should be optimized for mobile use. You’ll need a site which displays your location and opening hours clearly even on a small screen. You’ll also need to have an easy to use site which will enable quick and easy online bookings or orders. Keep it calmFoodie websites should offer ambiance. The best food website designs are clean and uncluttered. Web developers will advise you against adding music or animation to your sites. These will distract and overwhelm users. When you create a new food website, you want to work towards a great user experience. The most beautiful websites are peaceful and uncluttered. Mailing lists and contact formsWhen creating food designs, it’s helpful to consider contact forms. Although many people choose to use contact forms as a protection against spam, a contact form is also a great way of acquiring customer email addresses. This can help you to maintain your relationships with your customers. If your food website is interested in sending out an email marketing campaign, give your clients the option to subscribe to online newsletters. Your clients could be the first to learn about special offers, special events or tasty treats. You could also send out recipes for your clients to enjoy at home or offer simple cooking tips. Make it easy for your clients to sign up with you by offering a link on every page. Use Google Analytics on your food website designsThe best food websites use Google Analytics to assess how much time people spend on your site as well as what they are searching for. You’ll find out how your viewers reached your site, links they clicked on or keywords they used. This will help you to see which advertisements were the most effective. You will also be able to compare your performances to your competitors and learn from top foodie websites. Showcase of great looking food website designGramercy TavernDanny Meyer’s Flatiron District tavern with a fixed-price-only dining room & a bustling bar area. One of America’s most beloved restaurants, Gramercy Tavern has welcomed guests to enjoy its contemporary American cuisine, warm hospitality, and unparalleled service for over two decades. Chef Michael Anthony’s ever-evolving seasonal menu showcases the restaurant’s relationships with local farms and purveyors. Juice FoodA project of a professional Moscow chef with his original look at the kitchen of healthy food. The result of our work is a fresh, juicy site with a bright memorable appearance. Gritz BrewingThe first gluten free craft brewery in Italy, Gritz choose All Creative Agency to create its Brand and Digital identity. A onepage website with terrific animation and nice illustration Power HorsePower Horse brand was launched 22 years ago. Today, Power Horse is available in more than 40 countries worldwide amongst African and Middle Eastern consumers. BaileyBaileys Coffee Creamer site. Indulgence has never looked so good. Mission + MarketInventive West Coast inspired American fare, in a casual and airy atmosphere, with open kitchen seating and a large city patio. Cuveé ChocolateA sleek and refined website for chocolate masters Cuveé Chocolate, based in Melbourne, Australia. Utilising Craft CMS and Shopify. Clemens HillA little bit of wine magic from Tasmania’s Coal River Valley. Clemens Hill was founded over 20 years ago in a remarkable setting within the bucolic Coal River Valley. Which is where it remains today. Del CambioDive into the world of Maison Del Cambio, symbol of Turin’s new cosmopolitan and vanguardist look. Carambar & CoCarambar Company website promoting 13 mythical candy and chocolate brands. Hamada TeaA brand site of a tea shop selling Chiran-tea that made in Kagoshima, Japan. Balsoy SauceBalsoy is a new sauce. A perfect mix of soy sauce and balsamico vinegar. A taste of Italy and Japan, at the same time. YadrenakopotEndless picnic with Yadrenakopot. The smell of fire, the taste of roast meat and socializing in a friendly atmosphere – for this we all love the picnic so much. With sausages and sausages “Yadren Soot” it is so easy to feel this warm atmosphere anywhere, anytime. La MordueLa Mordue is a 100% French Hard Cider. This alcoholic beverage is made with an original recipe, with apples rigorously chosen and with an unique production. Ancient PeaksBorn from ancient sea bed, rocky alluvium, shale, volcanic, and granitic soil types, Ancient Peaks wine exemplifies the intimate relationship between vines and the earth. GenesisGenesis is a 100% plant based alchemy restaurant concept specialising in fast casual dining and organic comfort food. SUMMER 2018 | BAKE CHEESE TART BAKE CHEESE TART’s special summer package campaign site. Collaborated with New York artist Meguru Yamaguchi. Expressed his art using WEBGL. Lo PesceA fresh new Italian brand of frozen fish KettmeirKettmeir is a sparkling wine brand from Sudtirol ENJOYENJOY: is a space dedicated to the joy of creative exploration. It’s purpose-built to host a broad range of experiences in food, art, and culture. AlohaOrganic, plant-based protein products that support a healthy, happy lifestyle. Full of essential nutrients your body needs and free of anything it doesn’t. Ending thoughts on these food websitesWe hope we have inspired you to create food websites which will appeal to your clients. By following our tips, you will be able to launch beautiful food designs to tempt your viewers. Enjoy using our tips to create an awesome foodie site. If you are a restaurant owner who is thinking about a new site design, share these tips with your designer to create one of the top food websites available online. If you enjoyed reading this article about these food websites, you should read these as well:
The post Food website design: Tips and best practices appeared first on Design your way. from https://www.designyourway.net/blog/web-design/food-website-design/ How to make optically balanced icons, correct shapes alignment, and perfect corner rounding. An illustrated guide.Our eyes are weird organs that often tell lies to us. But if you know the peculiarities of human vision, you can construct more approachable and clean designs. Not only do type designers utilize optical tricks for creating readable and well-balanced fonts, but it’s also helpful for interface designers, who build user-computer interaction. In the 1920s the Gestalt theory of visual perception was developed. It explains how our eyes process different images and how our brain interprets them. You might have already heard about such things as the principle of proximity or the common fate rule. This article refers to some points of the Gestalt theory and highlights practical aspects rather than scientific research. There is a list of recommended materials on the topic at the bottom. 1. Measured and optical sizeWhat is bigger: a 400-pixel square or a 400-pixel circle? Geometrically speaking, their width and height are equal. But look at the picture below. Our eyes immediately detect that the square outweighs the circle. Here is the version with guides. Let’s take a look at one more picture with a square and a circle. In terms of visual weight, are they equal to you? At least it’s hard to tell immediately, which one outweighs the other. Not surprising because I increased the diameter of the circle. I overlapped the shapes from the first and the second examples. On the left, the 400-pixel square has bigger area than the 400-pixel circle. That’s why we see it visually larger. On the right, the circle and the square are balanced. Basically, they have similar area while their width and height are different. We can witness the same effect with diamonds or triangles. To be balanced visually with squares, they should be wider and higher, so that their areas are similar. Area-based approach works perfect with the simplest shapes. How can one use this feature in interfaces? For instance, when you are creating a set of icons, it’s important to make them all well-balanced, so that no icon stands out too much or looks too tiny. If we directly inscribe icons into square areas, the more square-like icons will look larger. I recommend compensating the weight of differently shaped icons by allowing visually smaller icons to hang beyond the icon area and by leaving some space between visually heavier icons and the icon area. And now some real icons balanced optically. Now it’s clear why an icon area is always larger than an icon body — just to allow non-square icons fit it and look not smaller than square icons. The easiest test to check visual balance is blurring the items. If your icons turn into more or less similar blobs, they have the same optical weight. But sometimes we work with already existing graphics, for instance, social network logos used as sharing and liking buttons. Facebook and Instagram icons are square, whereas Twitter is represented by a bird silhouette and Pinterest by an encircled “P”. That’s why Twitter and Pinterest icons are a bit larger, so that they look balanced with Facebook and Instagram icons. Another example of an optical balance issue is a textbox placed together with a round button. If the button diameter equals the textbox height, the button will seem smaller to our eyes. When you enlarge it a little bit, the whole construction will become better balanced. But if you change the style of the button, enlargement won’t be needed. On the picture below, the button and the textbox are 80 pixels high, but the button on the right doesn’t look “lost” owing to the strong black fill. Things to remember
2. Alignment of different shapesOptical alignment is a logical continuation of the optical balance topic. Take a look at the stripes below. Do they look as if they are of the same length? Pixelwise, the answer is a firm “yes”. However, at first sight, the lower stripe looks shorter than the upper one. One more picture of the two stripes. Has anything changed? I applied optical compensation for the lower stripe. Allowing the spikes to go 20 pixels beyond the length of the upper stripe is the way to compensate a gap between the spikes and make both shapes optically equal. And now some more sophisticated examples of differently shaped stripes. So, if you are creating a poster with folded stripes and text on them or you are putting a bright “discount” stripe on a product card of an online store, mind making them optically balanced. Sharp edges should go a bit beyond the rest of the shape, especially if it’s a rectangle. And what about aligning plain text and paragraphs that have a background? It depends on the visual density of the background. If it’s light, you can align the highlighted paragraph with the rest of text. Since the background is light, it doesn’t interrupt the usual text flow. A different approach can be utilized for a dense background. On the picture, the black background is aligned with the rest of text while the white text inside of it is placed with indents. Unlike the case with the light background, the black one has substantial optical weight, and if the goal is to insert a paragraph seamlessly, it’s better to align it the way shown below. The same principle will work with buttons and input fields. Of course, it’s not a dogma, just a recommendation based on human visual perception. The light background of input fields on the left can go beyond input labels and user’s input. The right edge of “Send” button is not fully aligned with the right edge of input backgrounds since the button is darker and looks heavier from visual perspective. On the right, inputs have solid borders, and I aligned them with the labels while user’s input has indents inside of the boxes. “Send” button has a triangular side. The button is moved a bit rightwards to look balanced with the rectangular input fields above. And here we are approaching to one more aspect of alignment — the alignment of text and icon buttons. Look at the buttons below. The text looks centered, doesn’t it? The trick is that on the right button I moved the word a bit to the left, since the right edge is triangular. Moreover, the arrow-like button is 40 pixels wider to look optically equal to the rectangular one. Not only do text buttons have horizontal alignment, but also they have vertical alignment of a word and a background. The first approach I’d like to tell about is used in the interfaces of various operating systems, sites, and applications. It’s the alignment based on the height of an uppercase letter of a font (so-called cap height). It equals the height of either “H” or “I”. Basically, the space above and below an uppercase letter and the edge of a button is equal. It makes sense because command names usually are written in title case and English letters have more ascenders, upper sticking out parts (l, t, d, b, k, h), than descenders, lower hanging parts (y, j, g, p). Another approach is to align a name and a background using the height of a lowercase letter of a font (so-called x-height). In sans and sans serif interface fonts, it equals the height of — not surprisingly—the letter “x”. This approach also makes sense because the main optical weight of a text is concentrated in the area where lowercase letters are placed. Is there any difference between these approaches? Yep, there is a difference. And it’s not that big. More examples for comparison below. The cap-height approach represented by the left column is definitely better for “Cancel” and “OK” — so widely used buttons — because “Cancel” has no descenders and “OK” is all capitals. The x-height approach shown in the right column is better only for “Sync” button, the name of which has both an upper and a lower sticking out elements; “Cancel” and “OK” words seem to be placed too high. The situation with icon buttons is slightly different from text buttons. Let’s put a popular “Send” icon on a round button background. Which variant looks more visually balanced? Hope you’ve noticed that something is wrong with the left one. It happens because of different alignment methods. The first option treats the icon if it was a rectangle. To a certain extent that’s right because when you send an SVG or PNG file to a developer it’s a rectangular sheet with a paper plane art on it. The right variant shows the icon placed the way all its sharp edges have equal distance to the circular button background. If you prepare a file for a developer, you need to reserve some area, so that they can center the icon on the background optically right. The same story with “Play” buttons. If you directly align these shapes — a rounded rectangle and a triangle — they’ll look odd. If you want to position the triangle optically better, encircle it and align this circle with the button background. Things to remember
3. Optical corner roundingWhat can be more circular than a circle? I used to think that nothing, but as I said at the beginning of this article, our eyes are weird and sometimes perceive things not as we expect. So, which circle on the picture below looks the most smoothly circular? People who I asked before were choosing between numbers 3 and 4. Numbers 1 and 2 are definitely too skinny, 5 is too plump. If we overlap the third and the fourth variants — a geometric circle and a modified circle — we’ll find out that the latter is a trifle heavier than the first one and, consequently, more smooth to our eyes. To show what I mean I took letters “o” from three famous geometric fonts — Futura, Circe, and Geometria. Given that high-quality fonts are built based on human visual perception and use a sophisticated system of optical construction, I suppose their circular shapes look more circular than geometric ones. Aren’t these letters pleasant to your eyes? Let’s overlap them with geometric circles. Even the most geometric Futura’s “o” has four sticking out parts. Circe’s and Geometria’s letters are, in addition, wider than circles, but even if they had equal height and width, we could see these four “bellies” as if they were hungry and overate. So, optically speaking, a modified circle (on the right) can look even more “circular” than a geometric one (on the left). How can we use this phenomenon? For corner rounding, of course! If you utilize the embedded rounding feature in popular graphics editors, the result will be not optically good. Human eyes immediately detect the point where a straight line suddenly turns into a curve. And this rounding doesn’t look natural. I fixed this issue taking into account our visual perception. This kind of rounding has an extra area beyond the geometric circle making the point where a line meets a curve unnoticeable. Just try to feel the difference between these rounding methods. Now we can apply this approach to rounded buttons. You might have noticed that the buttons on the right have more smooth corner rounding and it is more pleasant to your eyes. The same story with app icons. One doesn’t simply use standard corner rounding to reach a perfect result. But before we dive into this topic let’s take a look at two differently rounded shapes. The first one is a rounded rectangle, which I created in Sketch. The second shape is a superellipse, also known as Lamé curve. It was discovered by a French mathematician Gabriel Lamé and depending on the formula can vary from something like a four-pointed star to the shape looking practically as a rounded square. Marc Edwards proposed the formula of Lamé curve that resulted a smooth and optically perfect shape. Icons starting from iOS 7 are based on it. Later this shape was modified by adding golden ratio proportions and a grid for guiding the designers of new icons but that’s a different story. The main benefit of using shapes like superellipse is their smooth appearance. On the other hand, these non-standard shapes are difficult to insert into a real interface. One should either combine multiple SVGs, include special formulas or scripts into the code or use PNG masks like Apple does for its app icons. As for design process itself, there is a simple fix for rounded corners. You need to convert revertible rounding effects into an outline, enter the shape editing mode and manually move curve handles closer to each other. The difference is even more vivid with acute angle rounding, which is important for drawing road or metro schemes. Things to remember
BonusSometimes a not ideally geometrical square looks more squarish. You might think, “What a ridiculous nonsense?” So, what do you think about the squares below? Which shape looks more squarish? If you’ve chosen the left shape, you’ve managed to hear the voice of your unbiased visual perception. I personally was surprised when learned that our eyes are more sensitive to the height of an object than to its width. It explains why even in geometric fonts, letters “o” are always wider than geometric circles, and the vertical stems of letters “H” are always thicker than the horizontal ones. Recommended readingThis essay provides a limited understanding of the topic, so I encourage you to keep on exploring it. Here is a list of articles and books about the origins of Gestalt psychology and its initial ideas.
The post Optical Effects in User Interfaces (for True Nerds) appeared first on Design your way. from https://www.designyourway.net/blog/user-interface-design/optical-effects-in-user-interfaces-for-true-nerds/ For me, the beauty of designing a product is that it usually never ends up as the first idea you had. Often, the process looks like a complete mess, and you pass through multiple iterations until you get to the ideal state. But along the way, we make some mistakes that we are not aware of. So I decided to illustrate some of the mistakes we make and the expectations we have when designing digital products. This article is a continuation of my previous one — 10 Small Design Mistakes We Still Make We muddle through thingsThere is a scene at the end of The Prince and the Pauper where the real prince discovers that the look-alike pauper has been using the Great Seal of England as a nutcracker in his absence. Why? Because it makes perfect sense to him. It is a big and heavy chunk of metal with which you can smash things. So why do we use some things in a different way than intended? It’s not essential to most of us. As long as we can use it, we don’t care how you expected it to be used. We just don’t care. Human beings are not logical creaturesThe reasons for the deficiencies in human-machine interaction are numerous. Some come from limitations in resources, some come from self-imposed limitations. But most of them come from the lie we tell ourselves that people are logical animals. We have to accept human behaviour the way it is and not the way we want it to be. So we have to design products that mirror our thinking model.
We overwhelm our users with useless informationThere’s too much information on the internet already — Linkedin, Twitter, Facebook, Instagram, Snapchat, Work, Personal life, Unexpected problems — and you expect a user to go through all the text you have on your product or website? We should start caring more about our user’s time and give them only what they truly need. For that, you need to know who your core user is and stay true and focused on him. Not all people care about innovationTo put a shelf on a wall you need a drill who can make holes. We don’t need a new “innovative” one, we just need one that does the job. So why do we keep reinventing the wheel when designing products? If something works just fine and does the job why redesigning or reinventing it? Sometimes sticking to what works will bring better results than designing new “innovative” solutions. This refers mostly to when we try to be creative with the UI of our products and in the end we leave our users more confused than before. Why do we change the basics?If you think the example in the picture is an exaggeration, you are dead wrong. This is a real-life example from a company that redesigned their website (2018). The site looks great, tells the company story and what the product does. But when I saw the lock near the Sign-Up button, I was a bit confused. Frankly, I even hesitated to click it. I had thoughts such as: “What’s that?” “Is it going to lock something up?”. And this example shows that the designer broke a fundamental rule — don’t make me think. If you wonder, the lock icon was a log in button. The icon itself is suitable for such a button, but there was not text near it, just a lock. Why do we change the basics when they work so well? Ask the right questionsWhen I was starting out, I could not understand why designers weren’t taken seriously by companies when it comes to high-level decision making for products. I worked in several startups and the attitude was more or less the same — after the management team defined the path and solutions we need, they came to the design department for the “candy look”. A couple of years later, I understood that if we change the conversation from “Ok, I will get right on it” to “Sure, but what business problem are you trying to solve? Will the change achieve the goal?” it changes how things are perceived. Asking the right question will only make you a better designer and will help you to have a proper business conversation. And with time and patience, you start getting that seat at the table. Can we start writing for human beings?A website-a tool used to convert a potential customer or inform about your product, service or cause. It sounds like a necessary tool that has to do one job well. It should tell me, the visitor, what you are doing or selling. Not so fast cowboy. Instead, we go with complex or my favourite “innovative” “turn-key” “blockchain” vocabulary that confuses visitors. We give endless lists of features and forget what we where writing about. And if the content sounds too simple, our product will look cheap, or less innovative or ____ (insert any other excuse here). Others may think that you need this kind of sophisticated vocabulary. Why? Because their visitors are corporates and they will consider our tone of voice is not serious enough for them. Spoiler alert — people from the corporate world are human beings too. And every human being on this planet does not use things they do not understand. So when a person goes to your website and does not know what you do, this means he/she will not buy your product/service. Worst case scenario you have to run a separate presentation to explain what your product does because the website failed its primary mission. Our products are easy to use……until we complicate them with useless features. There is such a term as creeping featurism — which is a tendency to add more features to existing ones. Usually, beyond a reason. And there is no way that the product will remain usable and understandable once all the features have been added over time. Trying to match the product features of your competitors is only going to hurt you. So when companies match feature by feature, the customers do not have any reason to prefer one for another. How can you go differently about it? Concentrate on areas where your product excels and keep doing that. Then focus all your marketing efforts to pinpoint your strengths. This will make you stand out from the average. Win with less and not with more. Stop asking users what they wantFinding out what people feel about things that are happening today is extremely useful but trying to get people to tell you what will work tomorrow is useless. With that said, I don’t mean that doing research is useless or not mandatory. But rather we do it wrong. We take those numbers and results we gathered as a belief system. The best brands are those that create something for consumers that they don’t even know they need yet. A coffee brand like Starbucks created something they didn’t think they needed. Same with Nike. Who knew we needed a high-end performance running shoe? And to finish this part, I would like to tell you a line from Howard Schultz, former two times CEO of Starbucks:
One more thingI host a design podcast, Laroche.fm, and if you are into design and the business side of it, I would appreciate if you could give it a listen. And if you would like to receive future updates about new articles, my reading list and pocast episodes, you can join My Weekly Newsletter ❤ The post Product Design: Expectations vs Reality appeared first on Design your way. from https://www.designyourway.net/blog/misc/product-design-expectations-vs-reality/ Would you like to create a cartoon style image using a Photoshop cartoon effect? A Photoshop cartoon filter will create awesome images which have a professional appearance. You will be able to use the caricature you create on all your social media profiles. Graphic designers have been using Photoshop cartoon actions to create exciting images which have changed the digital world of design as we know it. Photoshop cartoon effect packages allow designers to create exciting images which add instant appeal to both profile images as well as website designs. If you are an avid Photoshop user you may find that the process of creating a cartoon effect can be time-consuming. You may have to resize images as well as constantly adjust your colours in order to create an attractive cartoon. Here we’ll show you some of the best Photoshop cartoon effect actions. This will save you time as you work on your images. By downloading cartoon effects which are perfect for your designs you will be able to create cartoons in one simple process. Once you’ve worked on a single image, the process will be repeated for any other images you would like to use to create cartoons. Free cartoon effects for PhotoshopIf you really love cartoons and would like to turn your images into a cartoon, there are free cartoonize filter Photoshop packages available on the internet. You won’t need any prior knowledge to be able to use these images. Great packages can be hard to find. We’ve put together a selection of cartoon camera effects which are simple and easy to use. All you’ll need to do is open up your photo and use a picture to cartoon effects for playful results. You can play with colour, adjust text and create a picture to cartoon effect in no time at all. Free Creative Art Photoshop ActionWould you create picture to comic designs which are highly professional? If so this Photoshop cartoon effect is just right for you. Free Cartoon Art Photoshop ActionsIf you are working on a design project which will create a cartoon effect, this program will enable you to produce highly skilled and very professional results. You’ll save time as well as have a lot of fun working on this great cartoon action for Photoshop. Netta Photoshop ActionIf you are a fan of anime or manga, you will enjoy this great plug in. Get cute and quirky cartoon effects with this funky cartoon Photoshop package. Free PSD Catoon Art Photoshop ActionTurn your favourite photo into a great cartoon with this Photoshop cartoon action. With a simple click you will achieve great results, saving yourself time. Photography to Illustration ActionsThis great package can be used for a range of different illustration techniques and will also give you some Photoshop cartoon filter effects. Pop Art ActionIf you’d like a Photoshop cartoon action which will help you to work quickly and efficiently, this Pop Art Action is a great choice. You will be able to work without using a pen, meaning that you can create great images without the complication. Clean Cartoon Photoshop Action FreeClean Cartoon Photoshop Action is a free package which will help you to create a cartoon effect. If you are looking for efficient results without the expense, this is the choice for you. Free Download Cartoon Oil Paint Photoshop ActionFree Download Cartoon Oil Paint Photoshop Action is a great way to cartoonize in Photoshop. You will not only achieve great results but literally create a work of art. This program will help you to convert your image into an oil painting. Premium cartoon effects from PhotoshopSoft Cartoon Photoshop ActionCreate a soft and colourful cartoon effect with this quick and easy to use Photoshop cartoon plug-in. You’ll save yourself time while ensuring you achieve excellent results. Cartoon Art Photoshop ActionWould you like to go from picture to cartoon effect while creating exciting results? This great Photoshop cartoon effect will enable you to add texture to your images. Instead of flat cartoons, your images will have a gritty appeal, enabling them to stand out against the competition. You’ll also get a bonus filter which will give you a weathered look to your images. Add a great visual touch with this great Photoshop cartoon effect. Vintage Comic CreatorAre you a fan of old style comic book images? Use this cartoon effect for Photoshop to create vintage appeal to your designs. You will be able to use this simple action to convert any text into a cartoon style design. You will get a range of different patterns and layers with this Photoshop cartoon effect. These layers are easy to edit giving you a customized result. Caricature Maker Photoshop ActionsWould you like to have fun while you adjust, twist or distort your images? Create playful and quirky results with this great Photoshop cartoon effect. You will be able to use different colour presets for unique results. You’ll also save time as you work with efficient ease. Cartoon Melted Drips ActionCartoons enable you to work with fluidity. This great Photoshop cartoon effect takes this fluidity one step further by adding melted drips to your images. You will be able to use different colours and shapes to give the appearance of a melted image which drips onto your work. This plug-in will work with CS6 and above and will give you the choice of 25 colour scripts to work with. If you are a fan of vector images, this Photoshop cartoon effect will give you quick vector cartoons in no time at all. You can use your images for digital or print designs and include them on social media sites as well as posters or album covers. You’ll have 25 different colours to select from while creating your cartoon effects. Vector Cartoon Photoshop ActionWould you like to turn a picture to comic style vectors? If so, this is a great option. This simple Photoshop cartoon effect action will enable you to upload your cartoon images to your digital or social media sites. This action can be used with Photoshop CS5 or above. You’ll also get a Photoshop cartooning tutorial to help you create unique and interesting designs. 10 Geometric Style Text EffectsWould you like to create cartoon style texts? These cartoon actions will help you to create comic results. You’ll get ten different PSD file options. Layered graphics can be added to your work to create effective designs. All you’ll need to do is substitute the text for your own words and your work will be complete. Glitch Cartoon EffectWould you like to add a playful sense of humour to your work? You will be able to do this using this great Photoshop cartoon effect. You will be able to turn your photos into caricature – styled images quickly and efficiently. You’ll also be able to add a glitch style texture to create interesting and unique designs. You will be able to experiment freely knowing that you will be able to return to your original image with ease. This picture to comic style effect is so unique and easy to use that you’ll wonder what you ever did without it. Gradient Duotone Design Photoshop ActionWould you like to create images which reflect the cool psychedelic vibe of days gone by? You can with this cool Photoshop cartoon effect. You’ll end up with a great gradient duotone which comes with 25 different effects. This product is great for both print and digital designs. 3D Cartoon Text EffectsWould you like to make your comic book style texts really pop? By using this cartoon Photoshop filter you will be able to create striking 3D comic text designs. This Photoshop cartoon effect will give you 8 high quality professional files. You can edit using smart objects to create great digital or print designs. Cartoon Art Photoshop ActionIf you’d like your photo to cartoon images to stand out, you could always add texture. This great cartoon effect adds interest to your cartoons, eliminating that flat effect. You’ll get quality results as well as a weathered look to add a funky element to your work. What could be better than this Photoshop cartoon effect? Ending thoughts on these photoshop cartoon effects for imagesCartoons and duotone images have become a popular trend and so many people are turning photos to cartoons. However, you don’t need to go to a great deal of effort to create effective results. By using a Photoshop cartoon effect you can turn your images into cartoons with a few simple clicks. When working in Photoshop to create cartoon effects you’ll get the best results if you select your images carefully. Go for images with a bold appearance and turn them into cartoons using lines or bold and colourful images. There are so many different Photoshop cartoon effect packages to choose from. Take your pick based on the results you wish to achieve. You will be surprised how quickly you can great professional looking results! If you enjoyed reading this article about these Photoshop cartoon effects, you should read these as well:
The post Photoshop cartoon effect for images (19 great PS actions) appeared first on Design your way. from https://www.designyourway.net/blog/resources/photoshop-cartoon-effect/ Using a stone texture in your designs will always give you an interesting visual appeal. Nature offers up unique and eye-catching designs which will add beauty to your design. From rock texture to dark stone texture, there are so many great options you can use for your digital images. Graphic designers are starting to use natural textures more and more frequently. Research on how to use natural stone textures has become popular. Stone texture has become a favorite option when designers want to use natural textures to enhance their designs. A stone texture will suit a range of different design projects. When working with this type of texture there is a wide choice available. From pebbles to rocks, stones come in a range of different textures and sizes. As a web designer, adding great texture to your work will add quality. With so many free stone textures available online, there are many different designs and qualities available. Choosing the perfect texture could be time-consuming. As a result, we have created an article to offer you a great selection of stone and rock textures. Each texture will add beauty to your designs. From sandstone texture to stone wall images, you can download these textures to use in your next design project. Remember to read any conditions or agreements first. The list of stone texturesThere can be many different stone textures, from stone seamless texture to rough stone texture. After all, think of how many stones or rocks there are in the world. From the rough stone texture on a cliff face to the slippery sensation of dungeon wall texture or the old world textures of worn down slate, there are multiple different options. Think of the smoothness of marble or the rhythms of a stone wall pattern and select a choice most suited to your designs. From rustic to sophisticated, we have a choice for you. Are you looking for white stone texture for your website backgrounds? This is a stone texture for you. Stone Wall TextureStone seamless texture will add an eye catching appeal as well as a great pattern to your designs. Do you want to add a great stone texture background? Download this brown stone texture as an excellent pattern. Looking for black stone texture? This stone seamless texture will add impact to your designs. This free stone texture can be downloaded and used in Photoshop to create unique and interesting designs. Stone Washed TexturesWant to apply a subtle stone texture to your digital art? This great package includes 10 grey and white stone texture choices to add to your designs. Cracked Surface Texture PackIf you love a cracked concrete appeal, this digital pack is a great choice for you. This pack offers you images of 10 different cracked concrete surfaces to add a raw or broken touch to your digital designs. Would you like to add small stones texture to your digital art? This great package is the perfect choice for you. Are you looking for free stone texture designs that you can use flexibly and for multiple concepts? If so this is a great texture to use in Photoshop. Do you need smooth rock texture? How about stone texture background images? This package includes a range of stone texture designs to add to your site background. If you are creating a beach style project, you will love these free stone texture images. Are you looking for a stones texture design to use on your site, or for a themed design? If so, this pattern makes a great choice. If you’re working to create a nautical feel to your designs, this great stone texture design will give aesthetic appeal to your site. Free Pavement TexturesIf you are looking for stone flooring texture in a pavement design, this great download is just for you. You can use these designs freely in commercial or personal projects but you cannot resell them. Some tips for using stone texture in your designsStone textures are eye catching and visually appealing. When you use a stone texture in your digital designs, you will need to be careful with the rest of your site. By cluttering your site or using huge menus which block the pattern of your design, you will defeat the purpose. Stone texture is strong and sends a very definite message. From the sleek sophistication of marble to the rustic appeal of a stone wall, you’ll need to carefully design the rest of your site around your stone texture design. Here are some tips to give you the best results:
Ending thoughts on these stone texturesWhen working with stone textures, you will be able to add a gorgeous element to your designs. Stone textures add a creative and very natural touch that can be adapted to different purposes. This collection will enable you to create a rich and natural site that will have a high impact on viewers. Aside from using texture designs on your website or digital designs, you can add them to flyers or use them to create wallpapers. We hope that you can use them for both professional and personal designs. Stone textures are versatile and can be layered or used with alternate textures to give a unique and customized look to your site. We hope that you enjoy this selection of free stone texture designs and that they add aesthetic appeal to your designs. If you enjoyed reading this article about these stone textures, you should read these as well:
The post Free stone texture examples to use in your projects appeared first on Design your way. from https://www.designyourway.net/blog/textures/free-stone-texture/ What would you say if you were told you could build a full landing page without writing code; not just the content, but top to bottom including the header and footer? What would you say if you could create a landing page in WordPress easier and faster than putting together a relatively simple 100-piece jigsaw puzzle – something an 8-year old could manage? You’re about to discover exactly how you can do it, step by step, with the elegantly designed and intuitive Visual Composer Website Builder. What the Visual Composer Website Builder Is All About The Visual Composer Website Builder (commonly referred to as the VC Website Builder) is a live-preview, drag and drop editor that comes with ready-to-use content elements. Its great popularity stems from the fact that it makes page-building as smooth and intuitive as you could possibly imagine. Since managing your page’s content and visual hierarchy is a visual process, changes can be made and viewed instantly. “Smooth and intuitive” is a good selling point, but let’s dig a little deeper and check out 3 things that really shine a spotlight on the VC Website Builder.
The Visual Composer Hub is where key elements, templates, and blocks are stored. The Hub resides in the cloud, and you only need to download what you intend to use. You’ll want to check from time to time since new stuff is added on a regular basis.
The VC Website Builder is built on a ReactJS-powered technology stack that features zero shortcodes. Shortcodes have their place in website design, but here they would only serve to downgrade performance and create problems when you uninstall the plugin.
You get a well-documented open API. If you have coding skills, you can extend Visual Composer with your own custom elements which may be helpful for some custom projects. Now let’s quickly go through some of the main features:
*This feature is available in the Premium version of the product. How is Visual Composer Website Builder different from WP Bakery? That’s a good question that deserves a good answer, so before jumping into the tutorial, let’s address it: The Visual Composer Website Builder is a completely different plugin from the WPBakery Page Builder, and not an “advanced” version of it. The fact that both plugins were created by the same team has led to some confusion around the two. Here are the key differences:
You can check the full list of differences between two plugins here Building a landing page with Visual Composer. Let’s follow the 7 easy steps it takes to build a 100% complete landing page with Visual Composer’s drag and drop editor. Step 1: Create the layout The ready-to-use layouts that come with the package are easily accessed with the Add Template option. Choose one that suits the type of content you’re planning, click “+”, and the template is ready for use. Step 2: Customize the layout Every layout consists of rows and columns. The row defines the basic logical structure of the page. Visual Composer lets you select and manage the columns of a given row. You can either use the visual editor or the tree view of elements to modify individual properties of UI elements. The Pen icon activates a screen that displays the styling properties of each element. Step 3: Stretch the content VC lets you choose either a boxed or stretched layout. To select the latter, simply switch the Stretch Content toggle to “On”. Step 4: Add the top menu To add a top menu, go to Visual Composer Headers. Click on the Add Header button, write a title for your header, and click the Start Building button. You’ll be directed to the Hub where you can select and download the UI elements you want to use for your Header. Type “menu” in the search box and you’ll be presented with two options, Basic and Sandwich. Now you can choose the menu source, modify the appearance of the navigation options, and align the menu. Step 5: Add a header To modify your page to include a Header, simply hover over the *Please Select Your Header* element, click on the Add Header button, and look on the left side of the screen to select the type of Header you want. Having done that, you’ll see a menu at the top of your landing page. It’s worth noting that this option of adding headers is only available in the Visual Composer Website Builder. WPBakery doesn’t give you that option. Step 6: Pair image with text Next, it’s time to customize the description of the product or service you’re presenting. First, click the default image to upload your own. Select the row to change the background color option if you which. Now, you can click the default text to replace it with your own text and if you wish, change the background color to your liking. Step 7: Create a group of elements Let’s say you want to place one or two CTA buttons on your page above the fold and under your product(s) or service(s). The buttons might for example say, “Buy Now”, or Learn More”. You can adjust the button’s colors and sizes to make them more noticeable. As you’ve seen so far, customizing the general parameters for a UI element or selecting individual styling options is easy with Visual Composer. For individual properties, all you need to do is click on Edit for a particular button. All that’s left for you to do is any tweaking or polishing you feel is needed. Playing around with the editor to adjust text size, change and image, or add a logo will give you a better feel for building a page. And your page is done. You can check the full view version here. Good job! Conclusion As you can see, Visual Composer Website Builder makes building a full page in WordPress (including headers & footers) a snap. It doesn’t require any coding and almost anyone can do it irrespective of any lack of tech skills or abilities. Visual Composer is even popular among professional web designers in that it saves them tons of time and frees them up to focus on their creative endeavors. If you’re ready to have some fun with Visual Composer, go here to give it a try. You’ll be glad you did. The post How to Build a Complete Landing Page Fast Using the Visual Composer Website Builder appeared first on Design your way. from https://www.designyourway.net/blog/wp/visual-composer-website-builder/ You’ll probably agree that the Apple logo is one of the most identifiable brand logos in the world. The logo distinguishes Apple Inc products from those of its competition by an easily recognisable bitten Apple. The original apple logo was developed over three decades ago. Since then the logo has changed and evolved while maintaining its place in the minds of customers. Apple is known for the exquisite and almost Zen like design of its computer hardware. From computers to tablets, mobile phones to watches, the company provides attractive products created by an exceptional team. Apple’s client base can easily identify the brand based on the Apple logo as well as the attractive products. The company does not only have a history of creative product designs. The brand logo itself also has an interesting history. From the original apple logo design to the latest logo, the design has transformed and changed while maintaining a clear and easily recognised identity. The Apple logo historyWhen the original Apple logo was created, designer Rob Janoff probably didn’t know this would become one of the most easily identifiable brands in the world. The symbol and company name fit together perfectly and the bite helps to identify the brand industry. Let’s have a look at the apple logo history. From the old apple logo to the current designs, the apple logo evolution makes an interesting story. What about the bite?We mentioned that the apple symbolises the company name while the bite symbolises the industry. What does this mean? Rob Janoff shared that with a company named after a piece of fruit, the most logical decision would be to use an image of that fruit in the logo design. However, deeper and incredibly interesting stories linger behind the design and development Apple’s logo. Indeed the first story of the Apple logo begins with a man named Allan Turing. Alan Turing was a genius who helped to establish the world of artificial intelligence as a means of breaking military codes. Turing died a decade after the Second World War ended. Sadly, Turing’s work went largely unrecognised. Instead, he was persecuted for his sexuality. He faced jail because social stigmas present at the time. He felt very humiliated by the oestrogen injections meant to impose heterosexuality upon him. Legend tells that he bit into an apple laced in cyanide. He died on June 7th 1954 ten years after the Normandy landings. Although his ability to crack German war codes helped the allies tremendously, he died in obscurity. Myth has it that when Apple computers were looking for a logo for their brand, the story of Alan Turing served as inspiration. A different beginningAn alternate story behind Apple’s corporate image shares that the Apple was created by Steve Jobs and Ronald Wayne in 1976. The men remembered that Isaac Newton discovered gravity after being hit upon the head by an Apple which fell from a tree. The men remembered Wordsworth’s quote. “Newton… a mind forever voyaging through strange seas of thought” This quote was later inscribed into the company logo. The image of an apple felt appropriate for their newly emerging computer company. Touraj Saberivand’s storyTouraj Saberivand, design partner of Rob Janoff who created the apple logo, explains that the company designed the logo to look like an apple, after the name of the computer. The bite out of the apple was placed there to increase the likelihood that the logo would be associated with the fruit. He explains that when he was designing the logo, he wanted the fruit to look like an apple rather than any other round fruit. Taking a bite out of the apple achieved this result. The apple logo has become immediately recognisable in different parts of the world. Features of the Apple logo designApple’s logo, one of the most identifiable logos in the world, has a number of different features. ShapeThe shape of the logo is very distinct. The logo looks look an apple with a bite out of the right side of the fruit. A tear shaped leaf leans towards the bite side of the apple. ColoursThe very first apple logo used rainbow colours in the image of the apple. This has changed and current logos are usually chrome, giving a stylish feel to the logo. FontsApple doesn’t use any typography and as a result, the iconic image stands alone, representing the beauty and creativity associated with Apple products. The apple logo evolution processApple’s logo has changed over time. The initial Apple logo was created by company founder Ronald Wayne when the company began in 1970. Although the logo did still look like an apple, it is distinctly different from the iconic design we know today. As mentioned earlier, the first image was based on Isaac Newton’s discovery of gravity. Newton made a significant contribution to the field of science. However, he was able to make a massive contribution because of the apple which fell on his head while resting under a tree. The apple itself therefore played a crucial role, just as Apple computers make a contribution to the life and work of their users. Apple’s very first logo design had a frame which included the words: “Newton… a mind forever voyaging through strange seas of thought.” The first Apple logo design was easy to recognise but it didn’t make a large impact. As a result, the founders decided to create a new Apple logo. Steve Jobs believed that the logo was not iconic enough and needed clarity. Jobs wanted a logo which would be easy to use, would look effective even in a small size, and would be far more modern. Apple computers are renowned for their beautiful designs and Jobs wanted a beautiful logo to match the style of his computers. An Apple company logo would need to be impressive. Jobs wanted both the company name and logo to be seen in combination. Understanding that he needed a design team to create the simple, iconic and easily identifiable Apple logo, Jobs approached Rob Janoff to come up with a logo design. Janoff drew on the name of the fruit, quickly coming up with the modern and very recognisable apple with a bite on one side. This quickly replaced the old Newton logo. Apple’s logo quickly changed, with the new iconic Macintosh logo quickly replacing the old Newton logo design. The rainbow coloured apple logo designWhen Steve Jobs approached Rob Janoff to design the apple symbol, the company was still very small and nowhere near the large corporation it is today. Apple had only been operating for a year and consisted of three partners. These were Steve Jobs, Steve Wozniak and Mike Markkula. Rob Janoff decided that when a company was named after a piece of fruit, the very best thing he could do was create a logo which replicated that fruit. As a result, he set out to create a logo which looked distinctly like an Apple. He created an illustration of an apple. The bite out of the side ensured that the apple could not be mistaken for another piece of fruit. It also represented the byte of the computer industry. The original Apple logo was rainbow coloured. The colours represented the Apple II computer which was the only computer with a colour display monitor. Jobs was so delighted with the logo that he began using it a little before the launch of the Apple II. Rob Janoff explains that there was no real reason for the colour arrangement within the logo. He shared that from his perspective, the rainbow colours were also a sign of the times. The green colour was placed at the top because it connects with the right leaning green leaf. Once Steve Jobs launched the new Apple logo, customers became curious. There was a lot of speculation about the new logo and people began to wonder about the apple logo story. As mentioned earlier, some people thought the bite on the side of the Apple was a tribute to Allan Turning. The colours in the Apple logo image were attributed to the new colour monitor in the Apple 2 computer. This logo was so popular with computer users that it remained a firm favourite for over two decades. Even after Apple changed the logo, redesigning the use of its colours, the original iconic apple with a bite out of it has remained the same. Although many people wonder why the Apple logo is half bitten, many stories exist. This speculation has not stopped the logo from becoming increasingly popular. At present the Apple logo is known all around the world. The bitten apple is so immediately recognisable that the company does not use any form of lettering or font to accompany its famous logo. Apple executive Jean Louis Gassée once linked the story back to the original tree of knowledge, declaring the bitten apple to be a symbol of lust and knowledge. Like this tree, our computers are a source of knowledge, curiosity and continually evolving intelligence. This enables them to create a knowledge revolution which will transform the human race. Moving to monochrome: Apple’s logo 1998 to 2000Steve Jobs left Apple in 1985 but returned again in 1997. The first thing he did was update the official Apple logo. During 1997, Apple was struggling financially. Steve Jobs wanted to simplify Apple’s products and designs. This began with the iMac in 1998. Jobs wanted to work at creating products which were immediately recognisable. He aimed to use the Apple logo to the company’s advantage. If the logo was well liked and easily recognised, it made sense to display it where people could see it. Apple released its very first iMac, known as the Bondi Blue. This computer was sky blue in colour and simple and elegant in design. The Apple logo rainbow would have looked silly on such a beautiful and streamlined machine and was released in monochrome. By streamlining and simplifying the designs of Apple products, Steve Jobs created a new brand personality. Apple’s computers moved to metallic casing and the new logo was created in a solid colour to compliment this casing. This monochrome logo was approved by Steve Jobs and from this time onwards, the elegant apple emblem has become a symbol of beauty, creativity and simplicity. It remains one of the most appreciated and recognised logos in the world today. The current Apple logo: stylised and sleekAlthough the monochrome logo made a great impression, the evolution of Apple logo designs was not yet complete. In 2001, Apple introduced the new millennial logo design. This logo comes in three colours: silver, white and black. It is slightly different to the original logo, having been tweaked a little to make it more stylised. The logo was released with a glassy effect, with light shining through the surface. It has also taken on a metallic appearance, which enables it stand out against the background. The current Apple logo is so famous that it has become as familiar, throughout the world, as the MacDonald’s arches. The decision to hire Janoff and to create a flat logo has gone so far as encouraging companies around the world to incorporate ‘flat’ logos into their branding or marketing concepts. Steve Jobs consistently lead the way in creative branding, encouraging innovation in his product designs. The newest Apple logo has a glassy appearance and a slight gradient. The newest logo comes in two different colours: silver and chrome. Silver is used on the company’s hardware while chrome is used on software products. Looking to the future: new Apple logo opportunitiesApple’s logo has a long and interesting history. Throughout the decades, the Apple logo has been simple, sophisticated and iconic. The origins of the Apple logo began with Isaac Newton’s designs. There was then an evolution of Apple logo designs, leading up to the current logo. With each change and each new improvement, Apple has adjusted to the times. Every step taken has created an iconic image of beauty. Apple has certainly made the most of every new design change. Considering the iconic nature of the Apple logo, looking into the future means envisioning new and wonderful logo ideas. Apple has a history of working with beauty and simplicity and the future will be no different. As the previous logos have attracted increasing amounts of attention, Apple is set to continue the development of their attractive, popular and iconic logo. Speculation on the iconic nature of the logo has not stopped. Apart from analysing the meaning of the Apple logo, people have also speculated on why the logo has become so iconic. ThiagoBarcelos, a graphic designer, applied the golden ratio (or Fibonacci sequence) to the Apple logo. He explains why the logo has such a universal appeal. The golden ratio would provide a reason as to why the Apple logo has been appreciated throughout the decades. Despite the way the world has changed, the Apple logo has been able to stand the test of time. Becoming iconicAlthough the Apple logo has changed over time, logo creator Janoff explains that the colour changes are effective. He also argues that Steve Jobs had an excellent team of designers who made subtle changes to the original logo. Over time, the logo has become more geometric. Updated software, not available for the original logo design in 1977, has assisted to improve the Apple logo. The logo has also become more symmetrical. Janoff explains that the simplicity behind the logo design is key to its success. The logo looks great when expanded or reduced. It is also easily recognisable, giving the company a clear identity. Despite the great number of myths which have been created about the Apple logo, there is no denying that the company has created a logo of great value. Clients can identify the Apple brand at a single glance. The logo has lasted for a period of over four decades with only subtle changes and adjustments to Janoff’s original design. Steve Jobs worked towards simplicity and he achieved this with Apple’s logo. The company have never needed to use words or typography to display their brand. Apple’s iconic logo has been more than enough to identify the brand. From the very start, this little Apple logo has been a huge success. It is incredible how well Apple have done, emerging as leaders in the computer industry after a humble beginning in 1977. Few companies are as recognised or valued as Apple. It is the company’s visual design skills which have enabled them to emerge as leaders in the field. Their technology designs have transformed the industry. The tiny Apple logo has accompanied their technological gains, helping to identify the brand as they evolve and progress. Apple Inc. And the right to a nameWhen the name Apple was chosen for the newly emerging computer company, the name was similar to Apple Records, a label owned by 70s rock band The Beatles. As these names were both so similar, the two different companies entered into a lawsuit which would last 28 years. The result was that Apple.Inc owned all the rights associated with the name Apple. This ruling took place after the company had already spent $500 000. The rivalry between the two companies subsequently ended. Ending thoughts on the Apple logoA logo is at its very best when it helps to identify a brand. Apple’s logo timeline has grown along with Apple’s industrial design. As the company has grown and evolved, so has the iconic Apple logo. Over time, the Apple logo, along with the Nike Swoosh, Disney’s fantasy castle and McDonald’s golden arches, has become one of the best known logos in the world. Apple owes a great deal of its success to the perfectly proportioned, simple and very attractive logo which has accompanied its development. Each step of the way, new product developments have been accompanied by a sleek and sophisticated logo. As Apple as launched its new iPhones, iPads, Apple watches, laptops and computers, they have been accompanied by a professional looking logo. As new products emerge, the logo offers substance, creativity and beauty to the designs. Anyone who notices the Apple brand approaches it with respect and sometimes even awe. This has made a huge impact on a generation of people throughout the world. Apple has become a household name associated with high quality and creative products. Apple’s logo is associated with trust, dependability, beauty, creativity and innovation. As a designer, we hope that you have been influenced by the story of the Apple logo. Understanding how the logo has changed and evolved offers insight into how a brand can subtly adjust to the times. The quality and fascination associated with the Apple emblem is both intriguing and inspiring. The current Apple logo is enough to inspire any designer to work towards an exceptional design. After all, the thought and effort which goes into identifying a brand can stand the test of time. Not only has the Apple logo design stood the test of time. It has also changed and evolved, leading the field as it does so. The innovation, simplicity and sophistication behind a logo can transcend a product, offering a deeper and more human meaning which extends beyond a product. Apple’s iconic logo has done just that. If you enjoyed reading this article about the Apple Logo, you should read these as well:
The post Learn About The Apple Logo: The Tech Giant’s Branding appeared first on Design your way. from https://www.designyourway.net/blog/graphic-design/apple-logo/ |
AuthorPleasure to introduce myself I am Jamie 27 years old living in Searcy, AR. I am web developer and have developed over 50 sites for clients. Now a days I am focused on designing as I feel I am lacking it. Archives
April 2019
Categories |